I became lazy, and it cost me a little. There are two braces that are not yet attached to the bench. I knocked one off today. Which tells me I have to do this correctly.
The bench is currently in front of the garage/shop. At the end of every day working, I pick up all the tools and move them into the shop, someplace. It is very disorganized. I then put a heavy-duty tarp over the bench and call it a night.
A few nights ago, I left a couple of tools under the tarp. The rains came. No issues. The wind got me worried. When I got out to the bench, the tarp had been partially blown off the workbench, and the tools were soaked.
I spent the next 30 minutes drying, cleaning, and oiling the tools. I seem to have saved them.
The next day was hotter; I worked to the point where I could not move. Seriously, trying to stumble into the shade wasn’t working. Luckily my lady came to my rescue with water. She then helped me move my tools the 10 feet from the workbench into the shop.
This created a need for a way to transport and store tools.
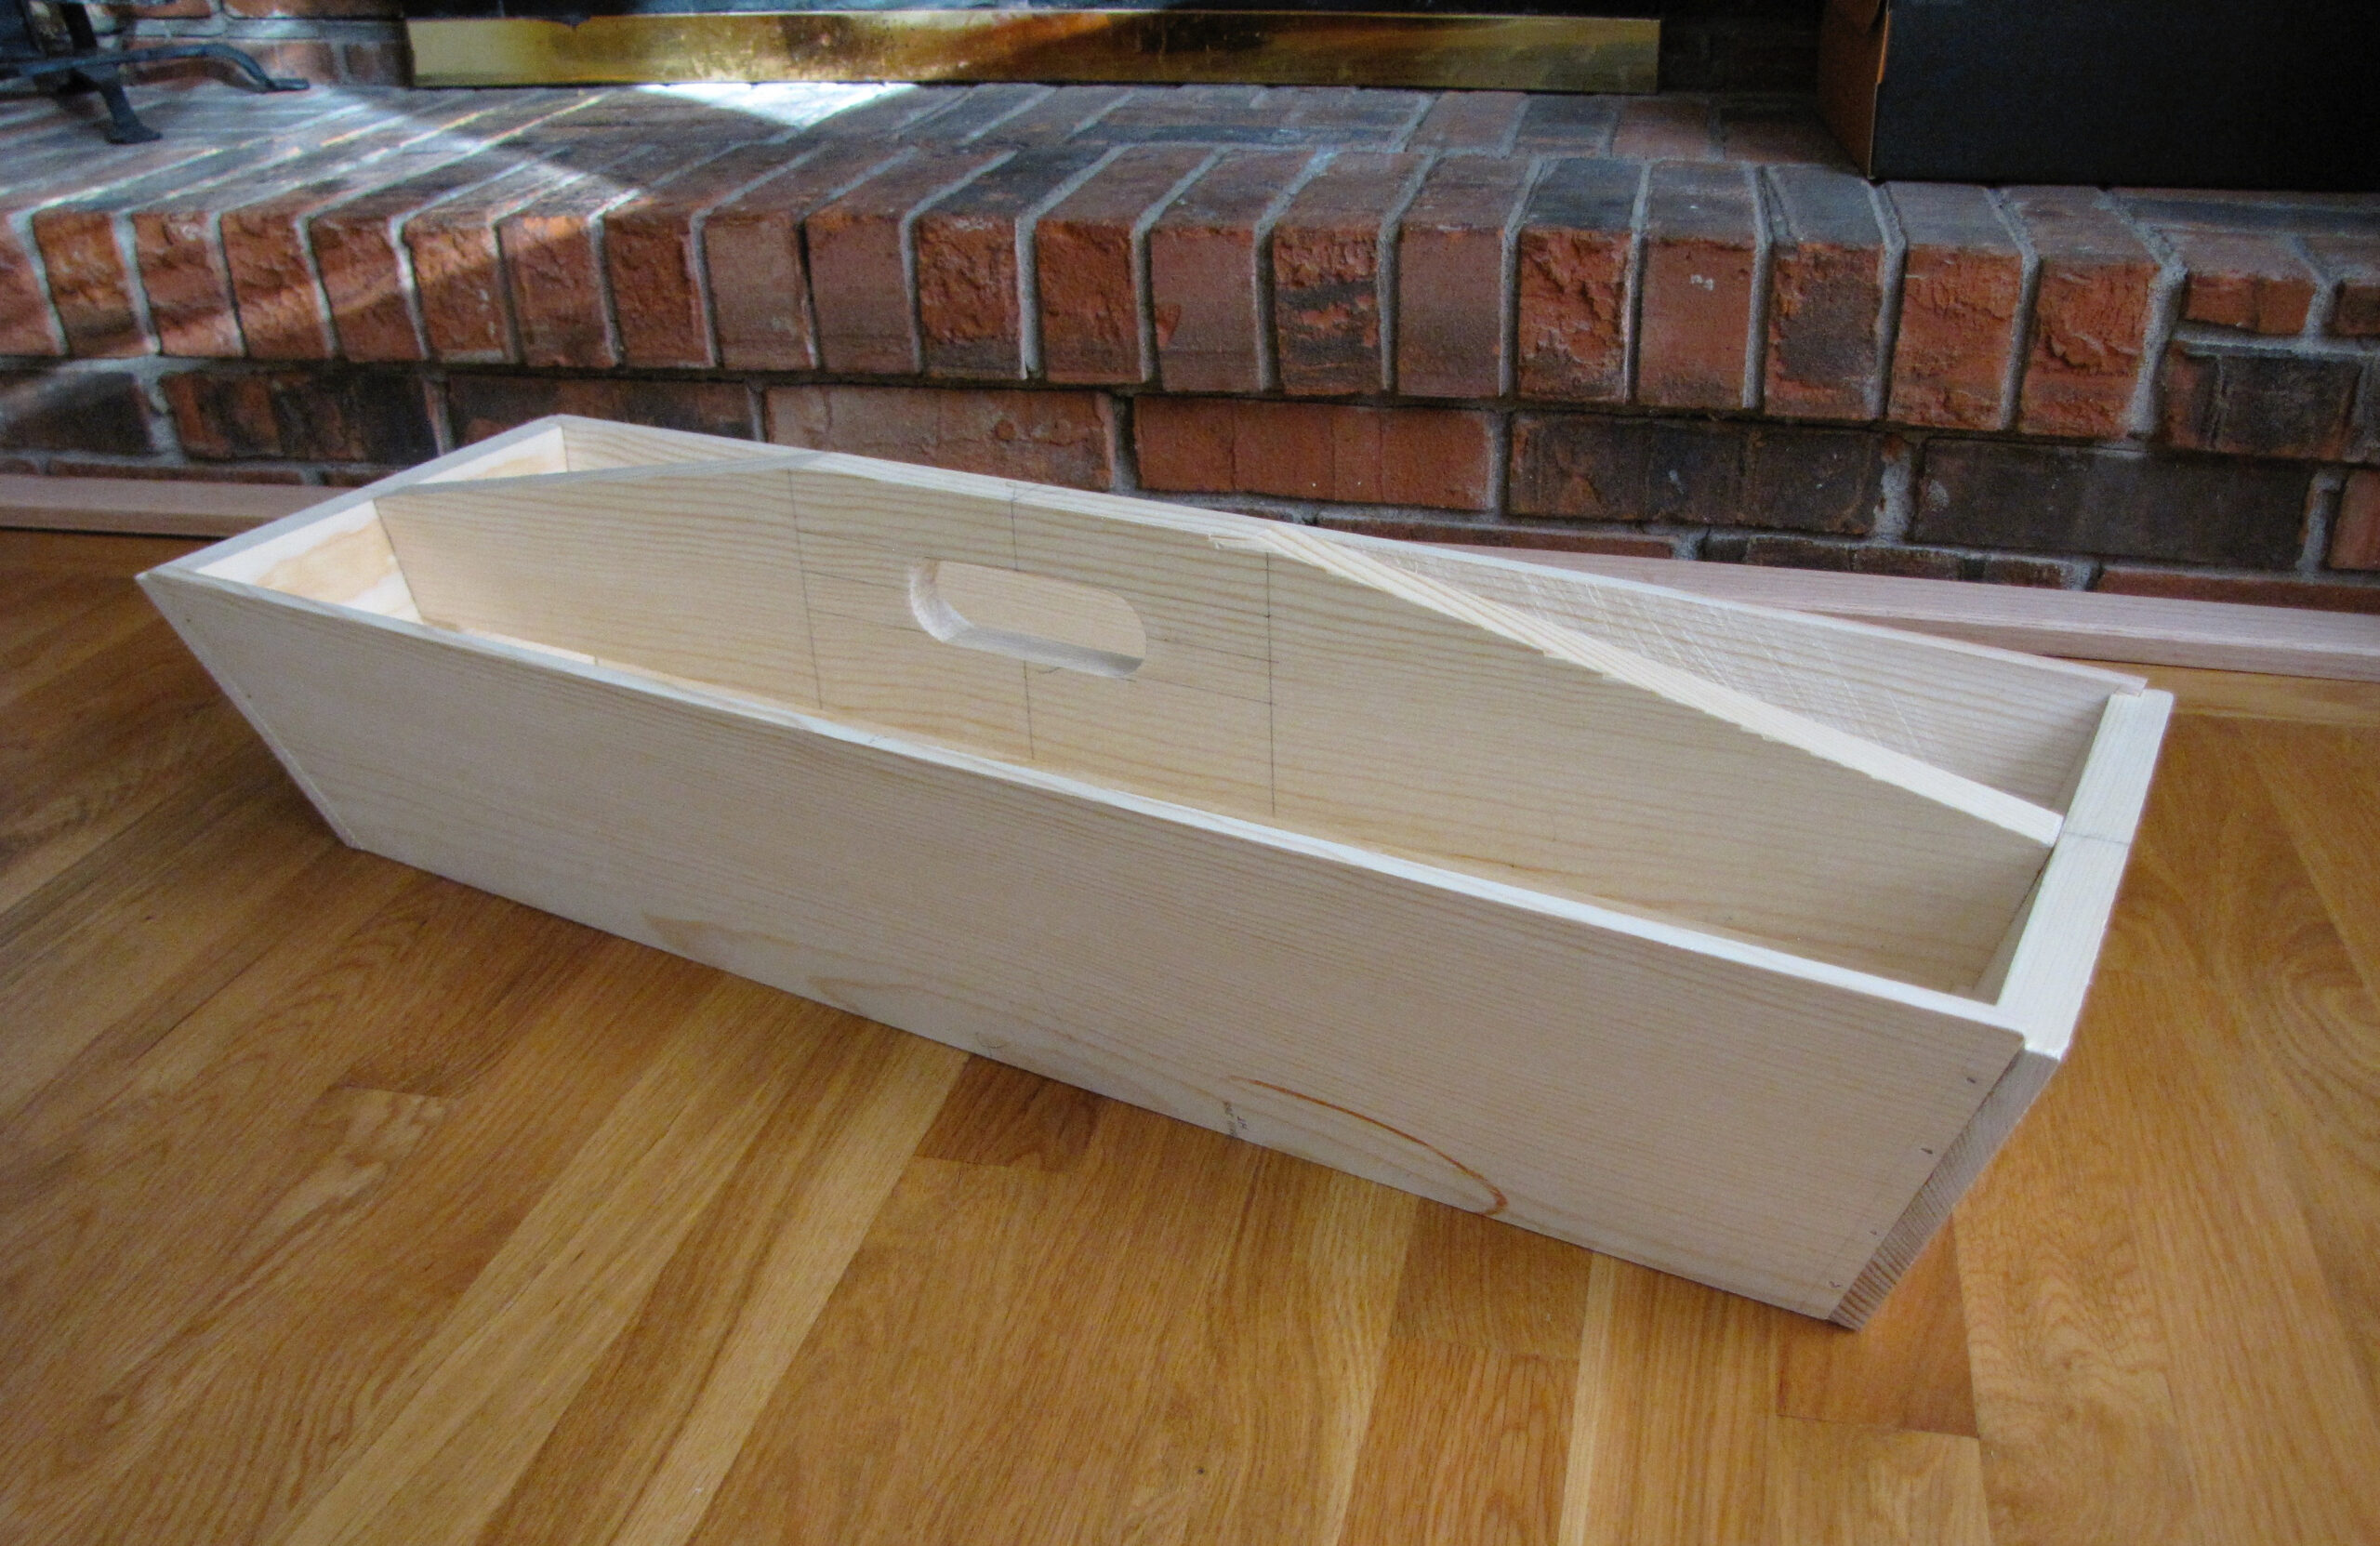
The first step is the tool tote. Mine is a simplified version of the one shown.
I could have gone to the local lumber yard and spent $75 to get some pine of some unknown quality. The plans call for true sizes of 3/4 x 5 1/2″ and 3/4 x 6″. The 5 1/2″ isn’t really an issue; that is a 1 by 6. The 6-inch board requires cutting down a 1 by 8.
The Sawmill
I intend to cut my own lumber soon. It is currently on the back burner. I have the tools; I just require the will and the time.
There are about a dozen sawmills within a 75-mile radius. The first half dozen I contacted were all big operations. One “local” mill answered the call in Maine. They have a local number; you just can’t get it easily. Another only dealt with softwood. Two were custom saw work only. They either bring their mill to your woodlot lot, or you take your wood to them and they saw it to your specifications.
I ended up going south into Morador to visit the closest mill. It was worth it.
The mill is a small, family-run operation. They have a kiln for drying wood as well as airdried wood.
I intended to get some hardwood for tools and some softwood for projects. This was some cherry and hard maple at $6 per board foot. I wanted a piece of dark walnut at $12 per board foot. Finally, I wanted some pine for projects.
Not only did he have all the lumber I wanted, he had it in the sizes I wanted and rough sawn. This means straight off the mill, no other processing.
He was generous in his measurements. There were boards that I got at 1/2 price because there was a flaw in the lumber. The flaw would not bother me, but he still gave me a great deal. The 2 bdf of black walnut was just given to me. It is two inches thick and about 10 inches per side.
This wood is absolutely beautiful.
A board foot is a volume of wood. It is 144 cubic inches, or 1/12 of a cubic foot, or 1 ft by 1 ft by 1 inch.
When I got home, I cut a 19″ piece off the narrower board and planed it smooth and flat. It was then edged which gave me a good face and a squared edge.
From there the other edge was squared. Finally the board was ripped to width, and the rough edge was smoothed and squared again.
This allowed me to face the other side and bring the piece to thickness. Starting with a 1 inch-thick piece of rough-sawn lumber, I ended up with a 3/4 S4S piece of wood.
What was under the rough surface is beautiful.
Yesterday, I surfaced the piece of dark walnut. With no oil or finish on it, just planed flat, it is one of the nicest pieces of lumber I’ve ever seen.
Knowledge is not Skill
There is a process in machining that is bringing a piece to size. This is the process of making all the faces flat and square to each other. Each of 6 faces must be properly milled to have a piece ready.
Woodworking requires the same operation, but the tools are much simpler which requires the layouts to be much better.
With this first piece, I did not notice that the edges were not parallel to each other. They were smooth and flat and square to the finished face. They were not parallel.
The process is different from machining. When you are machining, you only need one reference face to start the process.
For woodworking, you first smooth a face. This does not make the board flat; it just means that it is smooth. This is a 5-minute process for me at this point. Smooth means that within a local area, the board is flat. The size of that area depends on the tools used to smooth it.
Next, the board needs to be made flat. This is done with a straight edge. By moving a straight edge down the face, you can check for space under the straight edge, indicating where the board is low. You plane off the high spots until you have a piece of lumber that is smooth and flat.
After flattening the surface, you now need to test for twist and then remove the twist. Twist is called “winding,” and you use a pair of self-balancing straight edges at opposite ends of the board. You can sight over the closer stick and easily see if the board is twisted. If it is, you can plan out the twist.
Next, you smooth and flatten an edge, making it square to the board. The squareness of the edge to the face is measured with a try square or any other precision right-angle square. This is a skill I am still working on. The near edge is always to high.
This is where I made a mistake. I wasn’t paying enough attention and ripped the board over wide and then brought the edge back to square after the rip. I didn’t make a guide mark for parallel.
I also didn’t get the board flat enough.
Yesterday, I finished the backboard and the two sideboards. Today, I’ll be attaching them to make the first part of the assembly.
Sharper, Sharper
Friday I thought I had a sharp plane blade. It was able to remove 1/4 inch from the faces of the end boards.
Yesterday I learned that my plane was not sharp. I spent a good hour sharpening plane blades. I’ll spend still more time today.
The difference is really incredible. What was an upper body workout becomes light work. Plus the sound of the wood being peeled away is beautiful.
What I need to do today is to finish sharpening the jack plane. Currently it is only cutting on the corners. I’ve touched up the blade on the diamond wheel, but I still need to take it through the regular sharpening process to get a blade that works as I want it to.
I will also be focusing on making sure I don’t produce cupped boards.
All in all, I’m very excited to get the next few projects finished.
The tool tote, a couple of boxes. The first being a simple 6-board box for reenacting. Then a jointer box to hold my wood tools well organized and safe. Then a stool and the start of other projects.
There is so much more pride in using hand tools and fitting pieces by hand then the feeling I got when I feed wood through my jointer and planer.