Yesterday, the circle of interests completed a circuit.
One of the primary reasons I purchased a 3D printer was to make foundry patterns. I know how to make patterns, I don’t have the skills I need to make patterns.
Many in the small scale casting arena are turning to 3D printed patterns.
These have the advantage of going directly from CAD to pattern.
They have the disadvantage of needing more prep work.
When you ram up a flask, you are forcing sand with a binder to be compacted so tightly that it will stick to itself. “Greensand” is made from sand, southern bentonite, and water. You need add enough water to cause the clay to bind. That water needs to be mixed in a process called mulling. If you add too much water, the sand won’t work right. If you add to little, the sand won’t bind when rammed.
You can tell foundrymen because they will forever be picking up a handful of sand, squeezing it in their fist, and judging how good it is.
The only truism is that the sand of other foundrymen is never as good as theirs.
Petrabond is a commercial product that is a combination of sand, magic binder, and oil. It does not need to be mulled the same way green sand is.
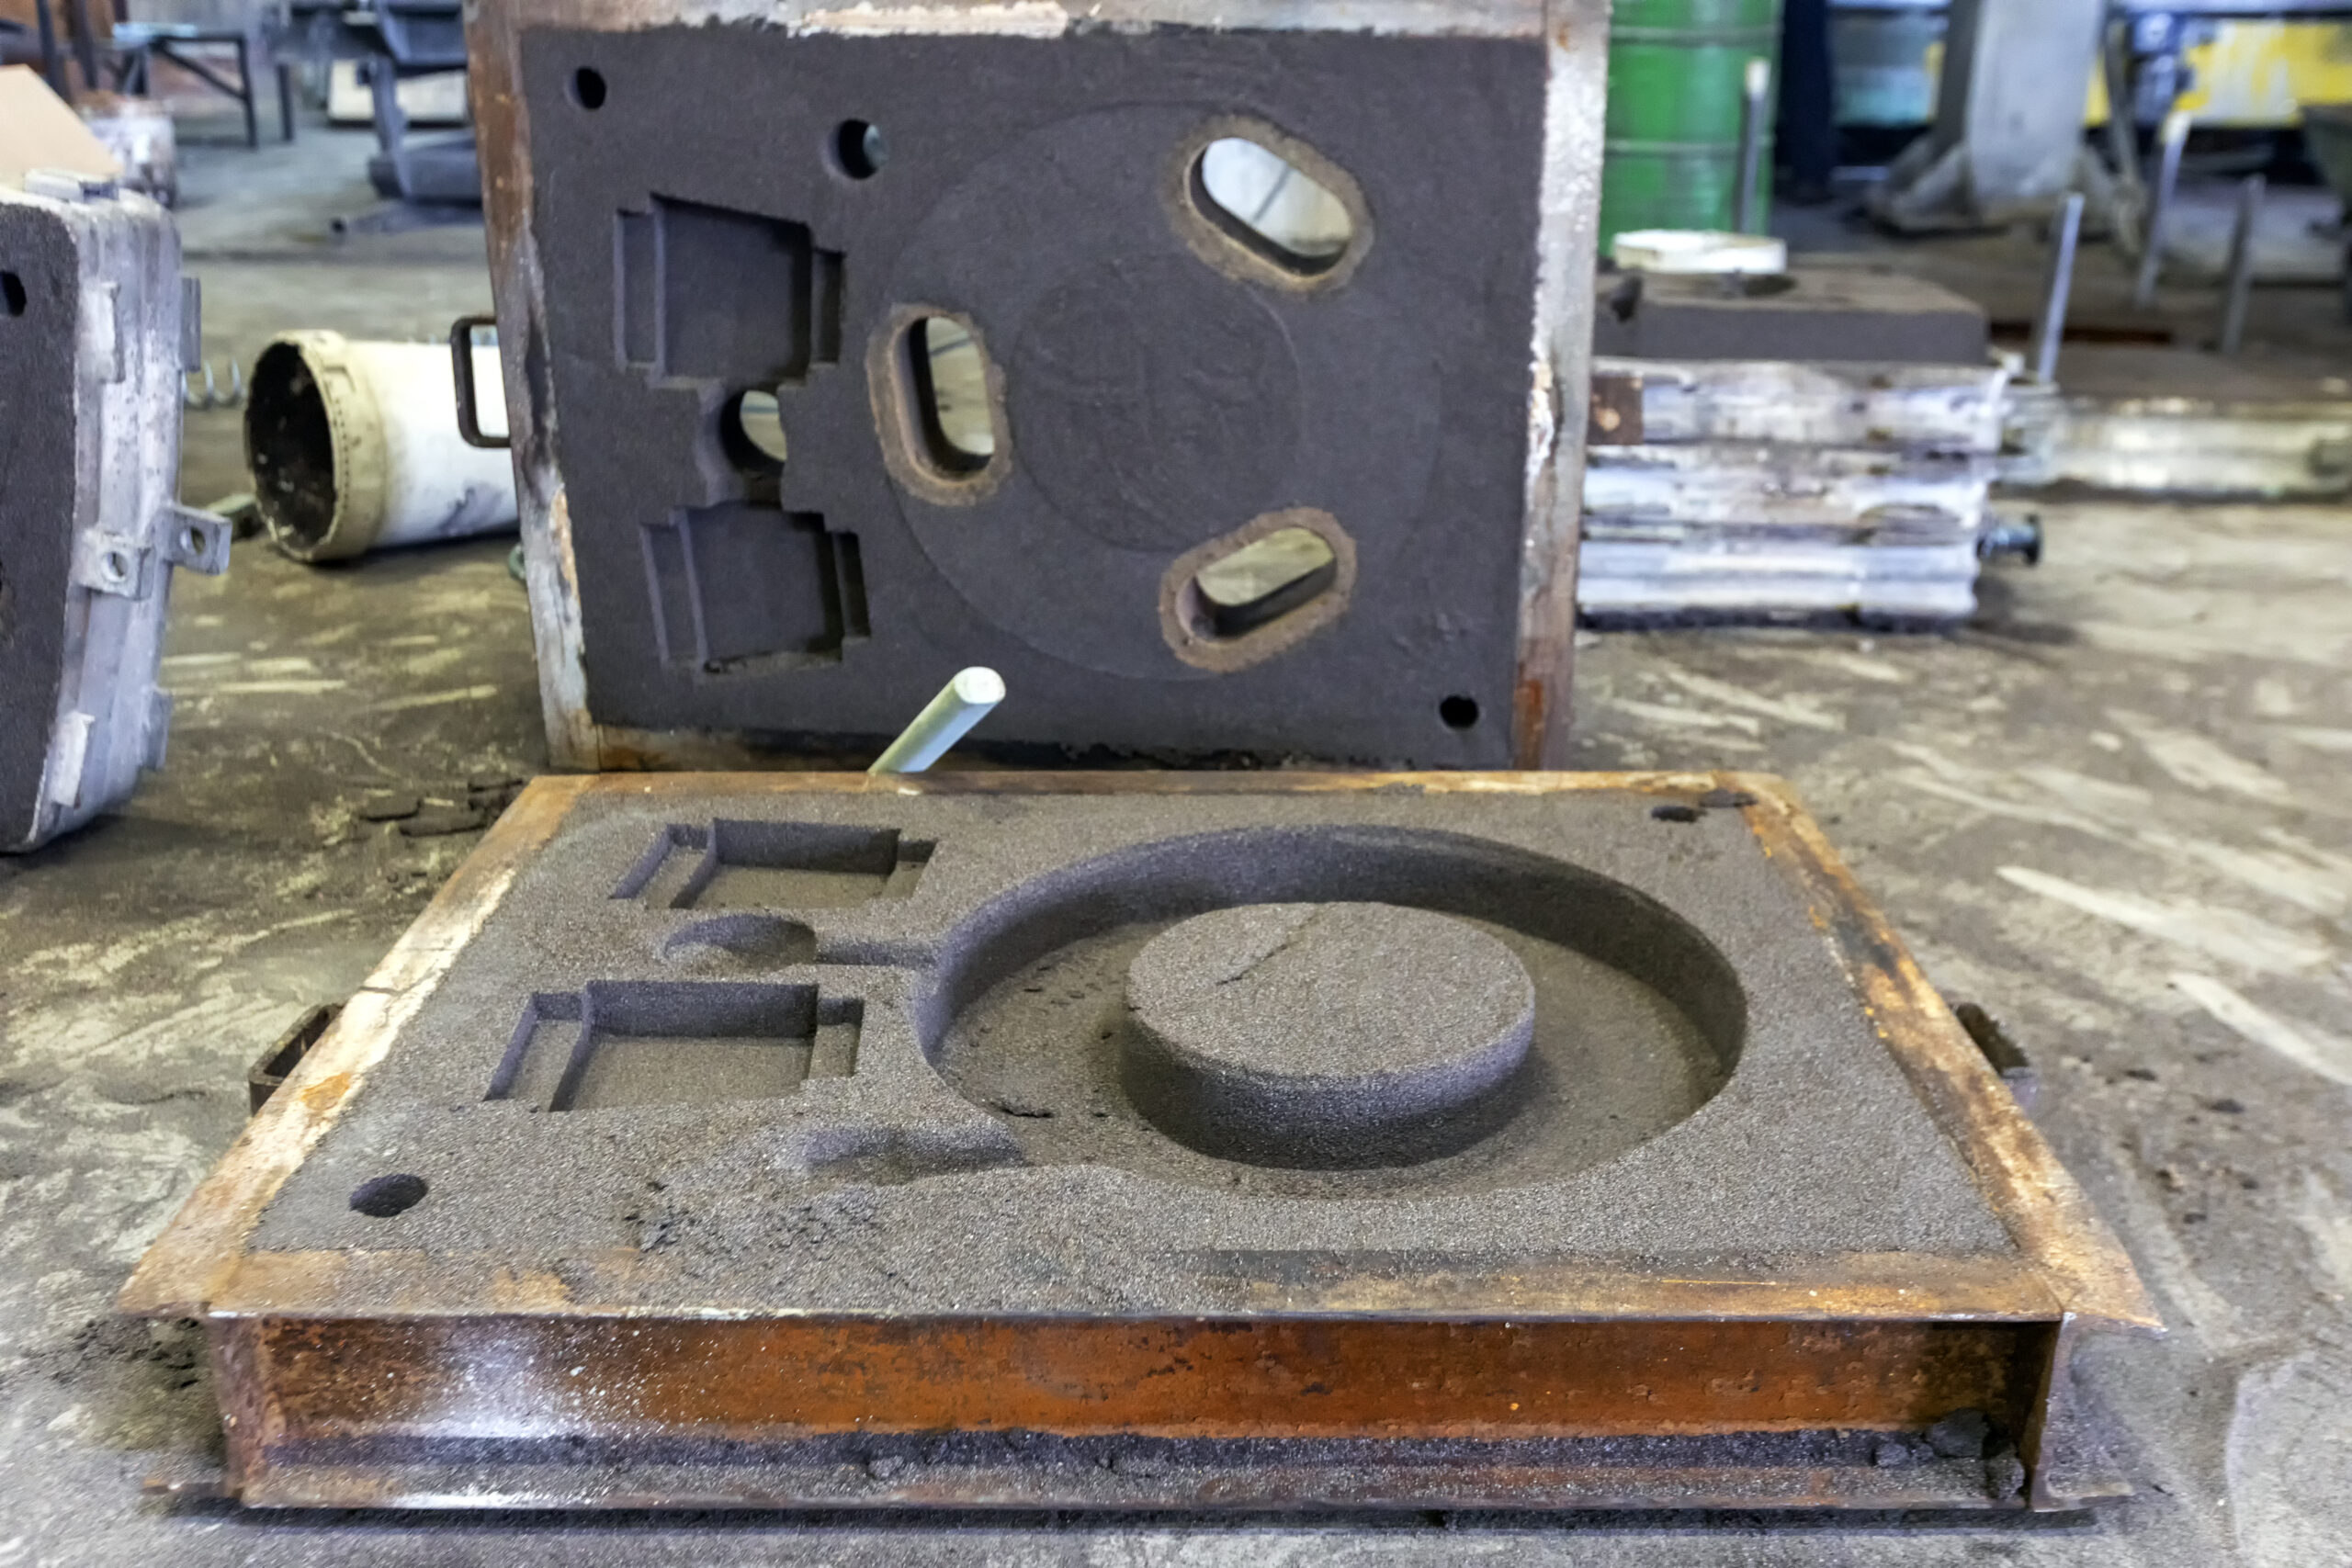
Whichever foundry sand you use, the process is the same. You start by putting the bottom half of your flask, called the drag, face down on the molding board. You position your pattern on the molding board within the boundaries of the drag. You sift your sand over the pattern until you have enough to start pressing it down. This needs to be done gently enough that you don’t damage the patterns.
In addition, you are sifting the sand to make sure no large particles are directly against the patterns. The finer the sand, the nicer the mold, and the nicer the casting.
Once you have the first layer down, you shovel more sand in, then you use a rammer (stick) to hammer the sand down, compacting it as much as you can. Once that layer is done, you add another and another layer until you go over the top of the drag.
You strike off the drag, which is to use a straight edge to remove all the sand above the edge of the flask.
You then flip the flask over, cut runners and gates, mark where the risers and sprue will go, then add a healthy coating of pattern dust.
Parting dust is basically talcum powder. Many home foundries use talcum powder. The powder keeps the sand from sticking.
With the drag right-side up, you can see the top of the pattern bedded into the sand. You place the top half of the flask, called the cope, on top of the drag.
If the pattern is a split pattern, the other half is put in place. Keys in the two halves (dowels) align the halves. More parting powder, then the cope is rammed up, the same as the drag was.
The sprue and riser are cut into the cope. The pouring mouth is cut.
The cope lifted off the drag and placed on its side.
Think about this: you are lifting somewhere between 40 and 55 pounds for a smallish 15×15 flask. That’s just the weight of the cope or drag, the entire flask will be 90 to 110 pounds.
This sand is compacted so firmly that it supports its own weight. I’ve actually seen video of the cope being lifted off the flask with a crane. It was about 6 ft by 6 ft by 8 inches.
We now have to remove the pattern from the mold. This requires pulling the pattern straight up. The sand will grip the pattern so tightly that you have to make small amounts of space around the pattern.
You do this by knocking the pattern. We put draw pins into the pattern. These are screwed into threaded holes in the pattern. We rattle the draw pins with anything that will cause the pattern to shift back and forth in the mold. Anything that is shaped like a two prong fork works well.
The pattern has draft, this is an angle put on the sides so that the parts deeper in the sand are narrower than the parts at the surface. Once you draw the pattern even a little bit, that taper means that the pattern is completely clear.
Think of the game Operation. That’s what we are doing.
Back to those 3D prints.
The problem with 3D prints is that the surface finish is rough. So after you print a pattern, any surface that would have draft has to be sanded and polished. It needs to be as smooth as possible.
Which brings us to yesterday.
I was able to print a modular flask pattern. This is a multipart pattern. You slide the pieces together to create one side of a cope/drag. You then cast the side of the flask. Do that 8 times, and you have a flask of the size you want.
Using these different modules, I can create a flask side from 7″ long to nearly 30″ long.
Which is what I plan to do. I’ll make four sides that are 8 to 10 inches long with the ability to accept alignment pins.
I’ll then cast 4 more sides in the 10 to 15 inch length with no alignment pins.
These sides will then be machined so they have flat tops and bottoms and are of uniform size. They can then be bolted together to form whatever flask size I need.
These were printed in “PA6-CF”. This is nylon 6 (I don’t remember what the 6 means) with carbon fiber. It is considered an “engineering material”.
This printed beautifully! The best prints I’ve seen so far. I’m very impressed. I still need to sand the draft edges to smooth them. I’ll also be looking at some sort of filler. The pieces of the module will then be painted with a filers and primers and a final coat to make them as smooth as possible.
I’m excited for casting weather to arrive.
What sort of paint does it take to paint Nylon?
Wikipedia lists a number of Nylon variants, 12, 66 (or 6/6) and 6. Apparently the name comes from the number of carbon atoms in the starting monomer (or pair of monomers in the 6/6 case).
What lead you to that filament choice? Seems like a far fancier material than I’d think you would need, but I guess depending how you put it into the sand or how fine of features you have maybe structural properties of the positive matter. I’ve used PLA for a similar job, but at a smaller scale.
I started this process years ago. At the time the choices for filaments were PLA, ABS, and Nylon. There were no “engineering” options. Since I was going to be making patterns and I had already seen just how much abuse those things take, I decided to print in ABS.
That printer was a complete failure. Everything from bed adhesion issues to problems with the Z height. In other words, the thing couldn’t print a cube.
This time around I looked at materials that would withstand the forces of ramming up.
That’s why PA-6