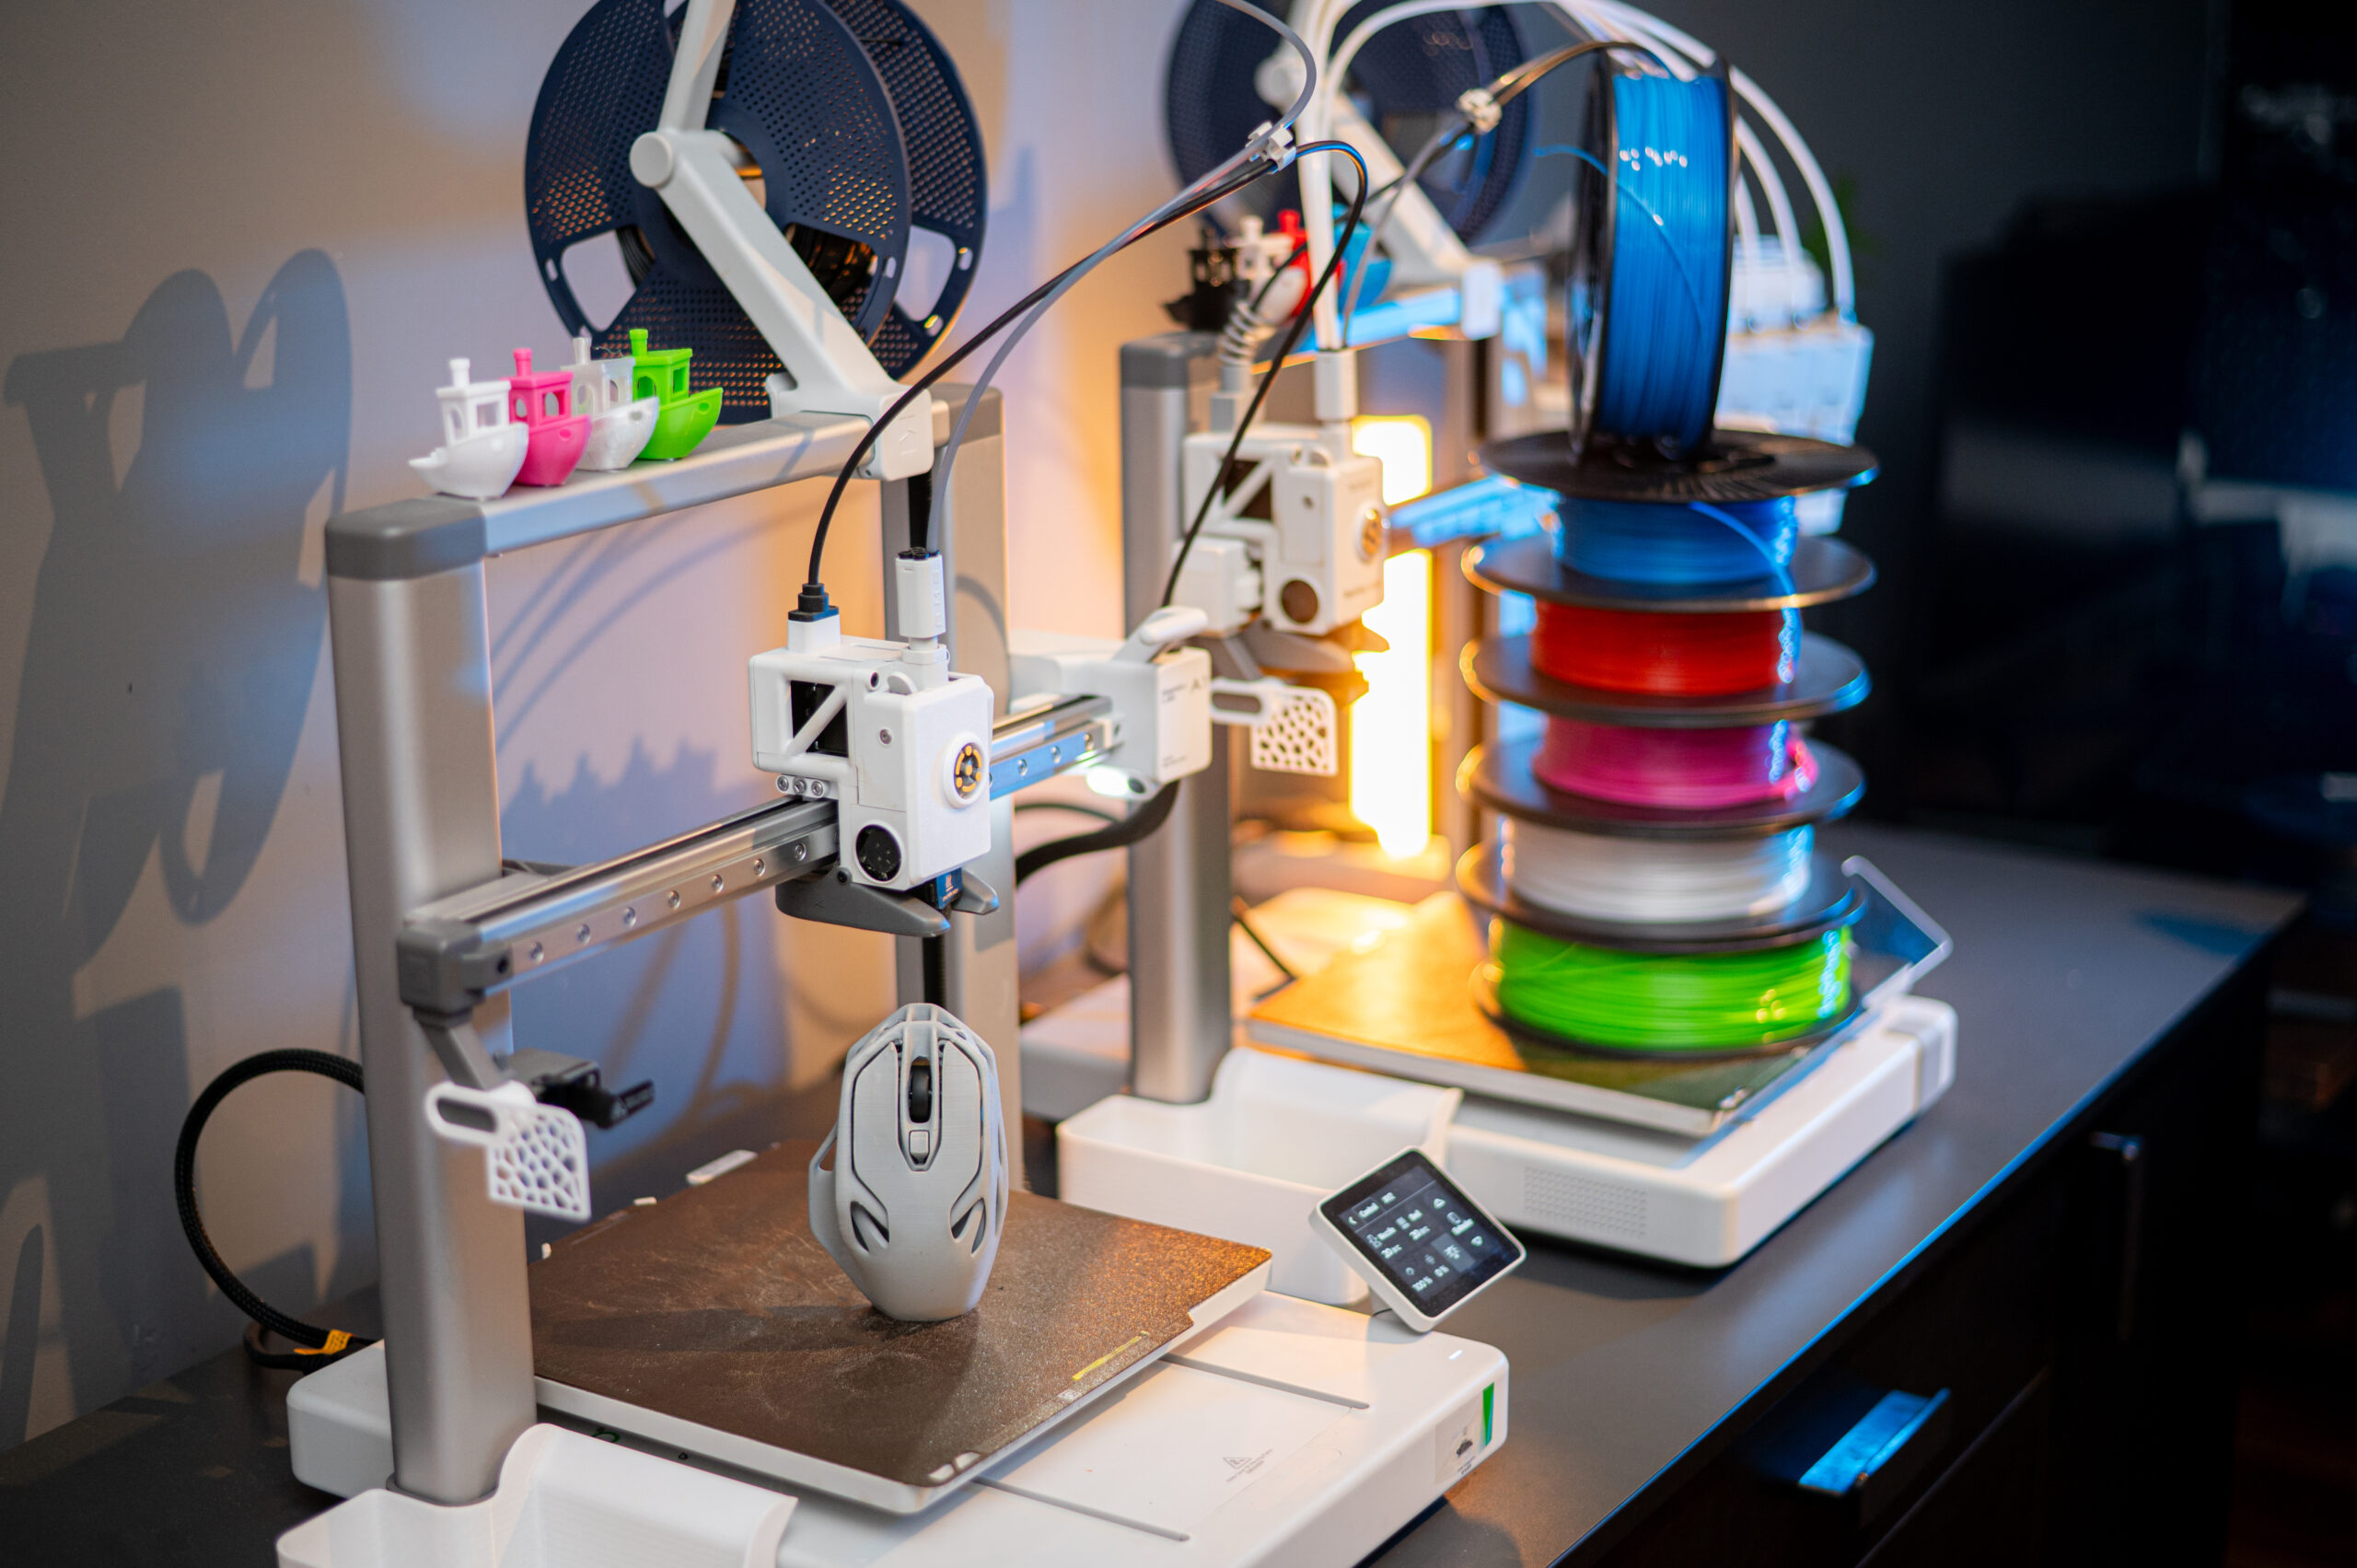
I went with a Bambu Lab P2S printer. It is an enclosed printer; it has excellent support and ecosystem. And it has strong vertical integration.
In order to 3D print something, you need the printer, a build plate, filament, a model, and a slicer.
The build plate is a surface that the filament will adhere to when you want it to and release your printed part when you want it to release.
Filament is a thermoset plastic. I.e., a plastic that melts when heated and can be reshaped and then will hold that new shape after it cools.
The model is a digital 3D solid. It is normally generated with a CAD package.
The slicer take the 3D solid and slices it into layers, then creates a sequence of g-code instructions to recreate that solid in plastic.
The First Print
To start with, I purchased filament from Bambu Lab to use on my printer. Their filament spools come with RFID tags. When you put the spool in the AMS, it will read the RFID, which tells the AMS what type of filament it is and what color. It also says it is Bambu Lab filament, but nobody else has permission (cryptographic) to create RFID tags that the printer/AMS will read.
I selected a useful “print” from the prints that are preloaded in the printer. Then I pressed “go”.
It printed exactly what I wanted, and it has been in use ever since.
The Second Print
It is nice to have models preloaded to print, but that would get boring rapidly. The next step was to use their phone app to print something.
This consisted of starting their app, pointing my phone camera at a QR code on a box. That QR took me to a model in the Bambu Lab cloud. I clicked the print button and a short time later I had a 3D version of that print.
There were more things I printed this way, but it was time to move up.
The slicer
The approved software is Bambu Studio. Which is an Apple or Windows program, no Linux version. I choose to go with OrcaSlicer because it is well respected and integrates nicely with Bambu Lab printers.
Using the slicer, I was able to download models from other sites, outside of the Bambu Lab cloud, slice them, and then send them to the printer. I could then use the Bambu App to start the print, or print directly from the printer control panel.
Over time, I’ve moved away from the Bambu Lab Cloud. I’m doing everything locally now. I still use their cloud to find models ready to print, but that is only because it is easy. I can use their phone app, search for a model, tag it, then download and print it later.
ReMix
My first major print was a riser for the AMS. This was printed in four large parts and a set of TPU gaskets. Yes, I can print custom gaskets.
The riser holds two drawers. I printed those drawers with a Gridfinity base.
All is good so far. I then print a deburring tool Gridfinity bin. It should fit perfectly. It does, except it is too tall. I can’t close the drawer.
This lead to me doing my first remix. I pulled the STL into FreeCAD, then created a sold cube the right size. Intersected the two solids and ended up with a shortened version.
This worked. My deburring tool now fits perfectly in my Gridfinity drawer.
This type of remix is simple. More complex remixes take more time. I’m not good at it yet because it requires me to create a solid from an STL or STEP file.
My First Model
I wanted a Gridfinity box to hold my ultra-precision torque screwdriver. I did all the right things, except I did a shit job of my B-splines. I also took a bad picture. I was too close, so lines that should have been straight were not.
Regardless, I printed it. What came out fit the Gridfinity base. The bin was short enough that the drawer would close.
The issue? The finger holes to lift the tool out were way too small. I’ve learned that I need between 20 mm and 30 mm to bake it easy to grip.
I have a second attempt ready to go, but I haven’t printed it yet. It was cool to see. It is a disappointment for it to not work.
My Latest Model
To control the path of filament, 3D printers use lots of PTFE tubing. This is 4 mm OD and about 2 mm ID pneumatic tubing. These fit into PTFE couplers. One of the coupler/connectors I’m using is a PC4-M10. This has a push connector on one side and is threaded M10 on the other.
I’m using a printed replacement cap for a cereal container. A 4L cereal container will hold a 1 KG spool on rollers with space for a hygrometer and desiccant. With a hole in the container, you can feed your filament out and directly to your printer without ever exposing your filament to the moisture in the air.
One method is to drill a 10 mm hole in the side of the container and use a PC4-M10 screwed into the side. A better method is to put a M10 flanged nut on the backside.
I would rather not drill holes, so I went with the replacement cap with a socket for the PC4-M10.
The model prints the cap, a sealing plug, a threaded and knurled screw-on cap. The cap proper has an inset threaded boss for the knurled cap to screw onto to seal the container.
That boss holds a PC4-M10. The model also contains a printed nut for the PC5-M10. Now here is my issue: the person that printed this seems to have found PC4-M10 with M10x1.5 threads. The PC4-M10 I have is measured with M10x1.0 threads.
I went into FreeCAD, I created a solid with a flange, 17mm hex nut, and a proper M10x1.0 threaded hole.
And it worked. Those nuts are now in use.
I am that much closer to being able to print my patterns for castings.