Skills

Prepping – Making Do

There are skills that our grandparents and great-grandparents had, that we (as a society, at least) are sadly lacking in today. The art of “making do” is one of those skills. It’s something we MUST learn to do, and quickly. Whether we have some type of country-wide emergency, an apocalyptic event, or a recession, the ability to “make do” is crucial.

So what is “making do,” you ask? It is actually an amalgamation of important skills. First and foremost, it is living within your means, no matter how uncomfortable. That means putting away the credit card and paying cash for things. If you can’t afford something, you don’t purchase it. Don’t live a filet mignon life when you have a hamburger budget.

It’s so much more than that, though. How many of you have mended a pair of socks or your jeans because they got a hole in them but still had a lot of life to them? Likely very few of you. Until the last ten years or so, I hadn’t done much of that myself. Even as someone who had a very low income, I could afford our frankly very cheap clothing. Today, even though I have access to considerably more money, I tend to spend less.

I do know how to darn a sock, mend a hole in a knitted sweater, and hem or patch clothing. I practice these skills on a regular basis. A good example of this is that I discovered my favorite holiday dress was eaten into (likely by a bunny, but we don’t know for sure). There are several jagged holes, and they’re near the hemline. I could patch the holes, but they would be very noticeable, and I don’t want that. I could darn them or put a decorative patch on them (which I’ve done with some of my jean skirts), but again, it wouldn’t look nice. It’s a nicer dress. Instead, I’ve decided to shorten the entire dress. I tend to wear it with tights or leggings anyhow, because it’s quite short and revealing, so taking off the 1.5 inches to remove the holes will not really be seen. As a bonus, it will give me a strip of the dress’s fabric that I can use for future patching, should it ever be necessary. My lovely holiday dress will live on, and I will enjoy wearing it despite a few mishaps.

Read More

chaotic mess of network cables all tangled together

Maximum Transmission Unit (MTU)

In 1983, CCITT and ISO merged their network definition to create The Basic Reference Model for Open Systems Interconnection.

This is the “famous” seven layer model. Which works for ISO standards but is a poor match for the Internet.

The three layers we are interested in are:

  1. Physical layer
  2. Data link layer
  3. Network layer

1 Physical Layer

The physical layer defines the electrical, mechanical, and procedural interface to the transmission medium. WTF?

Ok, let’s look at this in terms of some real examples. If you have a computer that is more than a few years old, it will have a network connection in it or a port that a network connection can be attached to.

The most common mechanical connection, the socket and connector, is the RJ-45. This is the thing that looks like a big telephone connector. Oh yeah, many of the youngsters don’t remember every plugging a phone into the wall.

This connector consists of 8 connectors. The location and form of these connectors defines part of the mechanical system.

The other part is that those 8 connectors are attached to four pairs of wires. The pairs of wire are twisted and bundled into a single cable. Each of the 8 wires are numbered, and the mechanical definition of the RJ-45 defines which wires are attached to which connector, at both ends.

When I say “numbered”, the physical reality is that the wires are color coded.

The electrical definition defines which wires are used for transmitting and which are used for receiving. It defines if the signals are ground referenced or differences between two wires.

Everything about how to connect the physical devices and how to transmit a signal are specified at Layer 1, the physical layer.

2 Data Link Layer

This layer defines how data is transmitted over the L1 physical network. It defines what how to use the physical layer.

For example, Frame Relay is a data link protocol for connecting distant devices. Each Protocol Data Unit (PDU), consists of a flag field, an address field, an information field, and a frame check sequence, or checksum field.

The information field contains the actual data (information) that is being transmitted.

The Frame Relay standard states that the information field must be at least 262 octets (bytes) and recommends that it support at least 1600 octets.

It is important to note that a length of 262 cannot be (easily) expressed in a single byte. This means that the length field must be at least 2 bytes wide.

While Frame Relay is still in use, today, it is not as common as it used to be. There are better options.

A much more common L2 protocol is Ethernet. This is called a Frame. The Frame consists of a preamble, start frame delimiter, destination address, src address, tag (or zeros), type or length, payload, CRC and a gap.

As originally defined, an Ethernet packet had a maximum length of 1500 octets.

Packet Size

In networking, we talk about sending a packet. A packet is a more generic term for “frame”. We have packets at the data link layer and at the network layer.

Every packet contains enough information to identify the source and destination of the packet, the length of the packet, and the payload. There will often be a header to identify more about the type of the packet.

As a packet moves through a network, it might be “fragmented” as it passes through a network segment which has an MTU smaller than the packet size.

There must be enough information to reconstruct the packet, even when the packet has become fragmented.

Fragmenting is something we want to avoid, if possible.

To that end, a part of the connection process is to discover the MTU for each device.

Consider a simple network segment. A network segment is a piece of the network that is connected at L2.

We have devices A and B. Device A is using a fiber physical layer and device B is using a copper physical layer. B is attached to switch 2, switch 2 is connected to switch 1, and switch 1 is connected to device A.

If all four devices are using old style Ethernet frames, then the MTU will default to 1500. A simple database backup is 3.3 GB. This means we will have to transmit at least 2,305,845 packets.

This requires each device to handle 2.3 million interrupts.

On the other hand, if we were to use jumbo packets, then we reduce this to around 384,307 packets. This is a huge savings in load on the network segment.

The two switches, as L2 devices, are going to either be store and forward switches, or simple hubs. Nobody uses hubs anymore. So they must be switches.

Each switch receives the packet, storing it, then transmits that packet on a different port.

The switch must be able to store the complete packet/frame. If it can not, it will drop the packet.

When designing your network, you want to make sure that all the switches on the network support the largest MTU you might be using.

Devices A and B will discover what their MTUs are. The smaller will rule. The switches, on the other hand, are transparent. They do not get a say in the MTU discovery.

What this means, is that you can have devices on the network that respond to simple testing, such as sending pings, but which fail for larger packets.

Conclusion of Rant

I accidentally purchased a switch (L2) when I was intending to purchase a router (L3).

This should not have been an issue. I intended to use some switches, regardless.

The specifications look good. MTU is documented as 12000.

I plug everything together and start testing. My first network test is always “ping”. If ping isn’t working, nothing else will work well enough.

That worked perfectly.

Then I attempted to login to the remote site using SSH. This silently failed, before timing out with destination unreachable.

Ping works, SSH doesn’t?

This makes no sense.

Until I found it. SSH does a key exchange with my RSA public key. The key size is 1679 bytes. This is larger than the supported MTU of switch 2 at 1500.

The network fails, silently.

So I have email out to the manufacturer, hoping for a positive response.

The Weekly Feast – Broth

If you’re like me, you currently have a turkey carcass somewhere in your fridge, freezer, or on your (very cold) porch. Thanksgiving was delicious, and you’ve mostly picked that carcass clean. What’s left are the bits no one generally eats (wings maybe, or the bottom of the bird, the backbone, and perhaps the neck and giblets). Don’t throw those away, folks. That right there is Winter Gold.

To make a hearty turkey broth is quite easy. You can do it in a crockpot, a Westinghouse (which is my method), or on your stove top. This can even be done over a fire, on a hearth, or on top of your wood stove, if you like. You simply need a heat source that will bring your liquid to a low simmer, but not a full boil.

Whatever method you’re using, the preparation is exactly the same. First, denude your bird. Pull off ALL the edible meat (yes, even from the legs). Leave behind tendons, bones, gristly bits, and parts no one eats. Store the meat in the fridge for later. Now take your hands, a large knife, or a good pair of kitchen sheers and cut the bird into pieces that will fit into whatever you’re making your broth in. You want all the bones and bits to be submerged, so depending on your size of pot, you may need to chop up the bird fairly small. It’s perfectly okay to put the carcass into your pot then use a large spoon or a wooden mallet to shove and break it until it fits. For our purposes, it does not matter if the bones are broken.

Once the bird is in the pot, you will begin to add your vegetables. If you want to be truly frugal, you should add in all the peelings and skins from Thanksgiving dinner. I didn’t save all mine (though I have in the past), so instead, I’m adding in the following:

  • one whole onion, skin on, quartered
  • one head of garlic, cut in half so all the cloves are halved, skin on
  • 2 bay leaves
  • leftover carrots (carrot tops and skins are fine here, too)
  • celery tops (the leafy bits, rough chopped)
  • whatever herbs you prefer (my garden yielded the last of the sage, thyme, and some parsley)
  • whatever spices you prefer (at least the standards: salt, pepper, garlic)

Add all these to your pot, and then pour in enough water to cover everything, but not to boil over. Bring your broth to a boil, and then put the temperature down to low and let it simmer for several hours.

Read More

Cybersecurity IT engineers are working on protecting networks from cyber attacks from hackers on the Internet. Secure access to online privacy and personal data protection

There is a reason…

The problem that people have been attempting to solve, for years, is the lack of space in the IPv4 addresses space.

There are currently more devices attached to the Internet or “the network” than there are addresses in the IPv4 space. This requires address overlap.

The smallest section of a network is the “subnet”. A subnet can hold anywhere from 2 to over a million devices.

Consider a small business network. They have three networks, a network that is connected to the Internet, labeled DMZ, a network for the security cameras, labeled CCTV, and the working network, labeled Internal.

They have a router between the Internal network and the DMZ. There is another router that takes traffic from the DMZ and transfers it to the Internet.

The CCTV network does not need to ever touch the DMZ network, nor does it really need to touch the Internal network. So they run a completely separate physical network so that CCTV traffic is never available on the Internal or DMZ networks.

This could become costly. Consider a situation where you need to connect multiple buildings. Maybe some of those buildings can be connected with fiber, but others are using radio links. Radio links are expensive.

The traffic is low enough that there is no justification for a second radio link. Besides, it is difficult to run two radio links side-by-side.

The solution that was implemented is the Virtual LAN, or VLAN.

When you define a VLAN, you set a tag in the Ethernet frame, identifying which VLAN this frame belongs to. Now, we can put all the CCTV traffic on a VLAN and use the same physical network as we use for the Internal network. All is good.

This isn’t a complete solution, it is possible to configure a network card to listen to a particular VLAN, even if that device isn’t supposed to be on the VLAN. It is also another configuration point which smaller devices might not support.

As an example, I’ve never found a method to put my cell phone on a particular VLAN. It is likely possible, I’ve just never found it.

Same with my CCTV cameras. They exist only on the default, untagged, network.

One of the very nice parts of using a VLAN, is that you can have overlapping address space. I can have 192.168.88.0/24 on the physical network and 192.168.89.0/22 on the same physical network but with a VLAN tag of 87. They are overlapping address spaces, but they do not interfere with each other.

The solution was to allow a L2 switch port to be tagged. Now, by device which only uses the untagged frame can be plugged into a tagged port. All traffic coming from that port will have a VLAN tag added to it. All traffic sent to that port will have the VLAN tag stripped from it.

This means that a CCTV device sends and receives on the default (no tag) network. It reaches the switch and the packet is now on a VLAN. Another device on the Internal network is also on the same VLAN. That device, a monitoring station, can now see the CCTV footage.

If a port receives a frame that is tagged, it drops the frame. This keeps VLANs from leaking from their approved segment.

If there is a need for a port to accept multiple VLANs, it is configured as a trunk.

Thursday, I attempted to move ceph to an OVN network. This would eliminate the need for a VLAN and would give me a single subnet across multiple physical subnets. It failed.

Friday, I attempted to put a new L2 switch into place. The good news was that I didn’t need to break my entire network to do the testing.

The test computer has two NIC’s. One is connected to the management physical network. The other to the back plane network. I was able to establish a connection to the management port.

Once there, I could establish that I had full bandwidth to other nodes on the physical network, using the physical subnet. I could even reach multiple subnets using that same interface.

Then I tried the VLAN. The VLAN failed. There was no network traffic passing through.

It also looks like they do not have a large enough MTU.

Conclusion

I’m still black boxing this thing. It has been a painful trip. I have more than a few more tests to run. It is just overly painful trying to get there.

The Weekly Feast – Side Dishes

Last week it was turkey. This week, I’m sharing my favorite side dishes that I use in a perfect Thanksgiving Feast!

Mashies

Mashed potatoes are a definite requirement at any Thanksgiving feast. The easiest way to make delicious mashed potatoes is to cut them into about inch square cubes, and boil them until they’re soft but not yet falling apart. Mash with whatever masher you have on hand, adding in a minimum of a tablespoon of butter per potato in the mix and drizzling in milk or cream (or in my case, oatmilk) as needed to bring them to the right consistency for you. I like my potatoes a little lumpy, but everyone else likes them creamy, so I tend to whip them very fine. Serve them with a slight well in the top, filled with a pad of butter and a sprinkle of salt and pepper. They don’t need anything else!

Bread Stuffing

Stuffing is a constant battle in my household. We have several recipes we like, but I’m going to share my Hungarian grandmother’s recipe, because it’s my favorite. This was named “Song Stuffing” by one of my kids, because it contains parsley, sage, rosemary, and thyme… but we adults call it “Heart Attack Stuffing” because of all the yummy fatty goodness inside it. It’s also a great way to get liver into your kids, because they’ll never know it’s there until they’ve fallen in love with it. It’s how my Nagymama got me to eat liver!

Read More

chaotic mess of network cables all tangled together

Are Those Level 4 Plates? (I wish, Nerd Bable)

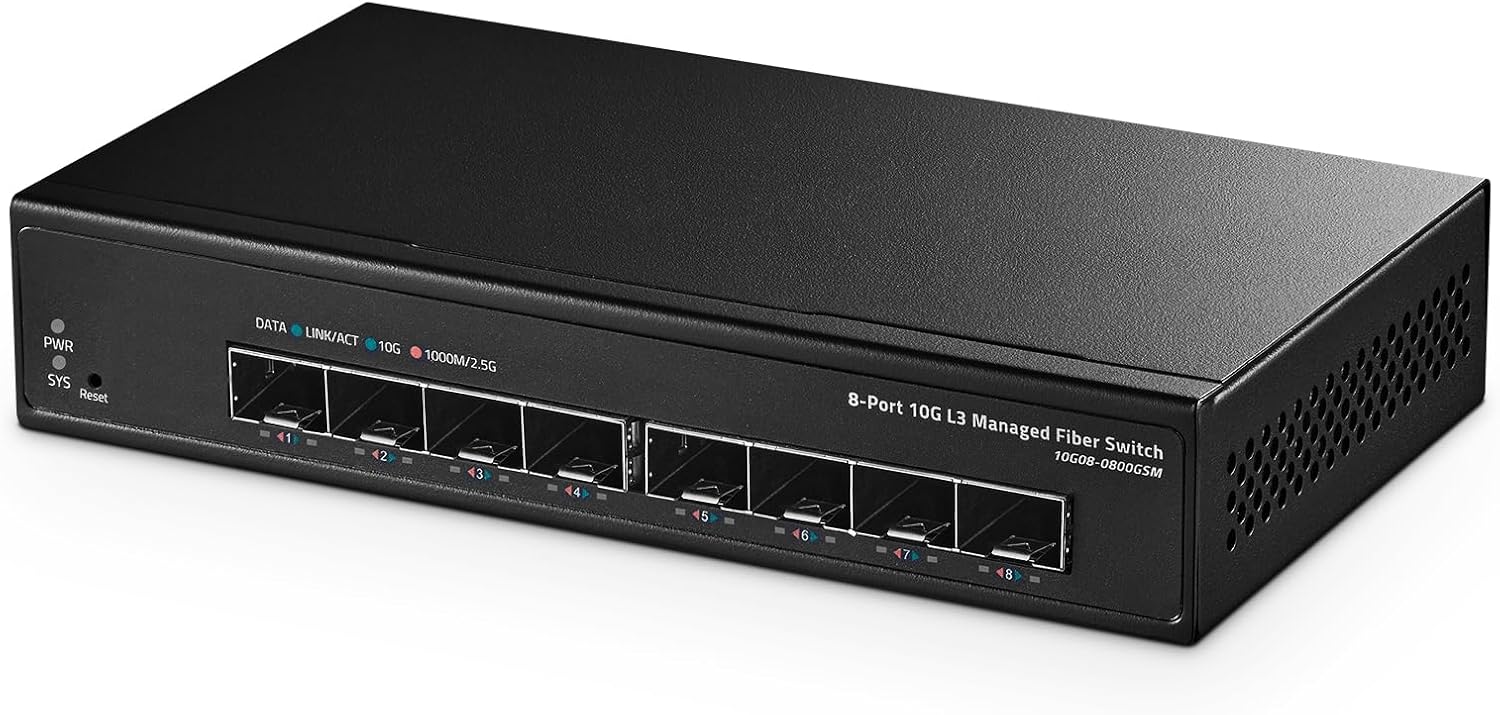
Sunday was supposed to be the day I migrated a couple of machines. I have a new physical device which is described as a Level 2 switch with SFP+ ports.

The idea is to replace my small mixed routers, 2 SFP+ ports plus some RJ45 ports with either a L2 SFP+ only switch or an L3 SFP+ only routers. This allows me to move some servers around and to increase the bandwidth from nodes to the backbone.

The switch arrived with a nice little instruction manual which claims I can find a web interface at 192.168.2.1 while the website claims there is no management interface.

Plugging it into an Ethernet port with an Ethernet SFP module gives me nothing on 192.168.2.1 and nothing on 192.168.2.x/24 but for my machine. It looks like it is unmanaged.

This means, it should be a simple plug in replacement for my tiny switch, giving an upgraded data path to the backbone.

It didn’t work.

So now I have to do some more testing. I’ll figure this out, one way or another, but it is another bottleneck in my path to full conversion to fiber from copper.

bottleneck, bottle opening, glass

Why Is It So Slow? Or How Many Bottlenecks?

My mentor, Mike, use to say “There is always a bottleneck.”

What he meant by this, was that for any system, there will be a place which limits the throughput. If you can find, and eliminate, that bottleneck, then you can improve the performance of the system. Which will then slam into the next bottleneck.

Consider this in light of traffic. It is obvious to everybody, because it happens every day, that traffic does a massive slowdown just past the traffic signal where the road goes from four lanes to two. That is the point which we want to optimize.

The state comes out, evaluates just how bad the bottleneck is. The money people argue, and 15 years later they widen the road.

They widen the road between the first and second signal. Traffic now clears the first traffic signal with no issues.

And the backup is now just past the second signal, where the road narrows again.

We didn’t “solve” the bottleneck, we just moved it.

With computers, there are many bottlenecks that are kept in balance. How fast can we move data to and from the network, how fast can we move data to and from mass storage, how fast can we move data from memory? These all balance.

As a concrete example, the speed of memory is not fixed at the speed of the socket. If there are more memory lanes or wider memory lanes, you can move data faster.

If you have a fast CPU, but it is waiting for data from memory, it doesn’t matter. The CPU has to be balanced against the memory speed.

My mentor was at a major manufacturer, getting a tour and an introduction to their newest machine. He had an actual application that could also be used for benchmarking. One of the reasons it was a powerful benchmarking tool, was that it was “embarrassingly parallel”.

In other words, if it had access to 2 CPUs, it would use them both and the process would run twice as fast. 8 CPUs? 8 times as fast. Since the organization he worked for purchased many big computers (two Crays), and he was the go-to guy for evaluating computers, his opinion meant something.

He ran his code on a two CPU version, found it adequate. Requested to look at the actual designs for the machines. He spent an hour or two pouring over the design documents and then said.

“We want an 8 CPU version of this. That will match the compute (CPU) power to the memory bandwidth.”

The company wasn’t interested until they understood that the customer would pay for these custom machines.

Six months later, these 8 custom machines were in the QA bay being tested when another customer came by and inquired about them.

When they were told they were custom-builds, they pulled rank and took all 8 of them and ordered “many” more.

What happened, was that my mentor was able to identify the bottleneck. Having identified it, he removed that bottleneck by adding more CPUs. The new bottleneck was no longer the lack of compute power, it was memory access speed.

The Tight Wire Balancing Act

I deal with systems of systems. It is one of the things that I was trained in. I.e., actual classes and instruction.

Most people have no idea of how complex a modern Internet service is. I.e., a website.

This site is relatively simple. It consists of a pair of load balancers sitting in front of an ingress server. The ingress server runs in a replicated container on a clustered set of container servers. The application has a web service provider that handles assets and delegates execution to an execution engine.

This runs a framework (WordPress) under PHP. On top of that is layered my custom code.

The Framework needs access to a database engine. That engine could be unique to just this project, but that is a waste of resources and does not allow for replication. So the DB Engine is a separate system.

The DB could run as a cluster, but that would slow it down and adds a level of complexity that I’m not interested in supporting.

The DB is then replicated to two slaves with constant monitoring. If the Master database engine goes offline, the monitors promote one of the slaves to be the new master. It then isolates the old master so it does not think it is the master anymore.

In addition, then non promoted slave is pointed at the new master to replicate.

I wish it was that simple, but the monitors also need to reconfigure the load balancers to direct database traffic to the new master.

And all of this must be transparent to the website.

One of the issues I have been having recently, is that in the process of making the systems more reliable, I’ve been breaking them. It sounds stupid, but it happens.

So one of the balancing acts, is balancing redundancy against complexity, against security.

As another example, my network is physically secured. I am examining the option of running all my OVN tunnels over IPsec. This would encrypt all traffic. This adds a CPU load. How much will IPsec “cost” on a 10 Gigabit connection.

Should my database engines be using SSD or rust? Should it be using a shared filesystem, allowing the engine to move to different servers/nodes?

It is all a balancing act.

And every decision moves the bottlenecks.

Some bottlenecks are hard to spot. Is it a slow disk or is it slow SATA links or is it slow network speed?

Is it the number of disks? Would it be faster to have 3 8TB drives or 2 12TB drives? Or maybe 4 6TB drives? Any more than 4 and there can be issues.

Are we CPU bound or memory bound? Will we get a speedup if we add more memory?

Conclusion

I ave so many bottles in the air I can’t count them all. It requires some hard thinking to get all the infrastructure “right”

Prepping – Thriving, not Surviving

There’s a difference between thriving and surviving. I notice a trend among those who call themselves preppers. There are two sorts: those who are prepared to simply go on living, and those who prepare to survive the apocalypse. The first sort have plans for growing food, hunting, trapping, collecting water, providing continuing light, creating electricity in small amounts, and a lot more. The second sort treat it like it’s a weekend warrior camp where they get to play commando.

I am among the first group. I hone my skills so that I can thrive, rather than survive. Yes, survival is important in the early days of any disaster. You have to make it through the mud slides or tornado or tsunami or whatever it is that went boom. The bottom line is, surviving is the easy part. Either you survive, or you don’t, and the answer to that question is going to come up pretty quickly. No matter how much you prep, there’s always going to be some kind of emergency that you didn’t think of that could wipe you out. Thriving, though… or, as I like to call it, “living,” is what it’s all about.

After whatever immediate circumstances mess up our civilization (because let’s be serious, the Earth, our world, is going to go right on spinning in space… unless the emergency has to do with Vogon Constructor Fleets, but that’s another matter entirely), we’re going to want to focus on getting things built into some kind of new normal. I’m one of the type of folks who hope the new normal isn’t like the old normal. I’d like to see less government, and more growing of food. But that’s me.

How do you prepare to thrive? Well, you get your life together in such a way that a disaster is only a momentary blip. I’ve chosen to do this by studying how medieval and early Colonial people survived in some of the most terrifying circumstances they’d ever encountered. I don’t need to re-invent the wheel, after all. I can see clearly how they did it. And then I practice those skills, over and over again.

Read More

Something SIGnificant

Monday, I had an opportunity to visit the SIG Academy/SIG Experience Center.

In the late 70s, I had a chance to visit NYC for the first time. That feeling of awe, looking up at the skyscrapers. Trying hard not to have pidgin droppings fall into our open mouths.

That is sort of how I felt walking into the building. I spent a long time in the museum portion of the building. I was surprised at the lack of firearms from the 1700 and 1800 hundreds. Starting in the 1900s, they had a presence.

One of the people who worked there was willing to discuss the things that are coming out of SIG for the military. One of the coolest is their short stroke piston operated rifles. Using a new caliber, they are getting good velocity out of shorter barrels.

I want one of those belt feed rifles. They might be out of my price range.

Part of the coolness factor is that with the dual action bars with the short stroke piston, they don’t need buffer tubes. This allows for true folding stocks. Or, something that was just FUD sick.

They took this beautiful action and shoved it into a plastic “hunting” rifle. No pistol grip. No buffer tube. It doesn’t look like an AR platform in any way, unless you shove a 30 round magazine into it.

I’m hoping for a version is 7.62×521(Win .308). That would be a nice rifle. No scaring the mundanes, packs a punch, light weight and reliable.

Unfortunately, I got to looking at the display case full of pistols…

Wouldn’t you know it, a cute little black guy followed me home.

Now, I’m a firm believer in my 1911s. I love the feel of them. I love shooting them. They are tack drivers.

I think I’ve found a new love. The P365 x macro.

This guy fits my hand perfectly. It doesn’t point exactly like the 1911s, but close enough. The grip size is perfect, if it wasn’t, you just replace the back strap. The gun comes with three different back straps.

The one I took home has an external safety, this is to standardize my manual of arms.

On Tuesday, I went to the range and put rounds down range. FUN!!!

I have three plates set up. 1/4 torso behind a round gong and a 1/2 torso to the side. One of my drills is to hit the head of the target hiding behind the gong, then hitting the 1/2 torso to the side, then back again.

With 17 rounds in the magazine, the grip wasn’t double stack wide. It performed admirably. From first to last round, it was consistently ringing steel.

The only downside is the magazines. You will want to use the loading tool to help load the magazine. Even with the tool, getting rounds 14 through 17 into the magazine was a pain. In some ways, it reminds me of loading the M3 grease gun magazines. Heavy springs to push those rounds reliably all the way.

The other thing is that I don’t like the bright orange followers in the magazines. I haven’t looked, but I’m pretty sure I can find replacement followers.

Now for the next bit of coolness, this thing has a drop in FCU. It is the FCU that is the registered firearm. This means that you can pay once for the FCU, then have multiple frames that you can put the FCU into.

Want a sub compact? Buy the frame, barrel, and magazines, you are good to go.

Want a full size? Buy the frame, barrel, and (maybe?) magazines, you are good to go.

I am going to add more SIGs to my collection.

Two is one, one is none. Have more.

The Weekly Feast – Turkey!

It’s that time of year. Most of us enjoy a turkey over the Thanksgiving holiday weekend. My family tends to do the “friendsgiving” thing on Saturday, but we also have a small gathering on Thursday afternoon. Turkey is ubiquitous. It’s also a bear to cook, if you ask many chefs. I’ve never understood that. My turkey always turns out moist, delicious, falling off the bone, and perfect. Maybe I’m just special? Never mind, I’m going to share my turkey secrets with you, so that you can also have a perfect turkey this Thanksgiving!

Ingredients:

  • one turkey, 15-22 lbs
  • stuffing of choice
  • Bell’s seasoning
  • bacon or butter
  • fresh herbs (parsley, sage, rosemary, and thyme are popular)

I prefer to make my turkey in a Westinghouse, because it frees up my oven for pies and other sides. The cooking method is exactly the same, though, no matter what container you use.

To prepare your turkey, make sure that all the giblets are out of it. Check the main cavity, but also the space around the neck. Sometimes, butchers like to hide little gifts in there, and it’s unpleasant to realize that half way through the cooking process, when the plastic they’re wrapped in begins to melt. I like to rinse my turkey, inside and out, but that’s a personal choice. If you do rinse it, make sure that your sink area is clear of all items that might be besmirched, and do a bleach wipe afterward. Turkeys (and chickens) can carry salmonella and other stuff, and even a little of it lingering on a countertop is bad. Use a lint free towel to dry off the exterior of your turkey. Salt the inside of your turkey well by taking a handful of salt and rubbing it on all the interior surfaces. This isn’t meant to be caking it on. Think of it as like a dry rub for steaks.

Add your stuffing. My family uses a variety of recipes depending on the year. We have a wild rice and sausage meat stuffing, and a more traditional bread and liver stuffing (nicknamed “heart attack stuffing” because of the “one egg per pound of turkey” rule used in it). If you don’t feel like making a stuffing, add the heel of a loaf of bread and one quartered onion to your turkey’s cavity. You can also add an apple or orange, if you like. Do not leave the cavity empty, as it changes how the turkey cooks. If you are in a rush, feel free to make up some “stove top stuffing” and jam it up inside there. I’m not going to judge you. Put your raw, stuffed turkey into the roaster pan or Westinghouse and tie the legs together with the tail tucked up in between them. Tuck the wings down into the bird’s underarms as best you can. Don’t panic if it doesn’t work; if the wings are a bit crispy at the end, they’ll be perfect for making turkey broth the day after Thanksgiving.

Using your hands, loosen the skin over the breasts of the turkey. There are several ways you can proceed here. My personal method is to stuff part of my bread stuffing up into the breast area, where it will keep the breast meat moist and help it cook. However, if you’re not using a bread stuffing, you can instead rub the breast meat UNDER the skin with either bacon or butter. Leave little bits of it under the skin. Slide your fresh herbs up under the skin, too, if you like. I almost always slide in a sprig of rosemary and a few leaves of sage from my garden. These will flavor the breast meat, especially as that bacon or butter melts into it.

Sprinkle the outer skin of your turkey with Bell’s seasoning and a bit of salt, pepper, and paprika (REAL paprika, not the red sawdust that passes for “paprika” in most stores). The skin should be evenly speckled with the seasoning, not covered entirely. Make sure to get some of that on the wings and legs, as well as the breast. Cover the turkey with a lid or tin foil, and put it into the cold oven or Westinghouse.

Bring your oven or cooker to 450F. Add a bit of olive oil or bacon fat to the bottom of your turkey roaster or Westinghouse pan, to help keep your turkey from sticking. If you want it to be really rich, you can melt a stick of butter in there, but beware that it may smoke due to the high temperature. Once the oven is to temperature, let it sizzle for 15 minutes, no more. Turn the heat down to 300F, and walk away.

You will not look at your turkey again until an hour before you think it’ll be ready. I mean, you can peek now and again, but you don’t need to baste or anything else. I will sometimes suck the fat out of the bottom of the roaster, if I think it’s getting too much, but that’s an individual thing.

Turkey cooks for about 20 minutes per pound of turkey, when stuffed. That means if your turkey is 21 lbs, like mine, it’ll take about 7 hours (yes, SEVEN) to cook (20 minutes per pound, that’s 3 pounds per hour, divided into 21 lbs, which gives you an answer of 7). When you get to the bigger end of turkeys (over 18 lbs), the timing gets wiggly. I might only have my turkey in for six hours, so I have to watch it during the last couple of hours to make sure it isn’t overcooked. For anything under 18 lbs, though, you’re safe to count 20 minutes per pound of turkey. Always start checking on it an hour before you think it’ll be ready, though.

Having a meat thermometer on hand is really handy. I use mine all the time. Turkey must be between 160 and 165F internally to be properly cooked. Turkey also continues to cook and rise in temperature for a full 20 minutes after it comes out of the oven. I always aim for 160F, knowing it’ll go up more as it rests before I slice it up.

If you don’t have a meat thermometer, or don’t care to use one, you can also do the “leg wiggle” method of testing. As you near the end of your estimated cooking time, wiggle one of the legs gently. You may need to pierce the skin if there’s a lot of liquid inside, which is fine. Your turkey leg should be very loose, almost coming off, when it’s ready. If your turkey leg comes off in your hand when you go to wiggle it, it’s definitely ready. Don’t panic if it does… this method of cooking will result in it not being dry even if you’re a little over in your cooking time.

Turkey MUST rest for a minimum of 15 minutes before you cut into it. Take it out of the oven, and out of the roaster. Place it on a large cutting board. I usually place a handful of towels I don’t much care about underneath the board, because the juices will run when you start cutting, and it’s easier to clean up if it’s all just drained into a towel. The resting time allows much of the liquid to be reabsorbed into the turkey meat itself, making it taste incredibly moist and delicious. It also lets it finish cooking. While you’re waiting, make some gravy with the pan drippings!

Don’t forget to take your stuffing out before you carve the turkey. You can do that at the 15 minute mark, if you like.

I usually cut the turkey up onto two platters: one dark, and one light meat. The breast is the most difficult part to cut up, in my opinion. It’s always at an odd angle. Take a few pictures of the turkey before you start cutting it up, and then carefully (using silicon heat pads if necessary) remove the two breasts and put them flat on the cutting board. It should be fairly easy, by cutting along the breast bone and then just gently pulling downward. Once on the cutting board, your turkey breast meat will slice up quickly and neatly. After that, you can pull off the legs, thighs, wings, and whatever dark meat you can get at. I can’t stress how useful silicon gloves are, because you can clean them in a way that fabric ones can’t be, which means you can grasp the various parts of the turkey more easily.

I know it seems like a lot of work. It really isn’t. Most of my turkey time is spent doing all the other assorted foods that go along with turkey. We usually eat around 5pm or so, which means I’m not getting up at the crack of dawn to try and do a gyn exam on my turkey before I’ve had coffee. I can get up at a reasonable hour, and set it all in motion by 10am. Once you’ve done this a time or two, it’ll become second nature. It’s such an easy way to prep the turkey.

A few notes:

  • Don’t pre-stuff your turkey the night before. You can make the stuffing ahead of time and have it ready to go, but letting it sit overnight inside the turkey will be a sure way of getting everyone to the ER in record time. Don’t do it.
  • Do invest in silicone gloves, a decent carving knife (NOT an electric knife), and the Bell’s seasoning.
  • If you use bread stuffing, REALLY stuff it in there. Cram it in. Every chef I’ve watched on television goes on and on about how you should never over stuff your turkey For Reasons. Ignore them. They’re wrong. Over stuffing your turkey will result in the turkey disjointing itself during the roasting process. This makes carving it up later SO much easier. There’s something special about opening the turkey roaster and just looking at your disjointed turkey, held together only by skin.
  • Ignore those stupid pop up timer things that come in some of the turkeys. They often don’t work, and sometimes they pop early. Just pull them out and toss them.
  • Remember to defrost your turkey, folks. None of this will work with a frozen turkey. Don’t try and cook a turkey from frozen, please. Even if you get one that says it CAN be cooked from frozen, just don’t. Whole turkeys should be slow roasted to preserve the moistness and flavor. Here’s a link to a handy defrosting schedule.