Quality Assurance is not something computer nerds are good at. It is boring, repetitive, and difficult.
That doesn’t mean it shouldn’t be done. Instead, it means that you need somebody to do QA for you. You cannot do QA on your own. You won’t see your own errors.
Consider a simple unit test. You have just created a new model (database table). You know you have created it correctly. Some of that is because you trust the infrastructure you are using, but mostly it is because it has worked in the past.
To do a proper unit test, you would need to verify that you can read and write an object of that model. That each functional manipulation does what is should, and that all possible options into the functional unit works.
In the past, I would test student programs that did simple math. For example, they would write a simple four function calculator. I’m the ass that would get their calculator to attempt to divide by zero. They had to handle that case.
The thing that happens, is that as we are developing new code, we test that code, extensively. We know what we are adding and what it should do. We don’t “retest” what we know is already tested and working.
Last Tuesday, that nearly broke me. I had tested my code, was getting ready to deploy the code. Before deploying, I was doing some testing. It wasn’t until I clicked on a link that went to a page I was not going to be testing that I discovered a major error.
I wasn’t even planning on looking at that page.
Here is another example, you have a standardized header for your website. If you check it on one page, why should you test the header on every page? It should work the same. So you don’t test it on every page. Except that there is one page that doesn’t set a context variable, so it causes errors on the page. Because you didn’t test that particular page, the error is missed.
This is where unit tests are a win. In theory, you write a test for every part.
Currently, I’m working with Selinium, This is an API that interfaces to an actual browser. This allows you to control the browser via code.
The basics are you write code to find a page element, you can then verify different aspects of the page.
I’m currently writing code to test the left column. The left-hand column is on almost every page of the website. In the past, I’ve verified the parts of that column I’ve been working on. I haven’t verified the entire column since I first created the site.
Using Selenium, I am able to run the same set of tests against the left column on every page. I can also verify that every menu item opens and closes. I can exercise the entire website.
Because it is so easy to do this, I can just run the tests every time, giving me better results.
Of course there is a learning curve. Of course it takes a different mindset to do these tests. Regardless, it is worth it.
Love it or hate it, project management is a thing. It has to be there. If you don’t think it is there, you are just doing it badly.
Project Managers are a different kettle of fish. Some need to be boiled alive. Others can just dance on hot rocks. And a very few can sit at the big boys’ table.
I’m coming off the end of a rush project that was big. I had to take a customized system and add tariffs to it with about 14 days from concept to deployed. More than a little to get done.
When I started programming, I had a choice of an 8080 with a 24×80 character display, or a 6502 with a 24×40 character display.
When I was introduced to JOVE, Jonathan’s Own Version of EMACS, I fell in love with it. Multiple views into the same file, the ability to copy and paste from different files or different places in the same file. And auto indentation.
Powerful stuff for the time.
My fingers worked will with vi and later vim because I played Nethack and before that, Hack. The programs had a particular key set for moving the cursor based on the key caps of a terminal type used at MIT.
The author had never seen a terminal without arrows over the J, K, H, and L keys. To give you an idea of how ingrained those are, I had to fire up vim and tell my fingers “down”, “up”, “right”, and “left” to record the keys for this sentence. My fingers know, I don’t.
Besides jove, I learned emacs. Emacs is my programming editor. It is what I use when I need to write a lot of code or text. With modern computers, it starts just as fast as jove ever did on a 68020 class CPU.
The problem we had was keeping track of what needed to be done or fixed. This might start off as a document, written with jove in troff. This could be fed to different processors to create PostScript files to be sent to our printers.
Later, some of us used LaTeX for the same thing. Your “design document” was a separate file that was “fixed” before you started coding. These documents never contained more than brief pseudocode and discussions of algorithms.
As you were coding, if you discovered something, you created a comment and marked it. The two most common marks were, XXX which meant that the code was broken in some way, but it didn’t need to be fixed now. All XXX marks had to be addressed before the code could be released.
The other mark was TODO. This was working code but needed some features or extensions added. These did not need to be fixed before release.
In general, we used grep to find all these markers in a list of files. It wasn’t difficult.
The small program I’m working with has some 250k lines of code. After 3 or 4 years of supporting this site, I would say I’ve looked at every line of code in the system.
Finding every marker in 4100 files across 1200 directories is a pain.
Enter Kanban
Kanban is a project management tool. The concept is easy enough to do with sticky notes and a white board or notes with push pins on a larger bulletin board.
Today, the normal Kanban has 4 columns to hold cards. The cards are labeled, “backlog”, “To Do”, “Doing” or “Working”, and “Done”.
When you create a card it goes into the “backlog” column. These are issues or tasks that have no resources assigned to them.
Once per week, there is a meeting of the workers and the project manager. In this meeting, the project manager evaluates the cards that are in the “Done” column. If they are truly done, then they are removed from the board and added to the QA project.
Cards that are in the working column stay in the working column. Cards that are in the working column can be moved into the backlog column if some other card blocks them.
For example, if you have a card that says, “Put new tire on left front wheel” it cannot be worked on until the card that says, “Purchase a new tire for the front left wheel.” Until the purchase card is completed, you can’t work on the installation card.
If there are any resources (workers/developers) that think they are going to need more tasks to work on, the project manager will take cards from the backlog column and move them to the To-Do column.
When a worker requires more work, they move the card from the To-Do column to the working column. When they complete the card, they move it to the Done column.
I’ve used Kanban in the past. It never really appealed to me as it didn’t feel any different from the old ways of doing things.
For this latest project, I used my Kanban board.
Instead of putting markers in the code, I opened a new issue. That issue just went into the “backlog” column. I could tag the issue as a bug or a feature. I could indicate that cards were blocked. It was faster to create the issues/cards than to make entries into the files and then try to locate them later.
Today, I’ll be looking through anything in the QA column and writing unit or web tests for them. I’ll also be doing a QA across the site, to add to the project board.
The biggest thing for me was the ability to visual see what still needed to be done.
In computer languages, there are very few that are structurally different.
FORTRAN is like COBOL, which is like Pascal, which is like BASIC, which is like ADA, which is like …
Forth is not like those above. Nor is APL or Lisp.
Assembly languages can be used in structured ways, just like FORTRAN, COBOL, Pascal, and many others. It requires the discipline to use if not condition jump skip_label; do stuff in condition; skip_label:. The actual programming logic stays the same.
The two computer languages I dislike the most are PHP and Python. Both because they are weakly typed.
In a strongly typed language, you declare a variable’s type before you use it. The type of the variable is immutable for its lifetime.
In other words, if you declare a variable of being of type integer and then attempt to assign a string to it, it will barf on you during compilation.
In PHP, all variables look the same, any variable can hold any type at any moment. The type can change from line to line. And the language will do implicit type casting. It is hateful.
Python has all the same characteristics I hate in PHP, with the added hateful feature of using indentation instead of begin-and markers for blocks.
I’m lucky that Python has an optional typing capability, which I use consistently. The optional part is a pain when I want to use a module that has no typing information. When that happens, I need to create my own typing stub.
But the worse part of all of this is that they get jumbled together in my head. How many entries in an array? In PHP, that is determined by the count() function, in Python it is the len() function.
In Python, the dot (.) is used to access methods and attributes of objects. In PHP, it is the concatenation symbol.
I am tired of writing Python in my PHP files and I dread switching back to Python because I know my fingers will mess things up.
When working with git, there are several areas we might be discussing. The most important areas are “working directory”, “staging”, “local repository”, and “remote repository”.
A repository without a working directory is called a “bare repository”.
The working directory is a location where your files live, with a reference back to the repository. It is possible to extract the files without keeping a reference to the repository.
Most working directories, and what we will assume for our discussion, have the bare repository within the .git directory (folder).
A remote repository is normally a bare repository located somewhere apart from your local working directory. This could be a different directory on the local machine, or it could be located on a remote, network connected system.
Creating a Local Version of a Remote Repository
This is what the remote repository looks like. A pretty simple version.
We don’t copy it, we clone it. The implication is that what we have in the local version is the same as what is in the remote version.
git clone ssh:git@github.com/author/book.git
This creates a directory named “book”, it clones/copies the bare repository from GitHub and places it in “book/.git”. It creates a “remote” reference within “book/.git/refs/remotes” named “origin”. With “origin” it creates a copy of all the branches that are in the remote repository, in our example, just “master”
The clone command then checks out the working directory into “books”. This would be the files “chapOne.md”, “chapTwo.md”, and “chapThree.md”. It creates a file in “books/.git/refs/heads” named master with the commit hash (identifier) of “0ccd79797”.
These two look the same, but notice that the last two commits have different values/hashes. This is because they are different.
Since you are done with your edit, you attempt to send your changes back to the remote repository named “origin” via a push command. git push origin main This fails because there would be two versions of the repository if you did this, there can be only one.
To correct this, you first fetch an updated copy of repo.
We do another fetch, there is nothing to do as nothing else has been added. We then push our commits back to the remote repository. git push origin main
Because I’m not the program, there might be some small ordering issues in the final commit.
The point in all of this is that all of this magic happens behind the scenes. The program can do most merges with no assistance from you. In the rare cases where there is a merge conflict, it is relatively easy to manual merge the changes.
A merge conflict happens when two commits modify the same line of code. In your version, you had “Ciliorys hat” originally. You modified it to be “Billy-Bobs hat” Your editor had changed it to “Cilory’s hat”.
Now you have two edits to the same line. Git says, “You figure it out.” and shows you the two versions of the line, in context. You can pick one version or the other, or put in an entirely different version.
You choose the third option and put “Billy-Bob’s hat”. The world is good.
Conclusion
git is powerful. This discussion barely touches on the power of git.
There is an entire process of modifying code by “forking” a repository. When you are finished with your modifications, you can contribute them back to the original repository with a “Pull Request”.
Git has multiple methods of inserting code review and other tools into the process.
It is so powerful, It can be used to create a full wiki, on the fly. The raw files are served as wiki pages.
There is a method of doing a binary subdivision to find bugs that were introduced in the past. There is a method of tracking who introduced an errant line of code.
There are tools for pulling a commit out of the middle of a branch and applying it to a different branch, without taking the rest of the modifications.
In general, there only about a dozen commands that a user needs to know to work with git.
If you would like to work with git, there are communities ready to help you, there are multiple cloud providers that will allow you to host your repo on the web.
My introduction to source code control came at University. The name of the program was “update”. It took an “update deck” which described lines to remove, by line number, and lines of code to insert.
This format allowed us to inspect the code that was actually being changed, as well as the surrounding code. Every line of code I wrote for the Systems Group that was installed went through three levels of code review and QA testing before going live in the system.
Having those change decks helped in the review process. As a side note, the author’s initials were attached as a note to the right of every line of code we modified. Easy stuff.
After a change deck was accepted, it became part of the “installed version” of the software.
One of the powerful features of working with change decks is that two (or more) people could be working on the same piece of code and unless their changes overlapped, they could be applied independently.
RCS
When I left University, I started working with the BRL CAD project. This introduced me to the RCS system.
RCS was something like “update” but not quite. And you didn’t think in terms of “change decks”. That was handled behind the scenes.
You had a directory (folder) in which you had your code. You also had hidden files that stored the RCS history of the code.
By default, files were stored read-only. You could read them, you could compile from them, but you could not modify them.
To modify a file, you needed to first check out the file. When you checked out a file, it was “locked” to you and nobody else was allowed to modify the file.
You made the changes you wanted to the checked out files, then you tested. When you were happy that your code worked, you checked in the file you had checked out.
This is great when modifying a single file, but if you are modifying more than one file to accomplish your fix or enhancement, you have to check in each file in a separate operation.
There was no linkage between the files to indicate that all the changed files needed to be processed as a gestalt.
When you were ready to make a release, you had to do some magic to mark each file as being part of that particular tag. Then, at a later time, you could check out that entire tree and work on it as if it was the day of the release.
RCS did magic behind the scenes to figure out the “delta” between the checked out code and the original. This was equivalent to the “update deck” I was used to from University Days.
To work in a collaborative methodology, you would have a single “working directory” with everybody on the team having read/write privileges to the directory. If you were working across multiple machines, each machine had to use the same shared directory via a network file system. (NFS at the time)
At one point, I was working on BRL CAD on my home machine. I did not have enough space on the drive to copy the entire RCS tree to my local drive, so I was using NFS over a 28.8k dial-up modem.
Compile times ran about 3 days. And if anybody changed one of the “big” include files, I would have to start the build over again.
If you were working on a copy of the source code, you would extract a patch file from RCS to submit back to the master RCS directory.
It felt easy at the time, but it wasn’t as easy as it seamed. We just didn’t know what we didn’t know.
CVS
CVS was the first major paradigm change in source code control for us. The basic use was the same as with RCS, but they had changed the layout.
You now had an explicit directory, CVS, which contained the history files. When you checked out files, the lock was done in the CVS directory.
In addition, you could check out the files read-only (no lock) remotely from the CVS directories and then checkout with a lock, edit on the remote system, then check in your changes.
This was a game changer. We no longer required a network file systems.
Unfortunately, we had some of the same issues as we had with RCS. The main one being that only one person could check out/lock a file at a time. With team members working nearly 24 hours per day, it was a pain when the morning dude wasn’t available at 2237 to release a lock.
SVN
SVN solved most of the known problems with CVS. It had the concept of a remote repository, it allowed multiple people to work on the same file at the same time. It had better branch and tag capabilities.
All in all, it was a vast improvement.
The two primary weaknesses were no gestalt for files and very slow check out of branches and tags away from the main trunk.
I remember using SVN. I had to use it just a couple of weeks ago. I don’t think I ever fell in love with it. It was a step-wise improvement over CSV.
git
Git is my favorite source control system. I understand that there is another SCS, but I can recall its name at this point. I’ve not used it.
Git changed the paradigm we use for changing the repository. Whereas all the previously discussed SCS’s work on a file by file basis, git works on a “commit” basis.
Even if you are working in a collaborative environment, you work on your personal repository (repo). We will get to collaborative environments shortly.
In the simplest form, you create a “working directory” which you populate with your code. That could be a book, a program, an application, or a web page. It doesn’t matter. Git doesn’t care what the files contain, only that they be text files.
Git can work with binary files, but that is not our focus.
Once you have your initial contents, you create your repo with git init. With this magic command, git creates all the required files to track the history of your project.
Let’s say you are working on a book. You have placed each chapter of the book in a separate file. One of your characters is named Cillary Hlinton. Your editor tells you that the name is just too close to a real person, and he would rather not be sued. He asks you to change the character’s name.
Under update, RCS, CVS and SVN, you would check out individual files, change the name to “Billy Boy” and then check in your changes. When you have made all the changes, you are happy.
The issue is that there Chapter One is on revision 44, Chapter Two is on revision 37, and Chapter Three is on revision 48. How do you figure out the revision from just before you made the changes?
With git, you do not check out files and lock them. Instead, all files are ready for you to modify. You just edit the files and change the name.
Now you have chapters one, two, and three that have been modified. You group them into a single commit by adding them to the staging area. git add chap1.md chap2.md chap3.md
You can do this on one git add or multiples, in one session or multiple sessions. At some point you will be satisfied with your collection of changed files.
At that point, you commit the changes. You will be required to supply a message.
Each of the following circles represents a commit.
Before Name change
After the name change
If we want to see the version before the name change, we can check out commit 4. When we do, all the files are changed back to the version before adding your name changes.
This makes it easy to find one particular point where the state of the book is one way and in the next commit, all the changes have taken place across the entire book.
The other major improvement that git brought was fast branches.
Branches
Here we see two branches added to the repository. The first “HEAD” is a special branch. It represents the commit associated with the working directory. It is manipulated implicitly instead of explicitly.
“master” is the default branch until “rrracist” was applied, so some repos now use “main” instead of “master” branch.
This ability to create branches rapidly allows us to make and destroy branches at will.
We are going to create a new branch, “editor” for our editor to work on. Meanwhile, you are continuing work on chapter four.
Editor and Master branches
And here is where git shows another of its powers, the merge. With the ‘master’ branch checked out, we merge the editor branch, fixing all the little grammar and spelling errors. git checkout master; git merge master
After Merge
With this merge completed, the master branch contains all the work done in the editor branch, but the editor branch does not have any of the new work done on master. To synchronize the editor branch with the master branch we do git checkout editor; git merge master.
After merging master into editor branches
If there is no more editing to be done, it is acceptable to delete the editor branch. No code will be lost.
Because the ability to branch and merge is so quick and powerful, it is normal procedure to start a new branch for each issue being addressed in a project. When the issue is resolved, the new code is merged into master or discarded.
Remote Repositories
Is a tale for another time.
Conclusion
If you can use a source code control system to track your work and changes, do so. It makes life so much easier in the long term.
The short of this is that I’ve been building PCs for years. They are LEGO blocks. You make sure the parts will fit together, and it all just works.
As an example, I “knew” that LGA sockets were for Intel CPUs. Last night I learned that LGA just means the motherboard socket has the pins. PGA means the CPU holds the pins.
How did I learn this? I was researching AMD CPU sockets and learned that the AM4 socket was of the PGA style, while the AM5 socket is of the LGA type.
I didn’t know what I didn’t know.
We run a local data center. It is still a work in progress. We have enough disk space, but not enough redundancy. We have some compute servers, but not enough.
We try to do some upgrade every month, trying to improve things. The last improvement was another node in the Ceph Cluster.
After spending weeks researching, I found a 4 bay NAS enclosure that took Mini-ITX motherboards. This felt just about perfect.
It uses a flex style power supply, which is balanced for the actual load of 4 HDD and a motherboard. 350 Watts is what I went with. Thus, it draws less power than older machines.
Finding a Mini-ITX board was another research hell. What I wanted was MB with 4 SATA 3.0 ports, 1 or more SFP+ ports, one gigabit Ethernet port, at least 16 GB of memory and NVMe support for 512 GB of storage.
I couldn’t find one. I haven’t given up, but I haven’t found one yet.
After searching, I found a Mini-ITX MB with an LGA 1155 socket, 4 SATA2.0 ports, a 10/100 Ethernet Port, 2 DDR3 slots (16 GB), and a PCIe slot.
This might seem low end, but it meets our needs. HDDs only require 3 GB/s to keep up. We would need 3.0 if we were using SSDs.
The 10/100 is useless for moving data, but meets our needs for a management port. All in all, a good choice.
When all the parts arrived, I couldn’t get the MB installed. The fan was too tall. I got a better cooler that was a low profile style. When that came in, I installed the board. It was painfully tight getting everything in. Took me over an hour to get all the cables hooked up just right.
Everything went well until I went to put the cover back on. At that point, I found the cover didn’t fit “because the case had the motherboard too close to the edge.”
I fixed that in the machine shop. Grinders and cut off wheels to the rescue.
Everything goes together.
After everything is configured and running, I slap a drive into the case and it works. Wonderful. Final step? Install the SFP+ network card.
It doesn’t line up. The damn thing doesn’t line up with the slot in the back.
After mulling it over for way to long, I made the cut-out in the back wider and moved the standoffs. Machine shop to the rescue.
Except I had a bad network card. Easily fixed via a replacement. No big deal.
After over a month of fighting this thing, making massive changes to the case. Taking it entirely apart to get the motherboard in, the machine is now in production.
Yesterday the motherboard for an upgrade arrived. The case I bought to hold it had the PCI slot moved over. This looks like it will all just work.
Except that when I go to install the MB, I can’t get it to fit into the case. No big deal, I’ll take this case apart too.
But the board doesn’t line up. It doesn’t line up with the standoffs. It doesn’t line up with the back slot. It doesn’t even line up with the onboard I/O baffle.
At that point, I measured my Mini-ITX board. It should be 170mmx170mm. This board is not. It is 0.8 inches to wide. It isn’t a Micro-ITX nor is it a Mini-ITX. It is some none standard PoS.
I’m spitting mad at this point. I’ll put everything back in boxes until the new MB arrives. When it does arrive, I’ll be able to retire an older box that has been holding this data center back.
Everything now fits.
It wasn’t the case that was the issue with the last build. It was the motherboard. Time to update the reviews I wrote.
When I started writing, regularly, for Miguel, I took it upon myself to cover legal cases. Since that time, I’ve learned more than I really wanted to about our justice system.
As my mentor used to say, “The justice system is just a system.” As a systems’ person, that allowed me to look at cases through the lens of my experience analyzing large systems.
One of the first things I noticed was that most people reporting on cases didn’t provide enough information for us to look up what was actually written or said.
CourtListener.com has come to my rescue for most legal filings in the federal system. If you know the court and the docket number you can find that case on CourtListener.
Once you have the docket located, you can start reading the filings. These are stored as PDFs. Most of my PDF tools allow me to copy and paste directly from the PDF.
What isn’t available on CourtListener is Supreme Court dockets. I’ve talked to Mike and others, the issue seems to be something about scrapping the Supreme Court website as well as other stuff. I’m not sure exactly what.
I want to be able to keep up on all the current cases in the Supreme Court, what their status currently is, what has been filed. They entirety of the case. I’m not concerned about most of the cases, but often it is easier to get all than a selected portion.
To this end, I have code that uses patterns to pull cases from the Supreme Court docket without have a listing of cases.
This tool will have search capabilities and other tools shortly, for now, it works well enough.
I am using the PySide6, which is a python implementation of the Qt framework. For the most part, I’m happy with this framework. There are parts I don’t like, which I work around.
My most recent success was figuring out how to allow me to click on hyperlinks in text to bring up my PDF viewer. This was not as simple as I wanted it to be, but it is working.
The other night, I wanted to write about a current case. I had the case docket in my tool. I pulled up the docket, clicked on the link, and John Roberts’ order popped up in my viewer, exactly as it should.
I started writing. Went to pull the quote and nothing.
Copy and paste does not seem to be functional in my tool.
Which takes me to the rant, which @#$)*&@$) coordinate system should I be using to get the right text!
Qt is built around widgets. Every widget has its coordinate system. In addition, there is the global coordinate system.
Each widget also has a paintEvent() which is when it paints itself.
To start the process, I capture mousePress, mouseMove, and mouseRelease events. While the mouse button is down, I draw a rectangle from the place clicked to the current location of the mouse.
I attempt to draw the rectangle and nothing shows up on the screen.
Through debugging code, I finally figured out that I am not updating the right widget.
The QPdfView widget properly renders the PDF document in a scrollable window. I have made a subclass of QPdfView so I am catching all paint events. But even though I’m telling the system that I have to redraw (update) my widget, there are no paint events being sent to my widget.
Turns out that my widget only cares about update signals that require the framing content be redrawn. I.e. if the scroll bar changes, then I get a paint event. Once I figured this out, I was able to tell the viewport that it should update and things started working.
So now I can draw a frame on the screen. But what I want is to get the text from within that frame.
I asked the QPdfDocument for a new selection from point_start to point_end. It tells me nothing is selected.
Where do I currently sit? I have my frame in my PDFViewer coordinate system. I have the PDF document in a different coordinate system. The PDF coordinate system is modified by the scroll bars or viewport. The scroll bars and scroll area modify the actual coordinate system of the viewport contents.
Somehow, I need to figure out which of these coordinate systems is the right coordinate system to use to get the text highlighted by my mouse.
Everything finally came together with the new system. Then I went and messed it all up.
The motherboard has a weak Ethernet. It is a 10/100 Ethernet, which is NOT a problem for a management interface. When I upgrade the box to have full redundancy, it will get a dual port fiber card.
What it does mean is that my Wi-Fi to it via a USB dongle is faster than if I were to plug it in.
Once the box was in position, I connected via Wi-Fi and finished configuration. I tested all the connectivity, and it all just worked.
At that point, I told it to join the cluster. It did with pleasure, and brought the cluster to a stop.
Did you catch my mistake? Yeah, I left that dongle in.
At the bottom of the barrel, we have 10base-T. I have some old switches in boxes that might support that. Above that is 100base-T, which is a good management speed. We can move data for upgrades and restores, but not the fastest. Some of my switches and routers do not support 100baseT.
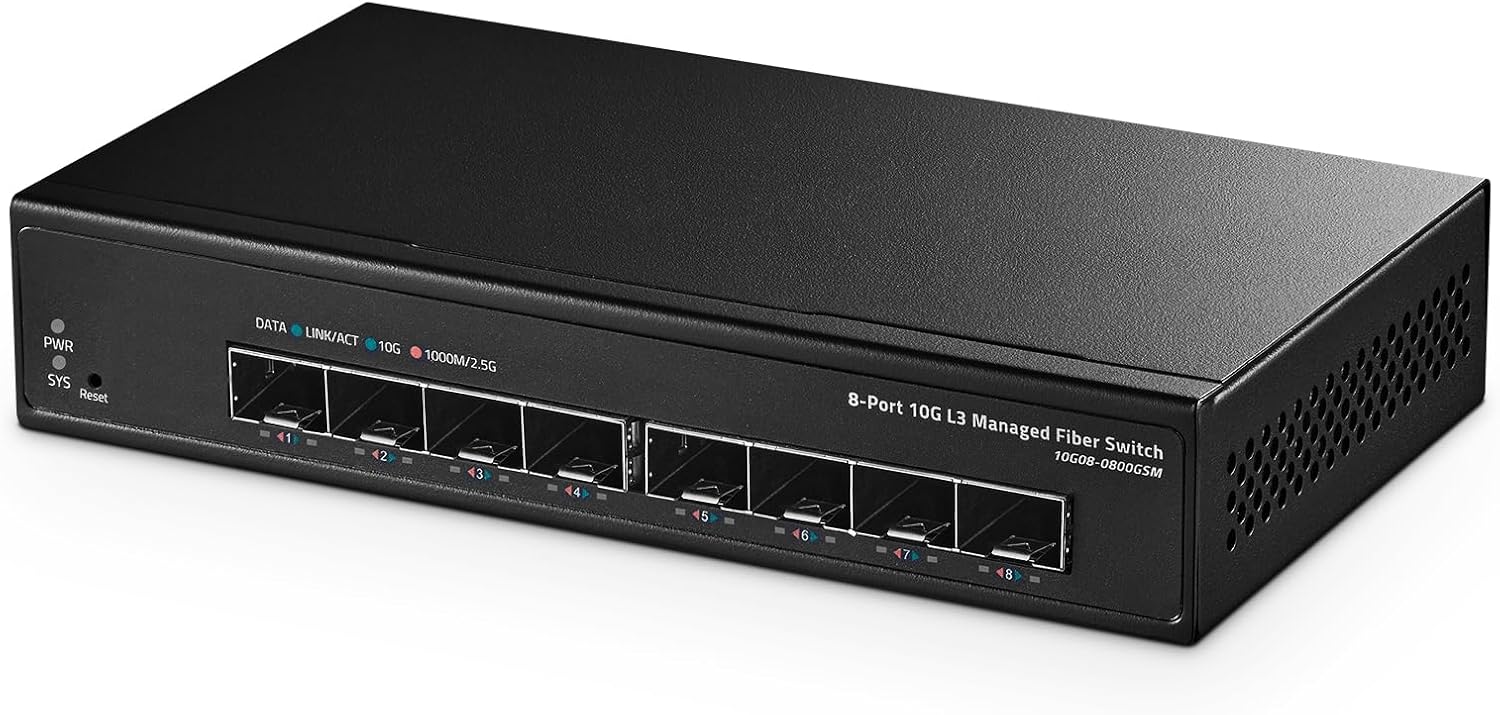
Above that is where we start to get into “real” speeds. Gigabit Ethernet, or GigE. I’ve now moved to the next step, which is ports supporting 10G over fiber or cable, depending on the module I use. The next step-up would be 25Gbit. I’m not ready for that leap of cost.
Wi-Fi sits at around 200Mbit/s. Faster than “fast Ethernet” also known as 100base-T, but not at “real” speeds. Additionally, Wi-Fi is shared space, which means that it doesn’t always give that much.
So what happened? The Ceph(NAS) cluster is configured over an OVN logical network on 10.1.0.0/24. All Ceph nodes live on this network. Clients that consume Ceph services will also attach to this network. No issues.
When you configure an OVN node, you tell the cluster what IP address to use for tunnels back to the new node. All well and good.
The 10G network connection goes to the primary router and from there to the rest of the ceph nodes. One of the subnets holds my work server. My work server provides 20Tb to the ceph cluster.
On that subnet are also the wireless access points.
So the new node correctly sent packets to all the ceph nodes via the 10G interface, EXCEPT for traffic to my work server. Why? Because the 10G had a 1 hop cost, while the Wi-Fi had a 0 hop cost. By routing standards, the 200Mbit Wi-Fi was the closer, faster, connection than the 1 hop 10G connections.
When I found the connection problem and recognized the issue, I unplugged the Wi-Fi dongle from the new node and all my issues cleaned up, almost instantly.
There are a few servers that are too old. There is a need for a few more servers to get a room level redundancy. These things can be expensive.
As I’m cheap, I’ve been using older servers that accept 3.5″ disk drives. Some except 2 drives, some 6, some could accept more, but the case doesn’t.
The fix I chose was to move to some four bay NAS enclosures. This is a reasonable size that balances with the network I/O capability.
These enclosures all take the Mini-ITX motherboard.
These motherboards are nothing short of amazing. In the middle tier, they have all the things a full-size motherboard has. Some have 4 memory slots, some only 2. They come with 1, 2, 4 Ethernet ports. Some have SFP ports. Some have SATA ports. The number of SATA ports ranges from 1 to 6. Some come with PCIe slots.
Depending on what your needs are, there is a motherboard for you.
Since this was going to be a NAS, the motherboard I selected had to have 4 SATA ports, an NVMe slot, and SFP+.
Yep, this exists. They don’t exist at the price point I wanted to pay. It finally clicked with me. I can just put an SFP+ PCIe card into the machine.
Thus, I picked a motherboard with 4 SATA, 1 Ethernet, 1 USB3, 1 PCIe slot, enough memory and 2 M.2 slots.
Some NAS enclosures do not have the opening for a PCI slot, so it was important to pick a case that had the card opening.
When I got the enclosure I was impressed.
It is a sturdy, thick steel case. There is no plastic on the entire thing. There are for hot swap disk bays plus mounting space for 2 2.5″ drives. Exactly what I was looking for.
When I went to install the motherboard, I was shocked to find that the CPU cooler didn’t fit. I ordered a low profile. I’m impressed with that as well.
I get the board mounted. It looks nice. I go to close the case and the cover won’t fit on. The cover has a folded U channel that goes over the bottom rail of the case to lock the case closed.
The problem is that there isn’t enough space between the edge of the motherboard and the bottom rail for the U channel to fit.
My first real use of the right-angle die grinder. I don’t have a cut-off wheel for it, so I just ground the edge away and it worked.
Of course, I gave myself a frost burn because I was too busy to put gloves on to handle the die grinder.
Back to the worktable, the cover now goes on. I plug a wireless USB dongle into the USB 3.0 and boot. Nothing.
It took me a couple of days before I figured it out. The case came with no documentation. The front panel connector has both a USB 3 plug and a USB 3 plug. I plugged both in. You are only supposed to plug in one. Fixed.
The installation happens, I’m happy. It is fast enough, it is responsive enough. I just need to get it put in place with the fiber configured.
I take the cover off the back slot. Go to put the PCI card in.
The (many bad words) slot does not line up with the opening in the back of the case.
The open in the back is off by 0.8 inches.
I consider cutting another card opening in the back. That won’t work. The card would be half out of the side of the case.
I ordered the cutoff wheels for the die grinder, I know I’m going to need them.
I decided to cut the back opening wider. This will leave an opening that can be taped closed on the PCI side. It allows me to use the existing slot with retaining hardware. I good idea.
All I need to do is unscrew the standoffs, drill and tap four holes in the right place, and I’m done.
Except… Those standoffs are pressed into place. They don’t unscrew.
No problem. I have a set of standoffs. I’ll just cut the existing standoffs off. Drill and tap holes in the right place and use my standoffs.
Except… My standoffs are the normal length. These standoffs are a custom length. I can’t do that.
Tools to the rescue
First stop, the arbor press. It is a small 2 ton press. I have no problems pushing out the standoffs. The press also removes the bulge from removing the standoffs.
Next step, the milling machine. Using the gage pins, I found the size of the holes is 0.197-0.198. Measuring the standoffs, I get 0.208. I settled on 0.201 for the hole size. I should have gone a 64th smaller.
There is no way to clamp this thing in the vise. I do have strap clamps. The case is quickly put into position.
The first hold is located, then drilled. No issues.
Except I don’t have enough travel to reach the other three holes. I reposition the case on the table and go for it.
I go back to the arbor press to put the standoffs back in. I don’t have enough height to support the case while installing the standoffs.
Back to the mill. Square to ends of a hunk of aluminum. Punch a 3/8in hole in it. Work on the mill vise and get the standoffs put back in place.
In the middle of this, I have an alarm, fearing that I put the standoffs in the wrong place. I do a quick test fit and everything is perfect.
It takes me a good hour to put the case back together with all the case mods done. It looks good. I’m happy with how it came out.
Today is search day. I have to find the 8 meter OM-4 fiber for this NAS, and I have to find the box of screws that came with the case for the hard drives. Once I have those, this can go into production.
I know what to look for on NAS cases. I’ll be building out a few more of these boxes over the coming months. First to replace two boxes which are too old. One for the redundancy.
The world will be good, or I’ll punch it again and again until it is good.
P.S. This is filler, the article about Trump’s win in the D.C. District court was taking to long.
The amount of grief I’ve put up with to get this working buggers imagination.
To have a NTP stratum 1 server, you need to have a certain set of capabilities.
First, you need a stratum 0 device. This is an atomic clock or a GPS receiver.
You need a method to communicate with the GPS receiver.
Your clock needs to be network connected.
Each of these pieces must be done correctly with the least amount of jitter possible.
Jitter is how much a signal deviates from its target. If the jitter is zero, then we have a level of accuracy that depends solely on our reference clock.
The little GPS unit is self-contained. If it is supplied 3.3V of power, it will search for satellites and do the calculations to know what time it is and where it is.
The calculations turn out to be for someplace along the cable from the antenna to the GPS unit. Some highly accurate versions of the GPS SoC measure the length of the antenna feed and account for that in the calculations. Regardless, it is the time for a place a little offset from the actual GPS chip.
For me, that is a delay of around 10ns.
The GPS will communicate via a serial protocol. This means that we have a delay from when the message is received and when we can put our timestamp on the message. For me, that is around 140ms.
This can be discovered by tracking the time indicated by the serial GPS and the system/local clock. The local clock is synced to multiple remote NTP servers to get this number.
Unfortunately, there is about a 1ms jitter in this signal.
If I were to use a USB converter. I.e., serial to USB, that jitter goes up. I am seeing a jitter of 4 to 9 ms.
Using the serial directly is a good start.
But there is another signal that can help. That is the Pulse Per Second (PPS). We are using a 1second pulse.
IFF we can capture the time at which the pulse arrives, we can get a very accurate start of the second marker.
This requires that the hardware have a general purpose input/output(GPIO) pin available.
Most motherboards do not have exposed GPIO pins. Worse, some boards have GPIO pins, but there is no documentation on how to access them.
So the server board requires GPIO plus a method of accessing those pins.
There are two ways to discover a change of value, we can pole for it, or we can get an interrupt.
Consider you have your phone alerts silenced so you don’t get a noise every time you receive an email or message.
You have to check your phone for new messages. This is “poling”.
If somebody calls, your phone still rings. You then immediately check to see who it is and perhaps answer the phone.
This is an interrupt.
The default operation of a GPIO pin is poling driven. Even if it is generating an interrupt, that interrupt is only used to record the change of value.
What is needed is a high-performance interrupt handler. When an interrupt happens, the handler records the system clock. A user land process watches, either poling or interrupt, it doesn’t matter, for that value to change.
When it changes, the software knows that the GPS “knew” it was the start of the second when it created the pulse.
The amount of jitter is only as much time as it takes for the system to allocate a CPU and for that CPU to process the interrupt. In other words, really, really fast.
Currently, the jitter on my PPS reference clock is 300ns. Because of the many samples that have been taken, the PPS reference clock is currently running 17ns from the real time. That has been going down over the last few hours. By the time you read this, it is likely to be even less.
The PPS clock is so tight that the other clock sources hide the values, even in logarithmic form
This is an interesting graph, to me, as it indicates how the system clock is slowly being conditioned to keep more accurate time. It software currently says that the drift is -17.796271 ppm off which I think translates to 3.324ms
So how bad was this task? More painful than I wanted it to be.
I’m fine with “dumb” computers. I started programming on 6502s. I’ve been bit slinging for 50 years. Programming Arduino’s? No problem.
Building a PC from components, installing any compatible operating system? I do it a dozen times a week when developing.
The Raspberry Pi is a different animal. It isn’t sold as a low-level system. You can use it that way, but that is not how it is intended to be used. It is sold as a System On a Board (SOB) that runs a modern (Linux, Android) operating system.
This is where things get strange. When we are working with modern PCs, they have known hardware. We boot the computer, run the OS, the OS has drivers to talk to the hardware. Everything just works.
This is possible because PC’s have a Basic Input Output System (BIOS). This is a low-level set of routines that are there to allow accessing certain parts of the hardware with a standard Application Protocol Interface (API).
Since every BIOS has the same API, OS vendors can use the BIOS to load enough of their software to continue booting. The hardware is attached in known ways. The hardware vendor supplies the drivers for their hardware. Linux people write their drivers if needed.
So consider that SOB. It has a serial port. The serial port is controlled by a standard UART. That UART is programmed in a standard way. They are all the same.
In order for that UART to work, the software needs to know where the UART is located in memory (or on the I/O bus). In addition, the pins that the UART uses have to be configured for the UART. Most UART’s use standard pins on the GPIO header. The pins that the UART uses can be used in different modes for different things.
The problem comes from that address being different in every SOB or SOC. A board could have one, two, or more GPIO driver chips. It all depends on the designer.
The developers overcome this issue with what is called a “Device Tree”.
The device tree is a parsable description of devices and their locations in memory or on the I/O bus.
The board I purchased doesn’t have a supported modern OS. The only OS that I could get to boot was released in 2016. The OS is not really supported anymore. The board itself was flaky. It would randomly reboot, or just power off.
The “modern” OS that should have worked didn’t even complete the boot.
In discussions with a community support person, we decided that there was hardware that was not being properly initialized in the kernel. I.e., we had a bad Device Tree.
The replacement Banana Pi doesn’t have a supported modern OS. It is fully supported by Arabian, which is a supported, modern OS.
When I first booted the system, it just worked. I was thrilled. It has continued to work properly.
Then I plugged the GPS in. I could see it blinking. This indicates that it has a lock and the PPS signal is being sent.
But I can’t get any input on the serial ports.
It turns out that the default device tree doesn’t activate that UART. Once I figured that out, I had to find an overlay to the device tree to turn on the UART.
That was a pain, but it happened.
Working serial, no PPS.
With the tools on hand, I could monitor the GPIO pin and see the PPS. But it wasn’t doing anything.
I loaded the correct kernel modules, still no PPS.
My Google Foo suggested that the device tree entry for PPS was missing.
Yep, there was no PPS overlay.
The Linux kernel documentation describes the Device Tree. But no real examples, and nothing fully commented.
By comparing multiple sources, I finally was able to create a device tree overlay for PPS. I need to figure out how to return that DTD to the community. The problem is, I don’t know what the hell I did. I made it work. I think I know what was done. Nonetheless, it was truly a case of looking at different device tree overlays and picking out the parts that seemed to match what I needed to do.
I don’t think I’ve had this much difficulty hooking up a piece of hardware since 1983, when I was attempting to attach a DEC 10 MB hard drive to a computer that wasn’t really a DEC.
The only tasks remaining is to put everything in a case and move it to its long-term home, off the top of my computer.