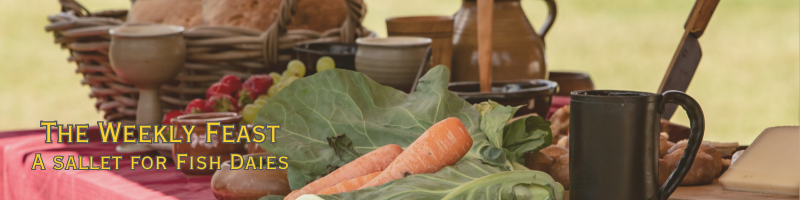
Allyson

The Weekly Feast – Broth

If you’re like me, you currently have a turkey carcass somewhere in your fridge, freezer, or on your (very cold) porch. Thanksgiving was delicious, and you’ve mostly picked that carcass clean. What’s left are the bits no one generally eats (wings maybe, or the bottom of the bird, the backbone, and perhaps the neck and giblets). Don’t throw those away, folks. That right there is Winter Gold.

To make a hearty turkey broth is quite easy. You can do it in a crockpot, a Westinghouse (which is my method), or on your stove top. This can even be done over a fire, on a hearth, or on top of your wood stove, if you like. You simply need a heat source that will bring your liquid to a low simmer, but not a full boil.

Whatever method you’re using, the preparation is exactly the same. First, denude your bird. Pull off ALL the edible meat (yes, even from the legs). Leave behind tendons, bones, gristly bits, and parts no one eats. Store the meat in the fridge for later. Now take your hands, a large knife, or a good pair of kitchen sheers and cut the bird into pieces that will fit into whatever you’re making your broth in. You want all the bones and bits to be submerged, so depending on your size of pot, you may need to chop up the bird fairly small. It’s perfectly okay to put the carcass into your pot then use a large spoon or a wooden mallet to shove and break it until it fits. For our purposes, it does not matter if the bones are broken.

Once the bird is in the pot, you will begin to add your vegetables. If you want to be truly frugal, you should add in all the peelings and skins from Thanksgiving dinner. I didn’t save all mine (though I have in the past), so instead, I’m adding in the following:

  • one whole onion, skin on, quartered
  • one head of garlic, cut in half so all the cloves are halved, skin on
  • 2 bay leaves
  • leftover carrots (carrot tops and skins are fine here, too)
  • celery tops (the leafy bits, rough chopped)
  • whatever herbs you prefer (my garden yielded the last of the sage, thyme, and some parsley)
  • whatever spices you prefer (at least the standards: salt, pepper, garlic)

Add all these to your pot, and then pour in enough water to cover everything, but not to boil over. Bring your broth to a boil, and then put the temperature down to low and let it simmer for several hours.

Read More

Gender Dysphoria

I wanted to share this young man’s post on TikTok with you, because it says a LOT in a small space.


@truscum_tr_nny Trans activists love to fuck EVERYTHING up for transsexuals. Thanks a lot. #Trump2024 #transsexual #Igbtrepublican #republican #conservative #LGBT #transgender #kamala #CapCut ♬ original sound – Nicholas

So… long story short, Trump is going to stop public taxpayer money (ie Medicare/Medicaid) from paying for transition surgeries. The kid isn’t the least bit upset about that. No, he’s upset over the fact that when gender dysphoria was considered a mental disorder, it was treated as one. That means that necessary care, through a doctor who’d gone to the trouble of having you tested six ways to Sunday, was covered. Just like being diabetic was covered. Or being clinically depressed was covered. Now that “being trans” is a social movement and they’ve removed it as a mental disorder, it’s not covered.

Now… I’m going to say something that would make the Left clutch its pearls, but y’all might just agree. I believe that gender dysphoria should be reinstated as a mental disorder. So should a few other things, but that’s another post. And then we, and by we I mean We The People, should get off our fucking high horses and stop making mental disorders so shameful for people.

I have mental disorders. I have Generalized Anxiety Disorder. If you met me, you probably would never know. It’s an invisible disorder, and I’m lucky that it’s well controlled  by medication. I don’t hide that I have it, and I often share with others who suffer from anxiety who feel alone or scared. Too many people want to demonize those who have mental disorders, and frankly, it irritates the fuck out of me. Here’s the thing… your body might not produce insulin, so you have to get it in a bottle. My brain over-produces certain chemicals, and I need meds to make it stop. It’s not a shameful thing. It’s just a thing.

Read More

The Weekly Feast – Side Dishes

Last week it was turkey. This week, I’m sharing my favorite side dishes that I use in a perfect Thanksgiving Feast!

Mashies

Mashed potatoes are a definite requirement at any Thanksgiving feast. The easiest way to make delicious mashed potatoes is to cut them into about inch square cubes, and boil them until they’re soft but not yet falling apart. Mash with whatever masher you have on hand, adding in a minimum of a tablespoon of butter per potato in the mix and drizzling in milk or cream (or in my case, oatmilk) as needed to bring them to the right consistency for you. I like my potatoes a little lumpy, but everyone else likes them creamy, so I tend to whip them very fine. Serve them with a slight well in the top, filled with a pad of butter and a sprinkle of salt and pepper. They don’t need anything else!

Bread Stuffing

Stuffing is a constant battle in my household. We have several recipes we like, but I’m going to share my Hungarian grandmother’s recipe, because it’s my favorite. This was named “Song Stuffing” by one of my kids, because it contains parsley, sage, rosemary, and thyme… but we adults call it “Heart Attack Stuffing” because of all the yummy fatty goodness inside it. It’s also a great way to get liver into your kids, because they’ll never know it’s there until they’ve fallen in love with it. It’s how my Nagymama got me to eat liver!

Read More

Prepping – Thriving, not Surviving

There’s a difference between thriving and surviving. I notice a trend among those who call themselves preppers. There are two sorts: those who are prepared to simply go on living, and those who prepare to survive the apocalypse. The first sort have plans for growing food, hunting, trapping, collecting water, providing continuing light, creating electricity in small amounts, and a lot more. The second sort treat it like it’s a weekend warrior camp where they get to play commando.

I am among the first group. I hone my skills so that I can thrive, rather than survive. Yes, survival is important in the early days of any disaster. You have to make it through the mud slides or tornado or tsunami or whatever it is that went boom. The bottom line is, surviving is the easy part. Either you survive, or you don’t, and the answer to that question is going to come up pretty quickly. No matter how much you prep, there’s always going to be some kind of emergency that you didn’t think of that could wipe you out. Thriving, though… or, as I like to call it, “living,” is what it’s all about.

After whatever immediate circumstances mess up our civilization (because let’s be serious, the Earth, our world, is going to go right on spinning in space… unless the emergency has to do with Vogon Constructor Fleets, but that’s another matter entirely), we’re going to want to focus on getting things built into some kind of new normal. I’m one of the type of folks who hope the new normal isn’t like the old normal. I’d like to see less government, and more growing of food. But that’s me.

How do you prepare to thrive? Well, you get your life together in such a way that a disaster is only a momentary blip. I’ve chosen to do this by studying how medieval and early Colonial people survived in some of the most terrifying circumstances they’d ever encountered. I don’t need to re-invent the wheel, after all. I can see clearly how they did it. And then I practice those skills, over and over again.

Read More

How It’s Supposed to Work

@notmelissavitelliKeep melting down

♬ original sound – MelissaVitelli

This couple is part of the reason I found the LGB community on the Right. The lady in the back is the Trump person, and the one talking in front is her wife. Her wife did not vote for Trump. Her wife, however, is not an idiot.

The reason I’m posting this because this is how it’s supposed to work. You can vote differently, think differently, even have different values (to a point), and still be loving partners. For a very long time, I did not back anything Right… and my partner still loved me. I still loved him. Now I have one partner who’s very Right, and one who’s moderately Left, and I love them both. It helps me hear outside my echo chamber, among other things, and it also makes it very clear to me that we often have the same goal but with different ideas on how to achieve them.

Those who’ve chosen to end relationships over Trump winning are also choosing to enact the stupid Handmaid’s Tale stuff. They’re feeding right into it. They are training themselves to REact rather than to act. I find it difficult to watch. I also find it rather disgusting to watch women cut off their hair or say they’re going to purposefully gain weight “to be unattractive to men.” Excuse me, but there are women out there who have lost their hair because of disease, who have no choice of the matter, and they are still beautiful. There are women who are fat and they are beautiful. I’m fat, and I’m beautiful. 🙂 Those women who are doing the 4B movement are just douches. It’s horrendous, and so against every single thing the Left purports to be for.


The Weekly Feast – Turkey!

It’s that time of year. Most of us enjoy a turkey over the Thanksgiving holiday weekend. My family tends to do the “friendsgiving” thing on Saturday, but we also have a small gathering on Thursday afternoon. Turkey is ubiquitous. It’s also a bear to cook, if you ask many chefs. I’ve never understood that. My turkey always turns out moist, delicious, falling off the bone, and perfect. Maybe I’m just special? Never mind, I’m going to share my turkey secrets with you, so that you can also have a perfect turkey this Thanksgiving!

Ingredients:

  • one turkey, 15-22 lbs
  • stuffing of choice
  • Bell’s seasoning
  • bacon or butter
  • fresh herbs (parsley, sage, rosemary, and thyme are popular)

I prefer to make my turkey in a Westinghouse, because it frees up my oven for pies and other sides. The cooking method is exactly the same, though, no matter what container you use.

To prepare your turkey, make sure that all the giblets are out of it. Check the main cavity, but also the space around the neck. Sometimes, butchers like to hide little gifts in there, and it’s unpleasant to realize that half way through the cooking process, when the plastic they’re wrapped in begins to melt. I like to rinse my turkey, inside and out, but that’s a personal choice. If you do rinse it, make sure that your sink area is clear of all items that might be besmirched, and do a bleach wipe afterward. Turkeys (and chickens) can carry salmonella and other stuff, and even a little of it lingering on a countertop is bad. Use a lint free towel to dry off the exterior of your turkey. Salt the inside of your turkey well by taking a handful of salt and rubbing it on all the interior surfaces. This isn’t meant to be caking it on. Think of it as like a dry rub for steaks.

Add your stuffing. My family uses a variety of recipes depending on the year. We have a wild rice and sausage meat stuffing, and a more traditional bread and liver stuffing (nicknamed “heart attack stuffing” because of the “one egg per pound of turkey” rule used in it). If you don’t feel like making a stuffing, add the heel of a loaf of bread and one quartered onion to your turkey’s cavity. You can also add an apple or orange, if you like. Do not leave the cavity empty, as it changes how the turkey cooks. If you are in a rush, feel free to make up some “stove top stuffing” and jam it up inside there. I’m not going to judge you. Put your raw, stuffed turkey into the roaster pan or Westinghouse and tie the legs together with the tail tucked up in between them. Tuck the wings down into the bird’s underarms as best you can. Don’t panic if it doesn’t work; if the wings are a bit crispy at the end, they’ll be perfect for making turkey broth the day after Thanksgiving.

Using your hands, loosen the skin over the breasts of the turkey. There are several ways you can proceed here. My personal method is to stuff part of my bread stuffing up into the breast area, where it will keep the breast meat moist and help it cook. However, if you’re not using a bread stuffing, you can instead rub the breast meat UNDER the skin with either bacon or butter. Leave little bits of it under the skin. Slide your fresh herbs up under the skin, too, if you like. I almost always slide in a sprig of rosemary and a few leaves of sage from my garden. These will flavor the breast meat, especially as that bacon or butter melts into it.

Sprinkle the outer skin of your turkey with Bell’s seasoning and a bit of salt, pepper, and paprika (REAL paprika, not the red sawdust that passes for “paprika” in most stores). The skin should be evenly speckled with the seasoning, not covered entirely. Make sure to get some of that on the wings and legs, as well as the breast. Cover the turkey with a lid or tin foil, and put it into the cold oven or Westinghouse.

Bring your oven or cooker to 450F. Add a bit of olive oil or bacon fat to the bottom of your turkey roaster or Westinghouse pan, to help keep your turkey from sticking. If you want it to be really rich, you can melt a stick of butter in there, but beware that it may smoke due to the high temperature. Once the oven is to temperature, let it sizzle for 15 minutes, no more. Turn the heat down to 300F, and walk away.

You will not look at your turkey again until an hour before you think it’ll be ready. I mean, you can peek now and again, but you don’t need to baste or anything else. I will sometimes suck the fat out of the bottom of the roaster, if I think it’s getting too much, but that’s an individual thing.

Turkey cooks for about 20 minutes per pound of turkey, when stuffed. That means if your turkey is 21 lbs, like mine, it’ll take about 7 hours (yes, SEVEN) to cook (20 minutes per pound, that’s 3 pounds per hour, divided into 21 lbs, which gives you an answer of 7). When you get to the bigger end of turkeys (over 18 lbs), the timing gets wiggly. I might only have my turkey in for six hours, so I have to watch it during the last couple of hours to make sure it isn’t overcooked. For anything under 18 lbs, though, you’re safe to count 20 minutes per pound of turkey. Always start checking on it an hour before you think it’ll be ready, though.

Having a meat thermometer on hand is really handy. I use mine all the time. Turkey must be between 160 and 165F internally to be properly cooked. Turkey also continues to cook and rise in temperature for a full 20 minutes after it comes out of the oven. I always aim for 160F, knowing it’ll go up more as it rests before I slice it up.

If you don’t have a meat thermometer, or don’t care to use one, you can also do the “leg wiggle” method of testing. As you near the end of your estimated cooking time, wiggle one of the legs gently. You may need to pierce the skin if there’s a lot of liquid inside, which is fine. Your turkey leg should be very loose, almost coming off, when it’s ready. If your turkey leg comes off in your hand when you go to wiggle it, it’s definitely ready. Don’t panic if it does… this method of cooking will result in it not being dry even if you’re a little over in your cooking time.

Turkey MUST rest for a minimum of 15 minutes before you cut into it. Take it out of the oven, and out of the roaster. Place it on a large cutting board. I usually place a handful of towels I don’t much care about underneath the board, because the juices will run when you start cutting, and it’s easier to clean up if it’s all just drained into a towel. The resting time allows much of the liquid to be reabsorbed into the turkey meat itself, making it taste incredibly moist and delicious. It also lets it finish cooking. While you’re waiting, make some gravy with the pan drippings!

Don’t forget to take your stuffing out before you carve the turkey. You can do that at the 15 minute mark, if you like.

I usually cut the turkey up onto two platters: one dark, and one light meat. The breast is the most difficult part to cut up, in my opinion. It’s always at an odd angle. Take a few pictures of the turkey before you start cutting it up, and then carefully (using silicon heat pads if necessary) remove the two breasts and put them flat on the cutting board. It should be fairly easy, by cutting along the breast bone and then just gently pulling downward. Once on the cutting board, your turkey breast meat will slice up quickly and neatly. After that, you can pull off the legs, thighs, wings, and whatever dark meat you can get at. I can’t stress how useful silicon gloves are, because you can clean them in a way that fabric ones can’t be, which means you can grasp the various parts of the turkey more easily.

I know it seems like a lot of work. It really isn’t. Most of my turkey time is spent doing all the other assorted foods that go along with turkey. We usually eat around 5pm or so, which means I’m not getting up at the crack of dawn to try and do a gyn exam on my turkey before I’ve had coffee. I can get up at a reasonable hour, and set it all in motion by 10am. Once you’ve done this a time or two, it’ll become second nature. It’s such an easy way to prep the turkey.

A few notes:

  • Don’t pre-stuff your turkey the night before. You can make the stuffing ahead of time and have it ready to go, but letting it sit overnight inside the turkey will be a sure way of getting everyone to the ER in record time. Don’t do it.
  • Do invest in silicone gloves, a decent carving knife (NOT an electric knife), and the Bell’s seasoning.
  • If you use bread stuffing, REALLY stuff it in there. Cram it in. Every chef I’ve watched on television goes on and on about how you should never over stuff your turkey For Reasons. Ignore them. They’re wrong. Over stuffing your turkey will result in the turkey disjointing itself during the roasting process. This makes carving it up later SO much easier. There’s something special about opening the turkey roaster and just looking at your disjointed turkey, held together only by skin.
  • Ignore those stupid pop up timer things that come in some of the turkeys. They often don’t work, and sometimes they pop early. Just pull them out and toss them.
  • Remember to defrost your turkey, folks. None of this will work with a frozen turkey. Don’t try and cook a turkey from frozen, please. Even if you get one that says it CAN be cooked from frozen, just don’t. Whole turkeys should be slow roasted to preserve the moistness and flavor. Here’s a link to a handy defrosting schedule.

Prepping – The Art of Saying No

So there’s an emergency. The power is out, and your neighbor comes by to borrow a candle. It’s no big deal, you lend them one of your hurricane lanterns, so they can have light and be safe. You don’t even think twice about it. When it’s a short-term emergency, this is a standard response, and it’s very reasonable. When there is a better-than-coin-toss likelihood of replenishing your stash of any given item in the near future (“near” being defined however you like), lending or gifting is not a big deal.

If we’re dealing with a big emergency, though, this may not be the case. Suddenly, giving something to your friend or neighbor seems a lot less reasonable. You have to weigh the possibility that you may not be able to get more of whatever it is you’re lending, before you run out yourself.

It’s not easy to say no. It’s a skill, and it’s one you have to practice, as with all other skills. Unlike most of the other prepping skills, it comes with an emotional cost that far surpasses its use.

Consider this scenario: It’s the apocalypse, however you see that. You’re fairly well situated, and have “enough” of stuff that you’re not hurting. But you’re budgeting every calorie, and watching the weather to know what to do next. Your neighbor comes by and asks to “borrow” a candle. They have kids, and those kids are afraid of the dark, and she knows you have extras… Suddenly, it’s not so easy to say no. Note the kids, because that’s the gotcha that many people will inveigle into the conversation if they think it’ll get you to part with your goods.

It’s easy to say that they ought to have prepared in advance, like you did. And it’s true, the parents should have prepared. The kids, though, are not responsible for their parents’ stupidity or lack of forethought. So what do you do? You still say no.

Read More

Trying to Understand the Differences

It’s been a heck of a few weeks, but things seem to finally be slowing down slightly. I am behind in postings, and hella busy, so if I miss one or two, I apologize. It’s National Novel Writing Month, and I’m writing a new cookbook. I hope to have the first draft complete by Dec 1st. That eats a lot of time, because it requires me to do a LOT of writing each day, but it’s very productive.

I got talking with friends about the differences between the Left and the Right. The biggest one that I see is the concept of morals. These are, of course, very sweeping generalities. Take what you will from them.

The Right has a very strict sense of morality, and while there are people under the Big Tent with different beliefs, generally speaking the vast majority hold incredibly similar morals. You can be a straight laced, white Christian and be Republican. You can be as gay as they come, pagan, and be Republican. But if you think it’s okay to punch people because of their beliefs, you can’t really be Republican. The opposite is true of the Left. On the Left, if you aren’t clad in rainbows and supportive of whatever the victim-de-jour requires, you can’t be Democrat. On the other hand, you can have wildly different moral codes, and in fact have moral codes that change depending on the moment.

The Right likes to talk about how intolerant the Left is, and the Left makes all sorts of claims about intolerance on the Right. Trump’s election win has the Left trotting out Karl Popper’s essay on intolerance, of course. Let me share:

“Less well known is the paradox of tolerance: Unlimited tolerance must lead to the disappearance of tolerance. If we extend unlimited tolerance even to those who are intolerant, if we are not prepared to defend a tolerant society against the onslaught of the intolerant, then the tolerant will be destroyed, and tolerance with them. — In this formulation, I do not imply, for instance, that we should always suppress the utterance of intolerant philosophies; as long as we can counter them by rational argument and keep them in check by public opinion, suppression would certainly be unwise. But we should claim the right to suppress them if necessary even by force; for it may easily turn out that they are not prepared to meet us on the level of rational argument, but begin by denouncing all argument; they may forbid their followers to listen to rational argument, because it is deceptive, and teach them to answer arguments by the use of their fists or pistols. We should therefore claim, in the name of tolerance, the right not to tolerate the intolerant. We should claim that any movement preaching intolerance places itself outside the law, and we should consider incitement to intolerance and persecution as criminal, in the same way as we should consider incitement to murder, or to kidnapping, or to the revival of the slave trade, as criminal.” — Karl Popper, The Open Societies and Its Enemies

Read More

The Weekly Feast – Chicken with Creamed Corn

I’m not a huge creamed corn fan, but wow, this was delicious! It was a bright, sunny looking meal on a miserable, chill evening. The sweetness of the corn complimented the savory chicken, and the entire dish came together in under an hour. I hope you enjoy!

Ingredients:

  • 2 lbs chicken breasts, cut into strips
  • 1 tsp onion powder
  • 1/2 tsp garlic powder
  • 2 cans of corn (15 oz each) strained
  • 1-1/2 cups milk
  • 3 tbsp olive oil
  • 1 large onion, diced
  • 4 cloves of garlic, minced
  • 1 tsp of dry oregano
  • 2 sprigs of fresh thyme
  • 1 pinch of red pepper flakes (optional)
  • 2 tbsp butter
  • 1/3 cup Parmesan cheese, freshly grated
  • salt and pepper to taste
  • fresh cilantro for garnish (optional)

On a plate or platter, lay out the chicken strips. Drizzle them with a tablespoon of olive oil, and season with salt and pepper, onion powder, and garlic powder. Set the chicken to the side.

Add the first can of drained corn into your blender or food processor and add in the milk. Blend until this is smooth, then set it aside.

In a large sauce pan, heat the remaining olive oil over a medium high heat. Add in the chicken strips and sear until they are golden brown. Don’t rush this! You  may need to do it in stages, depending on the size and depth of your pan. Don’t crowd the pan; it’s better to do several batches than to try and shove them all in at the same time. When the strips are seared, remove them and rest them on a plate.

In the pan you just removed the chicken from, add in the onion and saute until it’s soft and translucent. Add in the minced garlic, and saute until it is fragrant, about a minute. Add in the pinch of red pepper flakes (if desired), oregano, and thyme. Stir to combine.

Pour the corn and the corn and milk mixture into the pan over the onions and herbs. Stir well, and then simmer until it begins to thicken. Season it with salt and pepper, to taste.

Remove the sprigs of thyme, and add in the butter and cheese. Fold it in gently, and let it simmer for another few minutes until it’s all incorporated. Return the chicken and the juices to the pan, cover, and let it simmer for another few minutes until the chicken is cooked through and the sauce is thick and gravy-like.

Notes:

I didn’t use fresh thyme. Instead, I used a teaspoon of dried thyme. It worked fine! I used oat milk, because I can’t do dairy, but regular milk would be great. I used plant based “butter,” and I added the cheese at the very end, so I could have mine (with plant based “cheese”) separate from everyone else’s (with real cheese). That worked out relatively well, to be honest. I served it up with some pasta, but it would have gone equally well with rice or mashed potatoes.

It does need a vegetable, as corn really doesn’t pause much on its way through you. I went with carrots, because it was such a bright yellow that I thought it needed some orange in there. I boiled them, then sauteed them in olive oil and garlic, and served them on the side.

Prepping – Let There Be Light

Light is a topic that’s come up a few times in my prepper discussions, and so I thought it deserved its own article. Light is defined as “…something that makes vision possible.” (Merriam Webster) We call the light part of our day, aptly enough, daytime. We can see to study, to teach, to learn, and to do. For hundreds and thousands of years, light has been of immense importance to human beings.

The first light was, of course, the sun. Light happened during the day, and night was when you huddled together and tried not to get eaten. The purposeful use of fire is the second light. Fire allowed us to do things in the dark. It kept predators at bay. It warmed our bodies, our food, and even our souls. Once fire was harnessed, it was more a matter of what method to invent to keep the light on at night, safely and effectively.

Some of the earliest lanterns were Canaanite oil lamps. These were basically pinch pots, or rather, a shallow bowl with a pinched spout at one end for holding a wick. These open candles go back farther than our written history. I can say with authority that they do work, too, having both made and used some myself. From a prepping standpoint, open candles can be made out of just about anything. A wick in a bowl works, especially if you can float the wick somehow. Consider an old cork with a hole in it to hold a wick, floating on an oil source.

Fuel oil in early times came from animal fat, or from nut oils. Tallow candles were used as early as 500 BCE, in Rome. They continued to be used until modern paraffin became easily available. Paraffin wax was quickly adopted, because it had almost no smell at all. Candles made from tallow or other animal fats were quite stinky.

Read More