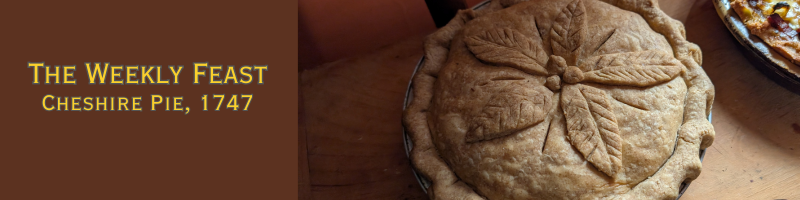
I went to the Fort last weekend and I made an amazing pie. Cheshire Pie is one of the recipes shared by Hannah Glasse in her cookbook The Art of Cookery Made Plain and Easy. The original recipe:
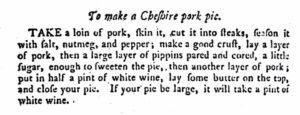
As you can see, it’s fairly sparse with its directions, which is a common theme among recipes prior to the early 1900s. One of the things I do is “redact” or recreate recipes from earlier times. I do this using my own skills as a cook, and it pleases me to no end when I find a great combination. This is one of those times, though I can’t take the credit. I went to the class to learn how to make a good pie crust (and succeeded: that’s my actual pie in the header image), and learned the recipe along the way.
For the pastry, I don’t have an exact recipe. I was taught to measure by feel, because your crust turns out much nicer. As this was my first successful crust, I have to say I agree it works. 😉 Basically, you can either purchase a pie shell (you’ll need a top and bottom), or you can use your own recipe. Or you can try this one, which I’ll describe as best I can.
First, take about 3 cups of good flour. We used a mix of all purpose, white, and bread flour (and no, I didn’t get ratios, so I’ll have to try it on my own), and put it into a large bowl. A pinch of baking powder was added in, and then we added “a bit” of Crisco vegetable shortening (you can also use butter or lard, but I’ve never had success with either and had GREAT success with Crisco, so I’m sticking to it), about a cup or so. Just plop it into the flour. Then, slowly use your fingers to rub the flour and fat together. You don’t want to handle the fat too much or it will melt, so you kind of scoop up a handful of shortening and flour and then rub gently but briskly between your thumb and across all your other fingers. It helps if you keep your elbows tight to your body while doing this. You continue doing this until all the fat is mixed in evenly to the flour. It will start to make little “peas” or look like coarse cornmeal. Add a bit more Crisco and keep doing it until the bits of dough are about pea sized. It took me about 20 minutes to do this by hand. At home, I think I’ll use my pastry cutter to do the early part, and just switch to hand mixing at the very end, which should cut the time down quite a bit. Two knives may also work, but I’d say that handling it at the end is important.

To the flour and fat mixture, we drizzled in water. I would say it ended up being about a quarter of a cup, but we added it a tablespoon or so at a time until the dough “came together” and became firm and … well, pastry-like. During all this, you’re trying to keep your handling of the dough fairly minimal. Once the dough is a solid mass, you split it into two fairly evenly sized pieces, then pick one up and gently press it between two hands to make it a sort of puck shape, about the size of a bagel. Hold the edge of the puck with one hand, letting the heat of your hand warm and “seal” the edges of the dough, while the other hand turns it around so you touch each section of the edge of the puck.
The puck goes onto a well floured couche (a floured cloth that’s low-lint). My teacher has a white sock that is also well floured that she puts over her flat rolling pin (meaning it doesn’t have handles that turn… it’s just a long stick), and that is used to roll out the dough carefully. You don’t want to press too hard because it’ll crack the edges, and you want those edges nice and solid. Continue to turn the dough and roll it out, until it’s about a quarter of an inch thick and large enough to cover the entire bottom of your pie pan. Using the couche to lift the edge of the dough, flip one side of it over the rolling pin and then use that to transfer the dough to your pie pan. Press it into place, firmly but gently, and cut off any excess (from OUTSIDE the pie plate, cutting from underneath the lip of the pan).
Repeat the entire thing to make your top pie crust, and let that sit until you have it all filled. When the innards are inside, moisten the lip of the bottom crust and then gently lay the top crust over it. With a finger, carefully lift the edge of the top crust and moisten it as well, then press the edges together. You can use fingers, a fork, or whatever you like. Make sure the edges are well connected all the way around the pie. You can use any leftover bits of dough to make decorations (like my leaves and berries).
For the filling:
- 1 pork loin, about one pound
- Salt, to taste
- Ground black pepper, to taste
- Freshly grated nutmeg
- 8 medium apples, any variety
- ½ cup sugar (or to taste)
- ½ stick (2 ounces) butter
- ½ cup white wine
With a very sharp knife, slice the pork loin thinly (about a quarter of an inch thick, or less if you can). Salt and pepper it. In a large flat pan, add a bit of butter or margarine, and then fry each of the pieces of pork until they are brown on both sides and cooked through. This doesn’t take long at all, maybe about five minutes. You can’t crowd the pan, however, so you will need to do it in batches. While the pork is cooking, cut your apples in half the long way, then peel and core them. We used a melon baller to core our apples, and it worked quite well. Lay each half apple on your cutting board, with the top (where the stem was) by your knife. Cut lovely half moon shapes of apple. These can be lightly sugared, or left as-is.
After the last of the pork is done, add a half cup of good white wine to the pan and deglaze it with a wooden spoon. Reserve the wine from the pan for later use.
Add the ingredients to the pie: first a layer of pork slices, then apples, then more pork, etc. until the pie is full and/or you run out of ingredients. In a small bowl, mix together a quarter cup or so of flour, a quarter cup of the sugar, and some nutmeg, salt, and pepper. Go heavy on the nutmeg, as it makes for a lovely flavor, about a quarter of a nut fresh grated. Sprinkle this mixture over the top of the pie ingredients, and then pour the reserved wine from earlier over as well. Dot the top with bits of butter or margarine, then add the top of the pie as described above.
Once your decorations, if any, are on the pie, you need to cut vent holes. I cut five holes into mine, slits between each leaf. You can be as decorative or utilitarian as you like. Heat oven to 350ºF and put the pie in. Bake for 55-60 minutes, or until the pastry is golden and the apples are soft enough to pierce easily with a knife.
Serve while it’s still warm, though allow it to sit for at least 15 minutes before serving (this both lets it cool enough not to burn people’s mouths, and allows the juices to mingle).
That’s a quite handsome pie. I make many meat pies but seldom sweetened fruit and meat pies, I’ll keep this in mind for when we get apples in season around here…
I do a lot of pies, of varying type, because of my historical reenactment. Pies were all the rage in the 15th and 18th centuries. 😉 But I’ve always sucked at pie crust, so this was a big deal for me. I’m really pleased with how it turned out. I’ll be trying it out at home in the very near future.