Woodworking

Collection of antique woodworking tools in a wooden chest.    Lots of texture and warmth with a vintage subject and look.

A Simple Box

Last week’s project was to make a shooting board.

I had all the stock prepared and had started assembling it when I realized that the screws were too long. They poked out into the part my plane slides down.

This is not good. The project is on hold until I receive more screws.

A Joiner’s Box

This is a simple box to hold my tools. It is about 38″ wide, 15″ deep, and 13″ tall. I think. The design calls for a simple till, an internal box for small parts. I think I will do the more period-correct and have two sliding trays the length of the box.

I brought in my first glued-up panel for my wife to fuss over and tell me nice things. Ego stroking for sure.

She came clean and told me that it was just a board to her, not really worthy of praise.

This led me to think about that simple panel.

To get to the point where I could make that panel, I needed to build my workbench. This was a big build; it is done.

I needed work holding for the bench. I installed a leg vise and drilled holes for hold-downs. I made a batten to hold boards in place as they are planed. This was more than a bit of work.

The first step of making a panel is to be able to cut it to size. My skills at handsawing have gotten good enough that this is no longer an issue for right-angle cuts. It is fast enough that I’m not interested in using a power tool.

Next, the stock needs to be planed smooth and flat. My smoothing plane made short work of the smoothing, and my jack plane got the boards flat. I was able to quickly check for twist and flatness with my winding sticks and a straight edge.

The first board I attempted to smooth and flatten took me hours, and I did a poor job. Today it went quickly, with low effort.

That is because I’ve spent far too many hours sharpening plane irons and chisels. My slow-speed grinder now puts a 26-27° bevel on an iron or chisel; the three stones then bring that to 25°, and the strop polishes the bevel to a mirror-like finish. It is to the point where I only need to use the fine, extra-fine, and strop to bring an edge back to razor sharpness.

You can hear and feel when the blade is sharp. If I would only put the time into sharpening the irons of all the planes every day before starting, my life would actually be better and easier.

Even with a sharp iron, you need to know how to adjust the plane. Before I started this journey, I didn’t know how to do that. My planes fought me constantly. Now they are a pleasure to use.

Besides knowing how to tune, sharpen, and adjust your planes, you need to know how to use them. It is to the point where the process of smoothing and flattening a piece of stock is easy. I start with the #4, make it smooth, and move to the #5 Jack plane for the flat. Using the Jack plane at an angle to present a shearing action also makes the boards flat from side to side.

It only takes 5 to 10 minutes to make a board smooth and flat.

The next part of stock prep is to square an edge. Again I start with the #4, knock down the high spots until I have a smooth edge from end to end, and then I switch to the #5 again.

Checking for squareness is easy but humbling. Except that more and more often the edge is square after the Jack plane.

I’ve been playing with the Jointer plane. It is a huge, heavy, and long plane. The iron is wide enough to cover 2+ inches of wood in a single pass.

For my first panel, I clamped the finished faces together with the squared edges aligned with each other. Less than 4 minutes in the vise with the Jack and Jointer, and the edges are jointed.

The glue-up went very smoothly. There was a very thin bead of glue that came out of the glueline, as wanted. The final product is pretty darn good for my first glue-up in many years.

After the glue had dried for a few hours, I took the clamps off and gave it the once-over. It is not flat enough to plane the finished surface, so I worked on the back surface.

I think that this will be the last panel that I glue up that is full thickness. From now on, I’ll either rough plane the back surface or feed it through the (cheating) bandsaw to take 3/16 off the back face to reduce the amount of chips I make.

So that very unimpressive 12×13 panel represents an entire series of new skills. I’m looking forward to doing still more.

Close up of Wooden Antique Workshop Table and Tools for Woodwork. Creative Space for Fine Art Creator and Sculptor, Witnessing Talent and Inspiration. Old Traditional Wood Carving Tools

A Tool Made

It isn’t perfect, but it is better than it was.

Tools To Make Tools

I finished my tool toot Friday. Yesterday I started work on another tool, a shooting board.

The tools I’ve made so far:

  • Workbench – Functional, needs more bracing
  • Winding Sticks – Used to visualize twist in a board
  • Crotch board – A V notch in a flat board used to hold a board on edge for planing.
  • A round-head mallet — used for hitting things
  • A tooltote — to carry tools more easily

The tooltote is an exercise in barely good enough. There are so many mistakes made, and yet it still works. Not only is it functional, but I want to use it.

Once I clear space on the workbench, this will reside at the back of the workbench to organize the tools I need. The front section is large enough to hold a #4 plane, a block plane, and a #5 jack plane. The back section is a bit narrower. It currently holds my chisels. Marking and measuring tools and a rasp.

I will remove the rasp to make the tote more useful for other things, such as a marking knife, try square, and straight edge.

I need more Planes

I will start the search for a ‘fore’ plane in the near future. A ‘fore’ plane is the plane you use before all the others. This plane is used to remove lots of material rapidly. It is used in a way similar to a scrub plane.

I already have my #4 smoothing plane. I’m still tuning it. The bed isn’t flat enough yet which causes the corners to dig in a bit too much. My #5 jack plane needs some work on the iron to finish bringing it back to life. It is a joy to use. My #7 requires much work on the flats of the iron. Mostly because of rust issues.

Part of the care and feeding of these tools is to keep the soles and plates lightly oiled so they don’t stick to the wood. I’m working towards that.

This leads me to “specialty” planes. There are three specialty planes that are required for general work. The first is a router plane. This plane is used for smoothing the bottom of a hand-cut dado or other pockets in the face of a board. Think of mortising a hinge.

I found a mini version; I’m going to make a wooden version of a more normal size.

The next plane needed is something for smoothing shoulders or making rabbets. I might have found a cheap used version. If so, this will be a huge improvement in my game. In the same vein, there are rabbet planes that are designed to cut right to a shoulder.

When I’m next at the Fort at No. 4, I’m going to see if I can borrow one of the molding planes. A simple roundover or a fancier edging tool is what I’m looking for.

Cheating

If I buy a piece of 1×6 pine from the lumberyard, it will be smooth. It won’t be flat. It is likely to have twist. This means that if I’m lucky, after preparing the board I’ll have something around 5/8 thick, not 3/4.

My sawmill is providing me 4/4 rough-sawn lumber that is not smooth, but it is nearly flat and has almost no twist. Because of his quality, after preparing both faces, I will have a board 15/16 thick.

Because my target thickness is 3/4 (12/16), I have to remove nearly 1/4 of the wood. Turning wood into shavings is fun but requires time and effort.

So I cheat. I resaw my boards from 15/16 down to 13/16s. This reduces the handwork greatly.

Before I sharpened my handsaw into a rip saw I used the band saw to rip a board I used in my workbench.

Pre-drilling and countersinks

While it is unlikely that an #8 screw will split soft pine, it is always better to drill a pilot hole. The all-in-one version I’ve tried using isn’t working for me.

The nice thing about the all-in-one drill is that the drill bit is tapered, leading to a hole that is big enough to not grip the screw in one board but small enough to grip the wood on the far side, allowing the screw to pull the two pieces of wood together. The builtin counter sink acts like a depth stop and does leave a counter sink for the screw.

And it does a horrible job. I will be switching to doing this in three steps. First, drill the pilot hole, then drill the clearance hole in the outside board, and finally countersink the outside hole. If I do it this way, I know that all parts will be done correctly. Fewer stripped holes.

Screw Lengths

You’re doing it wrong! Yeah, that’s what I keep hearing in my head.

There are two types of screwed connections in normal woodworking. I.e., ignoring pocket screw construction. You can screw two pieces of wood together face-to-face, or you can screw face-to-edge.

When screwing face-to-face, it looks like the proper length should be the total thickness minus 1/4″. This gives the maximum hold without poking through the other board.

For attaching through a face into end grain, I should be using 2 1/2″ or 3″ screws. I didn’t know.

Nails

Period-correct nails are still available today. I picked up a pound of artsy-fartsy wrought iron rose-head nails to use on the 6-board box. But with what I just learned about screw length, I think I will pick up some two or three inch cut nails.

The only issue I know of when using cut nails is that you have to pre-drill to avoid cracking the boards. But you want the hole to be as small as possible to increase the grip of the nails.

Conclusion

Today I should finish the shooting board. This means I’ll be able to start my first 6-board box soon.

White paper with musical notes closeup background. Music writing concept

Tuesday Tunes

I’ve been building. I figured we had all heard Another One Bites the Dust more than a few times.

Today, I put the vise on the workbench. This is a game changer.

The jaws are 11+ inches wide. The vise can open around 15 inches. It is a parallel jaw vise, meaning that the jaw presses against the apron with the same force from top to bottom.

The shiny metal disk at the left front corner is an aluminum planing stop I turned on the South Bend. The handle for the vise is 1″ hardwood from the local hardware store, but the endcaps I turned myself. And then I found my 1″ bit was in such poor condition that I threw it away after it drilled two holes that drifted.

The board at the bottom of the image, on the ground, between the vise and the bench leg, is a wedge. It keeps the vise jaw parallel. It is the fulcrum point of the vise.

There is one of my homemade mallets on the table. Two crap saws, one good saw, and one OK saw. There is a 50″ straight edge and my clipboard with the plans attached.

The next modifications to the bench are to drill 3/4″ holes for side board support and some 3/4″ holes in the top for different hold-downs. Because this is a softwood top and it is thin, I need to add blocking under whatever boards I drill.

I also need to put the braces on the front and a stop on the chop (the moving part of the vise) to keep it from twisting.

I will soften the edges of the vise jaw at some point, but for today, it is fully functional. I’m happy.

On the other hand, I just messed up my tool tote build. Ally wants the broken one, but I’ll make it all work.

putting glue on a piece of wooden board

Clamps and Glue

If you ask a woodworker if they have enough clamps, the answer is always “no.” You always need at least one more clamp.

I’ve become that woodworker. I don’t have enough clamps. So I make do.

My glue of choice is Titebond III. This has a working set time of 15 minutes, it is an extremely strong adhesive, it is water resistant, and it is “easy” to work with. It comes in sizes ranging from your standard Elmer’s glue bottle to 55-gallon drums.

My local hardware and lumber store only had it in the pint size. I’ll be ordering more online shortly.

What I learned today is that I have not been using enough glue in my past glue ups.

Yesterday I went through almost half that bottle with an 11×48 three-board lamination. And I didn’t use enough.

The first board didn’t get enough glue, but I think it will be fine for what it is. The problem I ran into was spreading the glue. I had quickly made a spreading stick, but it just wasn’t working. I switched to using my finger and got better results, but I almost ran out of time working the first board in the sun.

Even a thin layer of glue is more than you expect.

I also took a page from the machine shop and looked up the specifics on the glue. It requires 100 to 150 PSI to properly work.

For those keeping track, that means we need to be providing over 65,000 lbs of pressure for proper use. A good clamp will provide 2000 lbs of pressure. This means that I should have been using 30 clamps on that one glue up.

I hate mathing.

Have a fantastic day; music tomorrow and SCOTUS on Wednesday.

Making A Tool Tote

I became lazy, and it cost me a little. There are two braces that are not yet attached to the bench. I knocked one off today. Which tells me I have to do this correctly.

The bench is currently in front of the garage/shop. At the end of every day working, I pick up all the tools and move them into the shop, someplace. It is very disorganized. I then put a heavy-duty tarp over the bench and call it a night.

A few nights ago, I left a couple of tools under the tarp. The rains came. No issues. The wind got me worried. When I got out to the bench, the tarp had been partially blown off the workbench, and the tools were soaked.

I spent the next 30 minutes drying, cleaning, and oiling the tools. I seem to have saved them.

The next day was hotter; I worked to the point where I could not move. Seriously, trying to stumble into the shade wasn’t working. Luckily my lady came to my rescue with water. She then helped me move my tools the 10 feet from the workbench into the shop.

This created a need for a way to transport and store tools.

The first step is the tool tote. Mine is a simplified version of the one shown.

I could have gone to the local lumber yard and spent $75 to get some pine of some unknown quality. The plans call for true sizes of 3/4 x 5 1/2″ and 3/4 x 6″. The 5 1/2″ isn’t really an issue; that is a 1 by 6. The 6-inch board requires cutting down a 1 by 8.

The Sawmill

I intend to cut my own lumber soon. It is currently on the back burner. I have the tools; I just require the will and the time.

There are about a dozen sawmills within a 75-mile radius. The first half dozen I contacted were all big operations. One “local” mill answered the call in Maine. They have a local number; you just can’t get it easily. Another only dealt with softwood. Two were custom saw work only. They either bring their mill to your woodlot lot, or you take your wood to them and they saw it to your specifications.

I ended up going south into Morador to visit the closest mill. It was worth it.

The mill is a small, family-run operation. They have a kiln for drying wood as well as airdried wood.

I intended to get some hardwood for tools and some softwood for projects. This was some cherry and hard maple at $6 per board foot. I wanted a piece of dark walnut at $12 per board foot. Finally, I wanted some pine for projects.

Not only did he have all the lumber I wanted, he had it in the sizes I wanted and rough sawn. This means straight off the mill, no other processing.

He was generous in his measurements. There were boards that I got at 1/2 price because there was a flaw in the lumber. The flaw would not bother me, but he still gave me a great deal. The 2 bdf of black walnut was just given to me. It is two inches thick and about 10 inches per side.

This wood is absolutely beautiful.

A board foot is a volume of wood. It is 144 cubic inches, or 1/12 of a cubic foot, or 1 ft by 1 ft by 1 inch.

When I got home, I cut a 19″ piece off the narrower board and planed it smooth and flat. It was then edged which gave me a good face and a squared edge.

From there the other edge was squared. Finally the board was ripped to width, and the rough edge was smoothed and squared again.

This allowed me to face the other side and bring the piece to thickness. Starting with a 1 inch-thick piece of rough-sawn lumber, I ended up with a 3/4 S4S piece of wood.

What was under the rough surface is beautiful.

Yesterday, I surfaced the piece of dark walnut. With no oil or finish on it, just planed flat, it is one of the nicest pieces of lumber I’ve ever seen.

Knowledge is not Skill

There is a process in machining that is bringing a piece to size. This is the process of making all the faces flat and square to each other. Each of 6 faces must be properly milled to have a piece ready.

Woodworking requires the same operation, but the tools are much simpler which requires the layouts to be much better.

With this first piece, I did not notice that the edges were not parallel to each other. They were smooth and flat and square to the finished face. They were not parallel.

The process is different from machining. When you are machining, you only need one reference face to start the process.

For woodworking, you first smooth a face. This does not make the board flat; it just means that it is smooth. This is a 5-minute process for me at this point. Smooth means that within a local area, the board is flat. The size of that area depends on the tools used to smooth it.

Next, the board needs to be made flat. This is done with a straight edge. By moving a straight edge down the face, you can check for space under the straight edge, indicating where the board is low. You plane off the high spots until you have a piece of lumber that is smooth and flat.

After flattening the surface, you now need to test for twist and then remove the twist. Twist is called “winding,” and you use a pair of self-balancing straight edges at opposite ends of the board. You can sight over the closer stick and easily see if the board is twisted. If it is, you can plan out the twist.

Next, you smooth and flatten an edge, making it square to the board. The squareness of the edge to the face is measured with a try square or any other precision right-angle square. This is a skill I am still working on. The near edge is always to high.

This is where I made a mistake. I wasn’t paying enough attention and ripped the board over wide and then brought the edge back to square after the rip. I didn’t make a guide mark for parallel.

I also didn’t get the board flat enough.

Yesterday, I finished the backboard and the two sideboards. Today, I’ll be attaching them to make the first part of the assembly.

Sharper, Sharper

Friday I thought I had a sharp plane blade. It was able to remove 1/4 inch from the faces of the end boards.

Yesterday I learned that my plane was not sharp. I spent a good hour sharpening plane blades. I’ll spend still more time today.

The difference is really incredible. What was an upper body workout becomes light work. Plus the sound of the wood being peeled away is beautiful.

What I need to do today is to finish sharpening the jack plane. Currently it is only cutting on the corners. I’ve touched up the blade on the diamond wheel, but I still need to take it through the regular sharpening process to get a blade that works as I want it to.

I will also be focusing on making sure I don’t produce cupped boards.

All in all, I’m very excited to get the next few projects finished.

The tool tote, a couple of boxes. The first being a simple 6-board box for reenacting. Then a jointer box to hold my wood tools well organized and safe. Then a stool and the start of other projects.

There is so much more pride in using hand tools and fitting pieces by hand then the feeling I got when I feed wood through my jointer and planer.

A Workbench

This is a beautiful piece of furniture. I made a workbench.

The beauty of this bench is such that I would be afraid to use it. It is that darn beautiful.

My bench is 60″ by 27″ by 34.5″ It was made from construction lumber, 2x10s, 2x4s, and 4x4s. Now that it is done, I don’t know that I can move it. It is that heavy. I might have to get retractable wheels for it.

This is the basic starting tool for woodworking. Until you have a chance to work on a real workbench, designed for hand tools, you don’t understand just how much of a tool it is.

For years, my goto woodworking bench was a sheet of 3/4″ plywood over a frame of 2x4s. It was stable enough, but it wasn’t really usable for planing.

There are several things that hand woodworkers do constantly. We saw boards either ripping, resawing, or crosscutting. Cutting tenons is an example of both. We drive chisels into wood and dig out mortises. We make boards flat and straight by planing.

If you swing a mallet and hit something and your mallet bounces, that is wasted energy. A solid workbench doesn’t bounce; it acts perfectly with the mallet, allowing hard strikes or controlled strikes.

If you are planing you need the work to stay in place. If you have your work attached to a flimsy work surface, every time you take a cut, the work and work surface move, stealing work. If you brace your foot against your work surface, you are unlikely to be in the correct position for planing.

If you are sawing, you want the work at the height at the correct angles.

Adding a leg vise to the bench will make it even better. That is happening over the coming days.

I’ll be drilling some holes for bench dogs and other work-holding tools.

So here is the astonishing thing: I had a round item on the workbench, I was planing a test piece. That round item did not move.

The number of times I’ve had things fall off a table because it is wiggling…

I’m excited.

Conclusion

The next steps are to make and attach a leg vise to the table. After that is adding some blocks to the underside of the table where I’ll be drilling 3/4″ holes for the work-holding thing.

There are two projects that come next: a journeyman tote to carry my tools and a 6-board chest for Ally for use at events.

After that is a knockdown cabinet with shelves for Ally to use at events.

Side Note

I was picking up some stair treads at Home Depot on Tuesday. As we were checking out we noticed a sale on the Husky 5-tier tote storage rack. The totes are 27 gallons with the nice flexible plastic. Each rack holds 8 totes by their upper edges and two more can be placed on top for a total of 10 totes.

The totes were on sale for $8 apiece. The rack was $149.

If you are looking for more storage, this might be the right thing for you.

professional carpenters and do it yourselfers need good tools

Tools To Make Tools To Make…

For lack of a nail and all of those things. Never a truer statement was made.

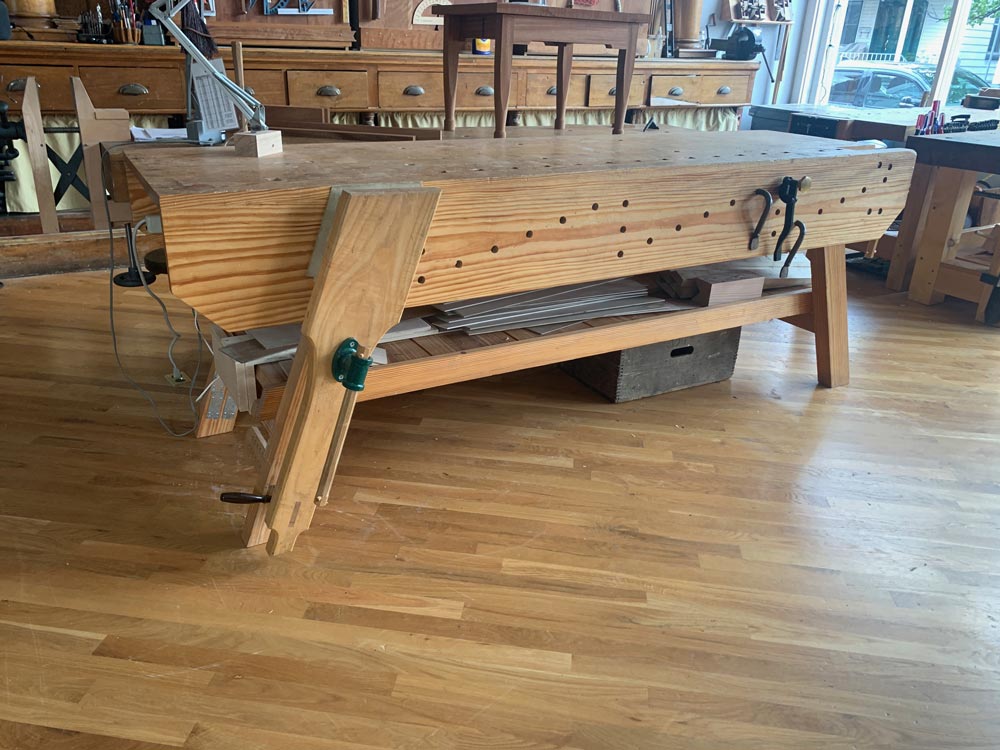
I have three workbenches in the shop. One is filled with machining detritus. It always needs to be cleaned up. The second currently is full with a mini-mill and storage containers that are waiting to be placed on the wall. The third is the grinding station with two bench grinders. One wheel is accessible because have the bench is blocked by wood that is waiting for a home.

Moreover, none of these workbenches are set up to be used for wood working. There is a copper jawed vise on the machining workbench. That workbench is a 24-inch by 96 sheet of 3/8 inch plywood atop a pair of 2x4s resting on a pair of folding saw horses.

If I bang on it, everything on the table jumps.

The mini workbench is stable enough, but it is set up for electronics work, doesn’t yet have good lighting, It is only 60-inches long, no vise and no room for working on longer boards.

The third is in a corner with no real access.

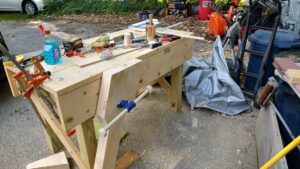
Thus, the new workbench.

Joinery

I’m sure this could be knocked together in a couple of days, but that’s not me.

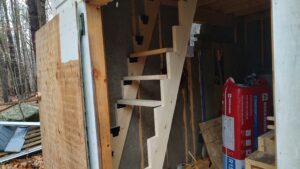
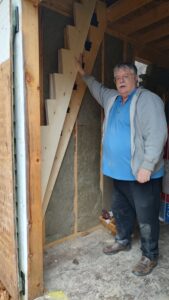
For the first trestle, I did knock it together. Construction adhesive and good old fashion screws. It was strong enough, but not pretty, and I can see my errors today.

The end apron, a piece of 2×10 by 24 inches cupped. I didn’t understand what this really meant when I put that apron on.

The difference between knowledge and skill.

It took me almost two weeks to get the braces cut. Some of that was plain stupid choices in my past. I didn’t have a saw that would for cutting the tenons.

Mostly, it was lack of skill and rain.

I’ve gathered more knowledge and a bit more skill.

To get good joints, you need to have flat, smooth, square connections. I didn’t have that.
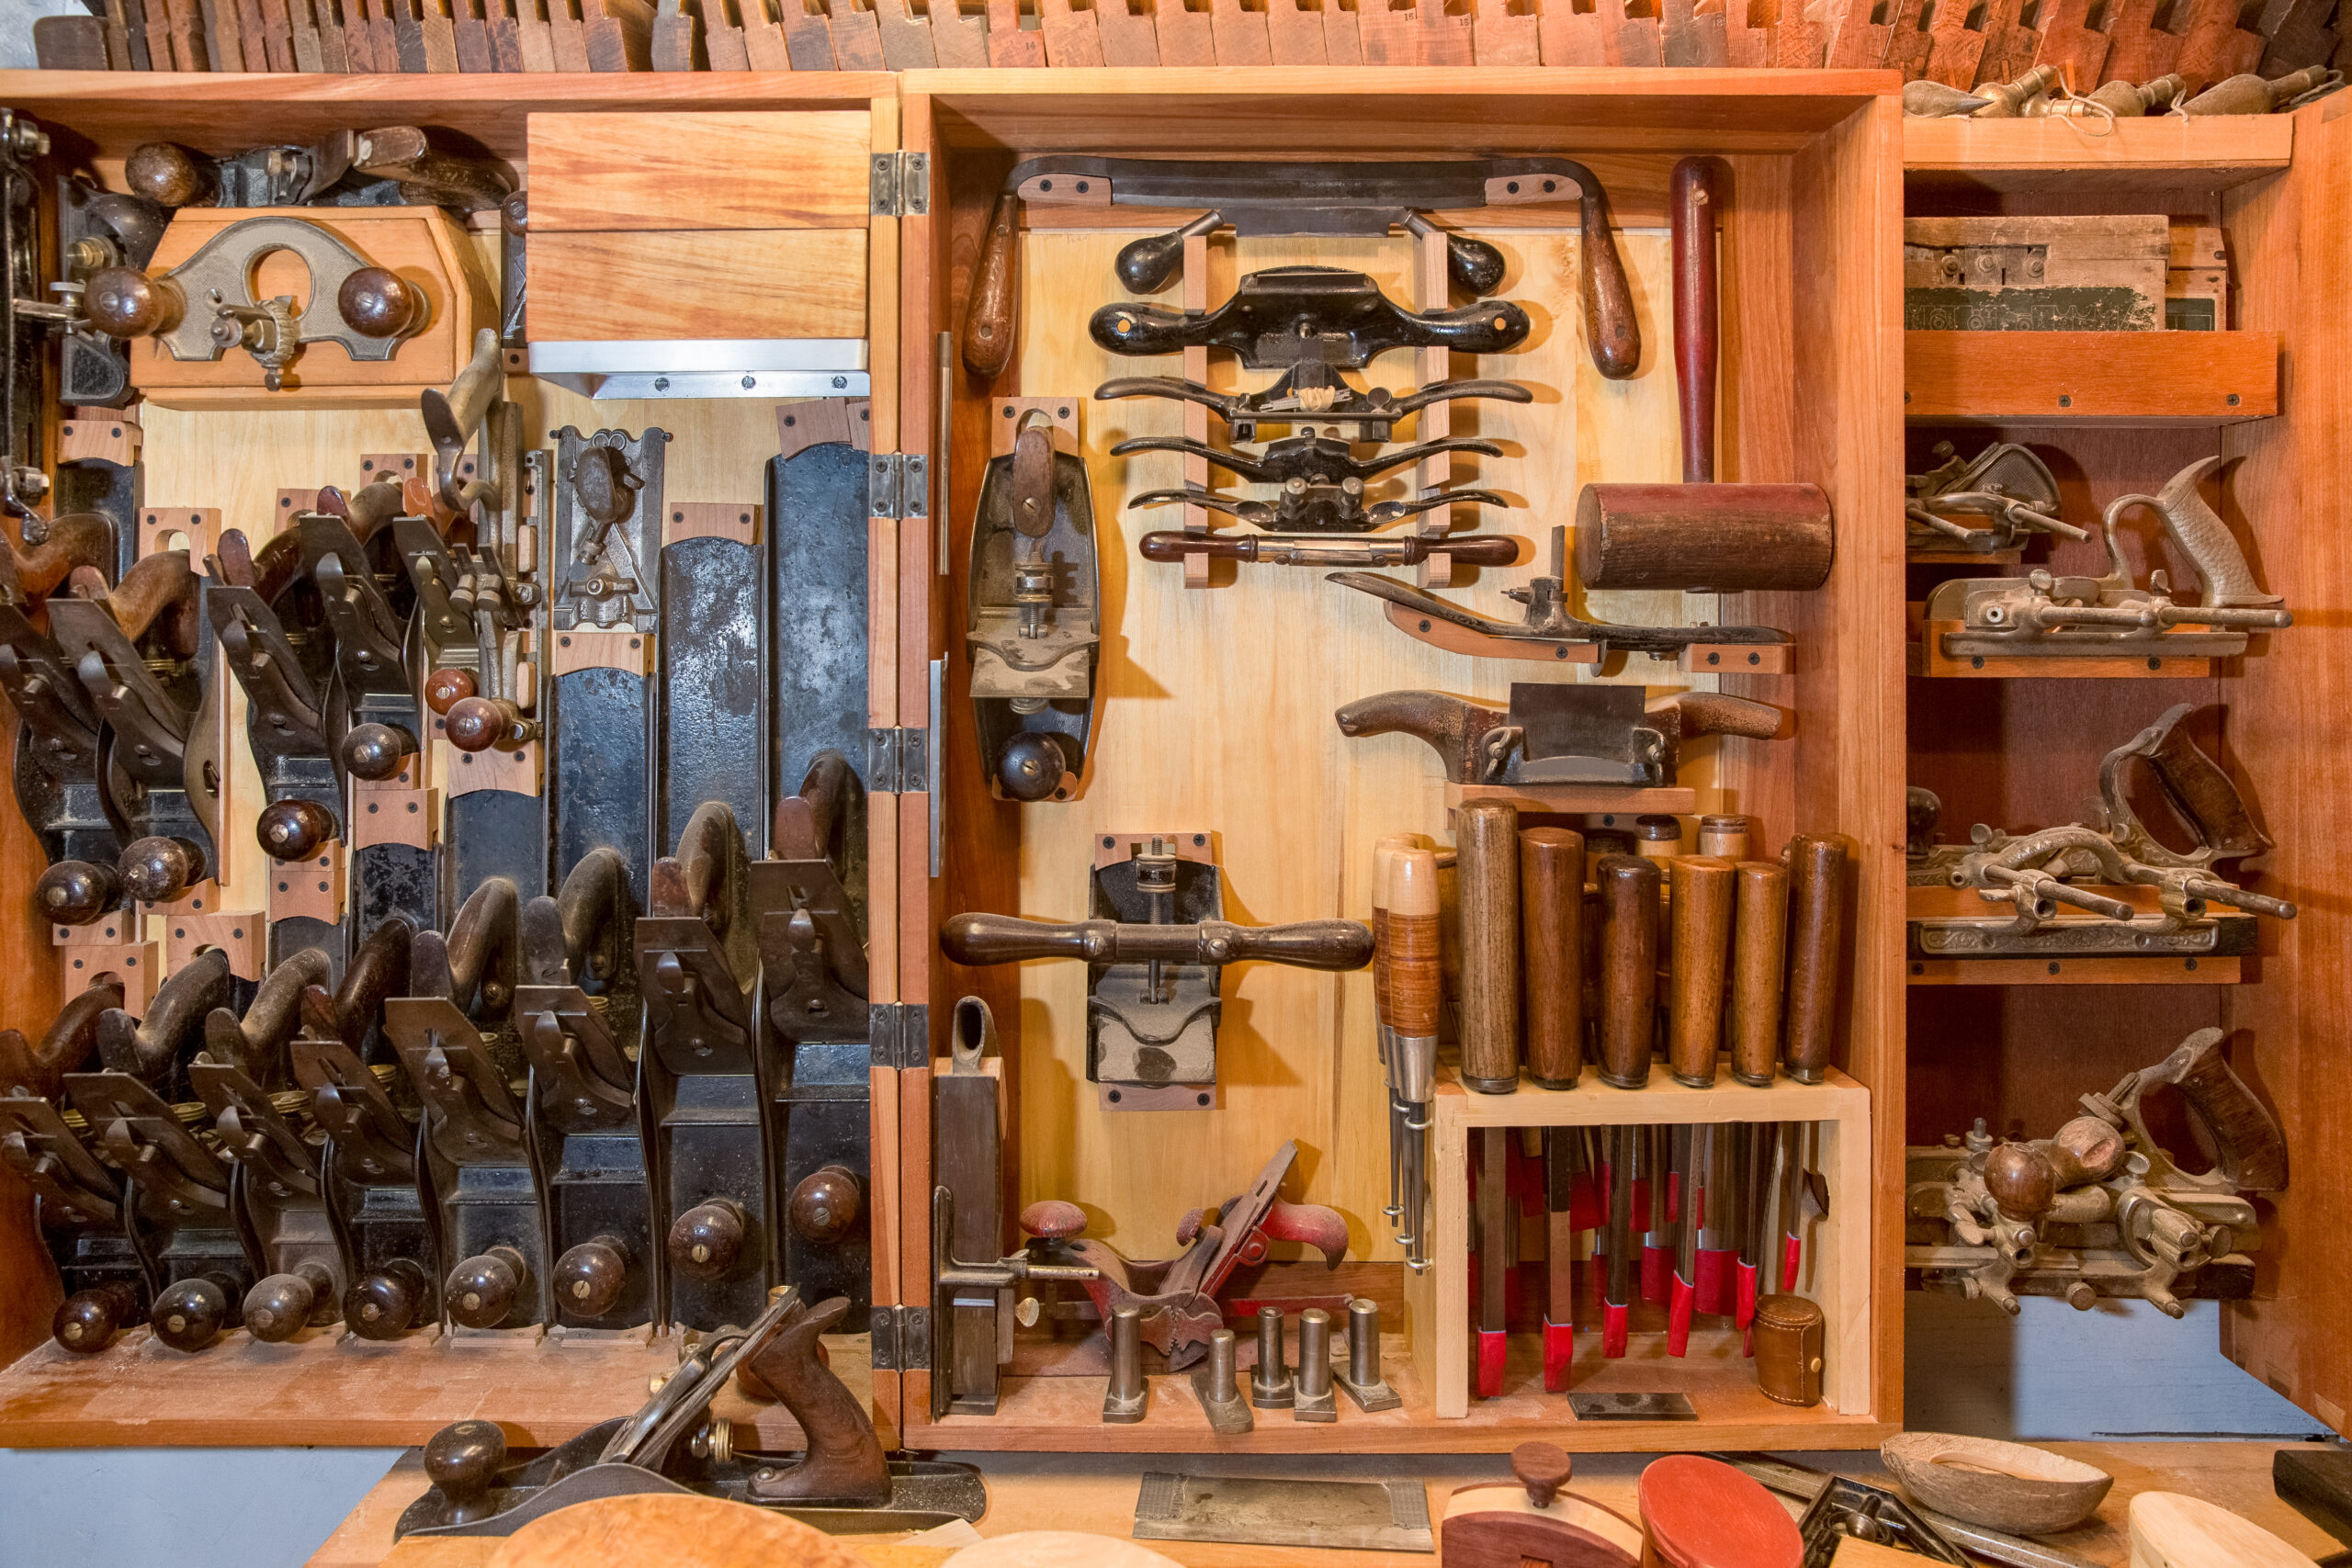
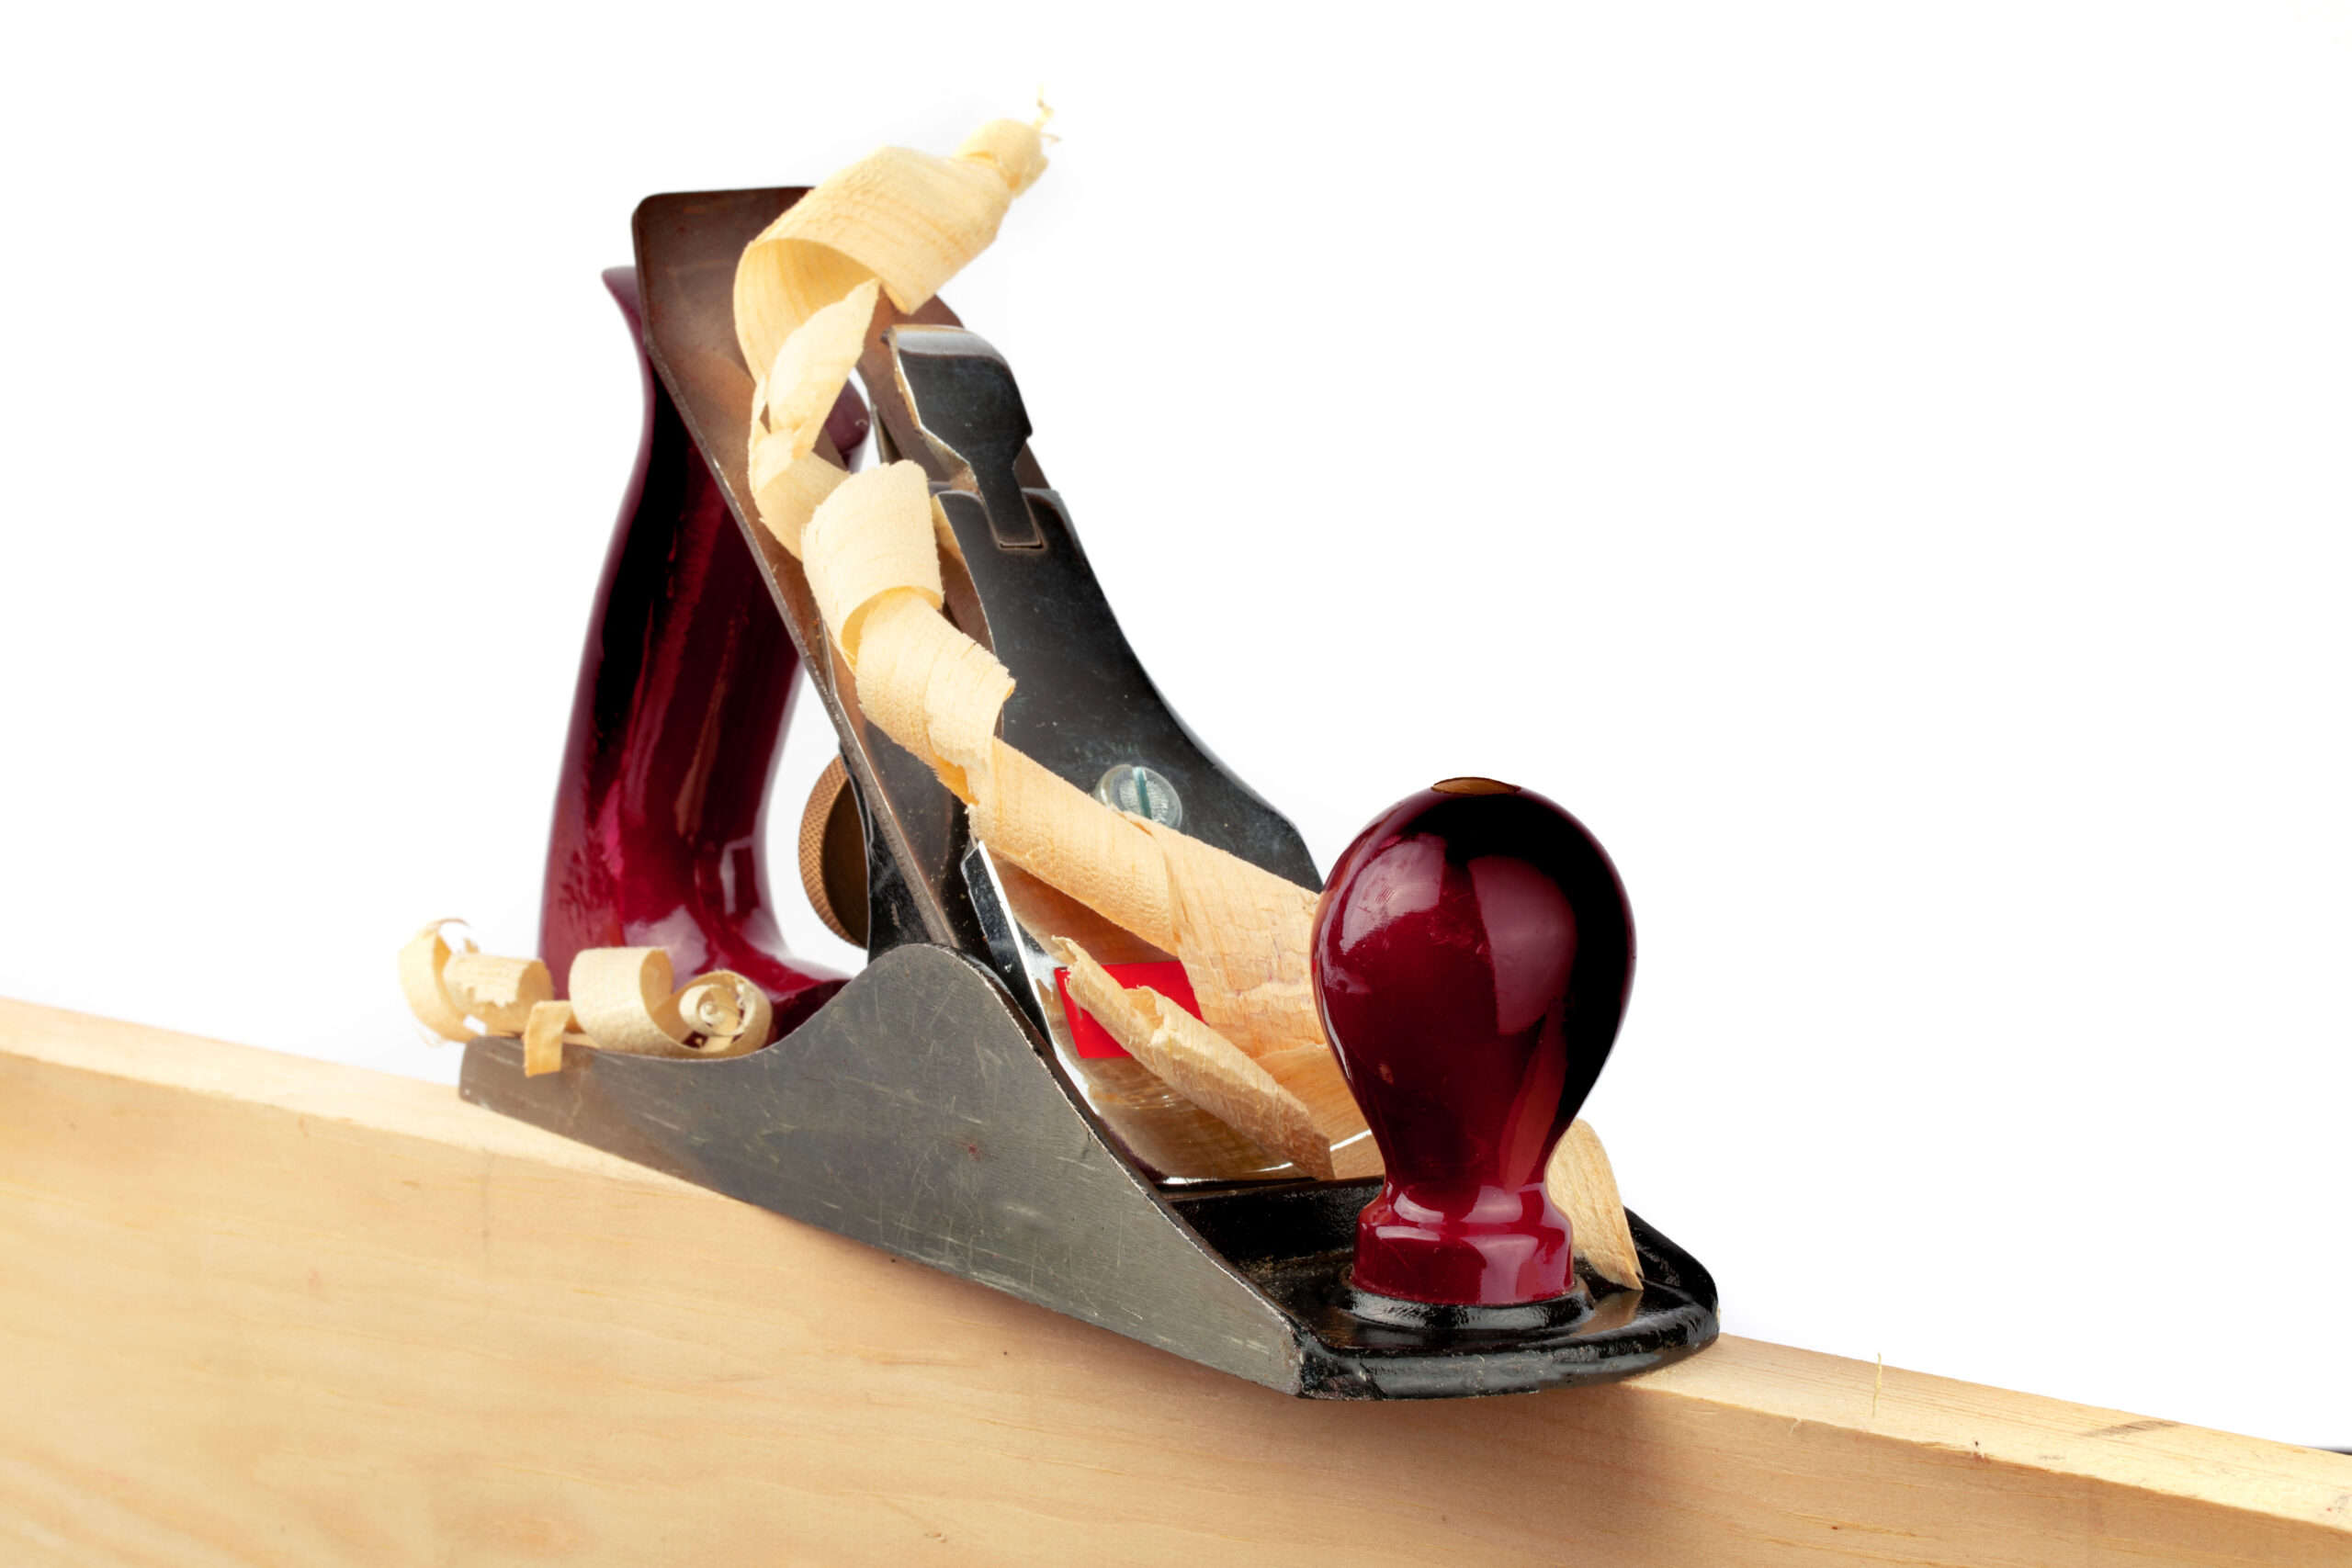
Smoothing

I’ve located some 5 wood planes so far. I knew of 2 of them, I suspected 1 more. I found 3 more after that. I also picked up 3 planes for a few dollars each, used.

That’s a total of 8 planes. Two block planes, Four #4 style planes. One #5 plane. One jointer, I think it is a #8 or #9.

One of the #4s is a piece of junk. It is stamped steel for the frog. Even after spending a couple of hours working on it, it doesn’t cut worth a damn. The second #4 isn’t ready yet. It has so much paint and gunk on the sole, that I haven’t gotten it ready yet. The third is a new Stanley #4. I’ve not checked it out yet.

That leaves one, #4. It is an older Stanley with a slightly cupped sole, but I have it mostly tuned, and it is doing its job of smoothing.

I realized that the #5, jack plane, hadn’t been checked since I purchased it 30 years ago. It needed sharpening, but is now doing a fine job.

Those two and a block plane I was playing with are all work ready.

This gets me smooth boards.

Flat

A smooth board is one that doesn’t have any roughness, but it might not be straight nor flat.

To make it flat, you need to test for flatness with a straight edge. Using an expensive Starrett combination square for woodworking messes with my head. I have multiple combination squares, but this one is my nicest.

You can have a board that is very smooth, but which undulates the length of the board. A longer plane, like a jack plane, will help with that, but ultimately, you need to locate those undulations with your straight edge.

After making sure your board is smooth, you set to work with your straight edge to find and mark all the high spots.

Knocking down the high spots will make the board flat. Using a longer plane will help isolate where you are cutting to just high spots.

The problem is that the longer the plane, the more work it is to use. They get heavy and that means more work. They also don’t cut as fast because they can only shave the high spots in that longer distance.

I am to the point where I can do this. I have the skill to make a board smooth and to remove the high spots.

This leaves the board with one more potential issue, twist.

Twist

Just because your board is smooth and flat in a local area does not mean it is flat over a longer distance.

This requires a different tool to measure.
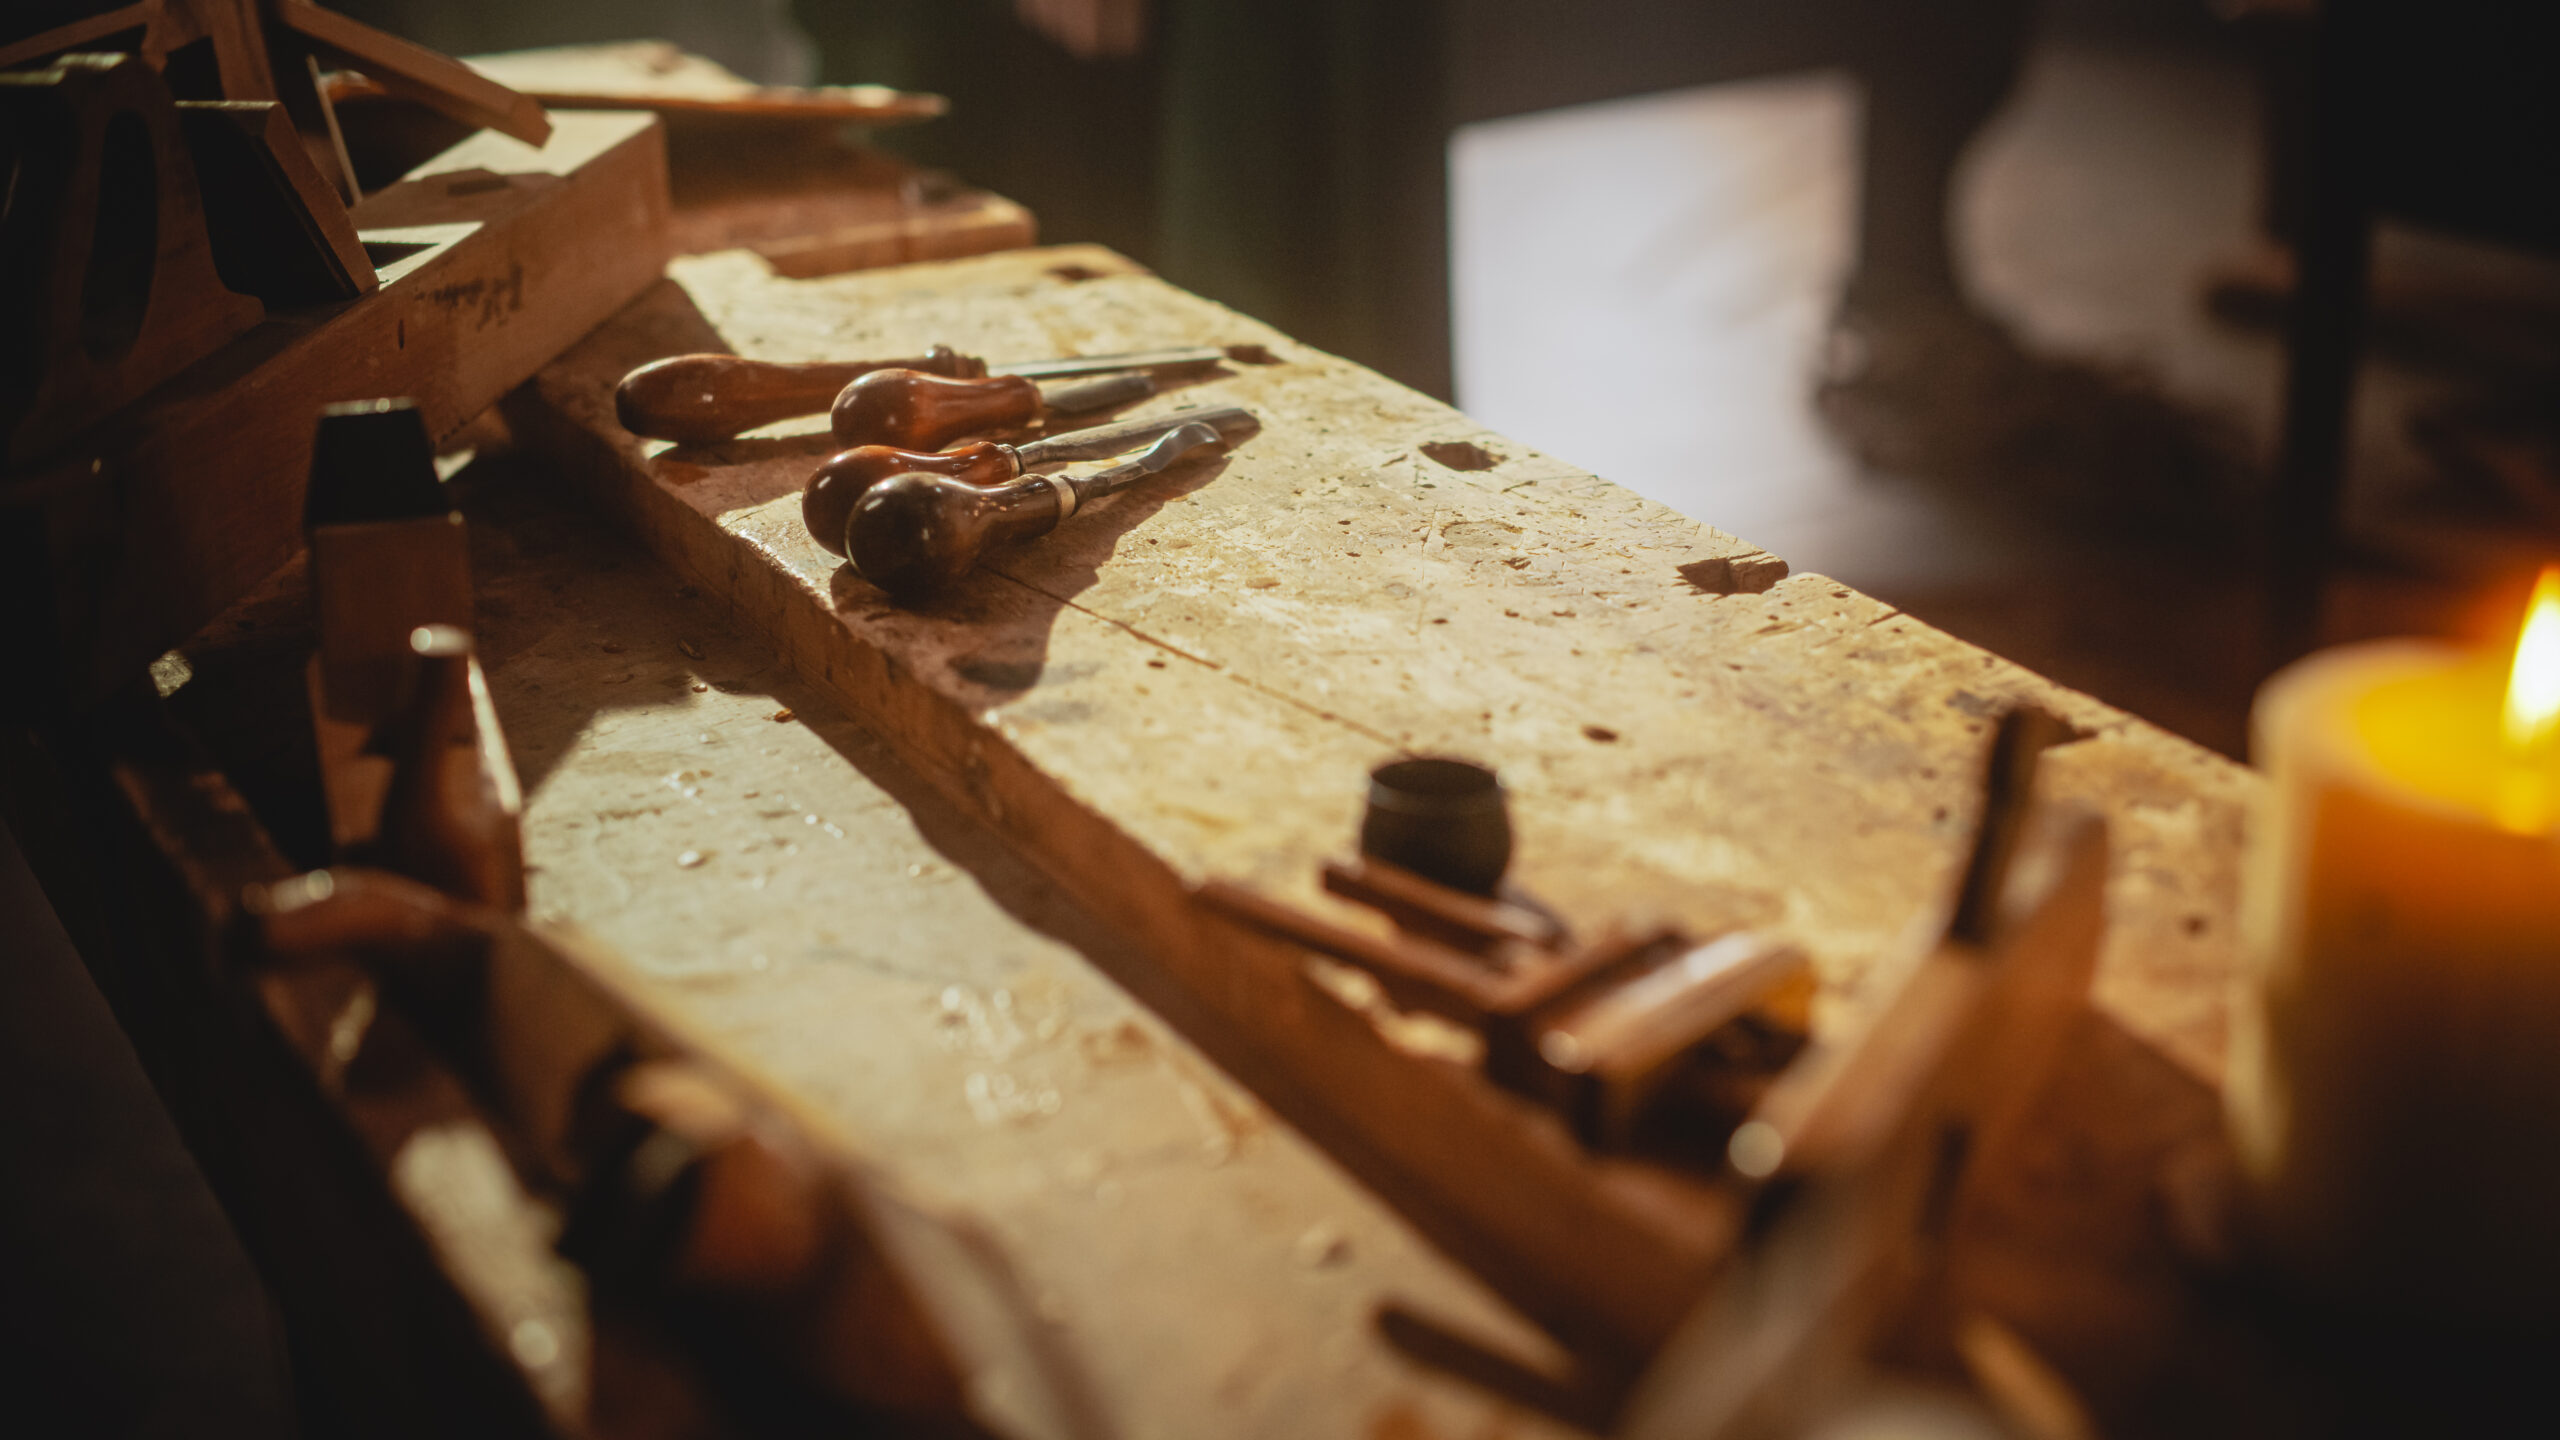
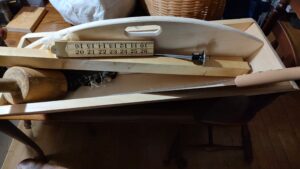
The winding sticks.

Winding sticks are two sticks that can stand on edge, have tops that have the same angle relative to their bottoms.

Think of them as thick rulers that can be easily balanced on edge.

The sticks are placed near the ends of the board, across the board.

You then lower your eye, watching for the far stick to disappear behind the near stick.

If the sticks are parallels, then the far stick should disappear at once. If there is any twist, one end will disappear before the other.

That indicates that the other side is high, relative to the near stick.

This tells you where to remove wood to remove the twist.

As long as the sticks have the same angle, relative to their bases, then this works great.

So I need winding sticks to finish prepping my apron boards.

Making Winding Sticks

Simple, plane one face of a 4×1 by 16 inches smooth. Make it flat, ignore minor twist. I.e., get it as flat as you can without winding sticks.

Now hold the board on its edge and plane the other edge smooth and square to the major face. Then flip it over and do the same for the other edge.

You require a square to make sure that the edge is perpendicular to the face.

This requires holding the board on edge. Except I don’t have a vise to clamp the board on edge.

We’ll assume I can solve that with a wedge board, later.

Once you have both edges square to the face, use your marking gauge (you do have a marking gauge? If not, stop now and make one.) to find the narrowest part of the board. Use that to strike a line (another skill) from one end to the other.

Now plane the board to that line. When you are done, if you have done everything well, you will have two smooth edges, square to the face, and parallel to each other.

At this point, use your marking gauge to find the center of the board. You can do this by eye, actually. Still another skill.

Stroke a line down the center, carry it to the back of the board, maintaining your registration on the same reference edge.

Now rip the board into two equal, or nearly equal, halves. Still another skill I have to learn.

That’s where my bandsaw comes into play. That is what I will use instead of a hand saw. I don’t have the vise to rip safely and easily.

Find the narrowest part of both boards with your marking gauge. Strike that line. Plane down to the line.

When done, you will have two boards that should be the same. You can joint them to make sure, this is the best thing to do.

If you joint them, make sure you mark the matching ends so that you can easily find them again.

You now have your winding sticks. To make it a bit better, darken the top edge of one of the sticks, to create contrast when you are using them.
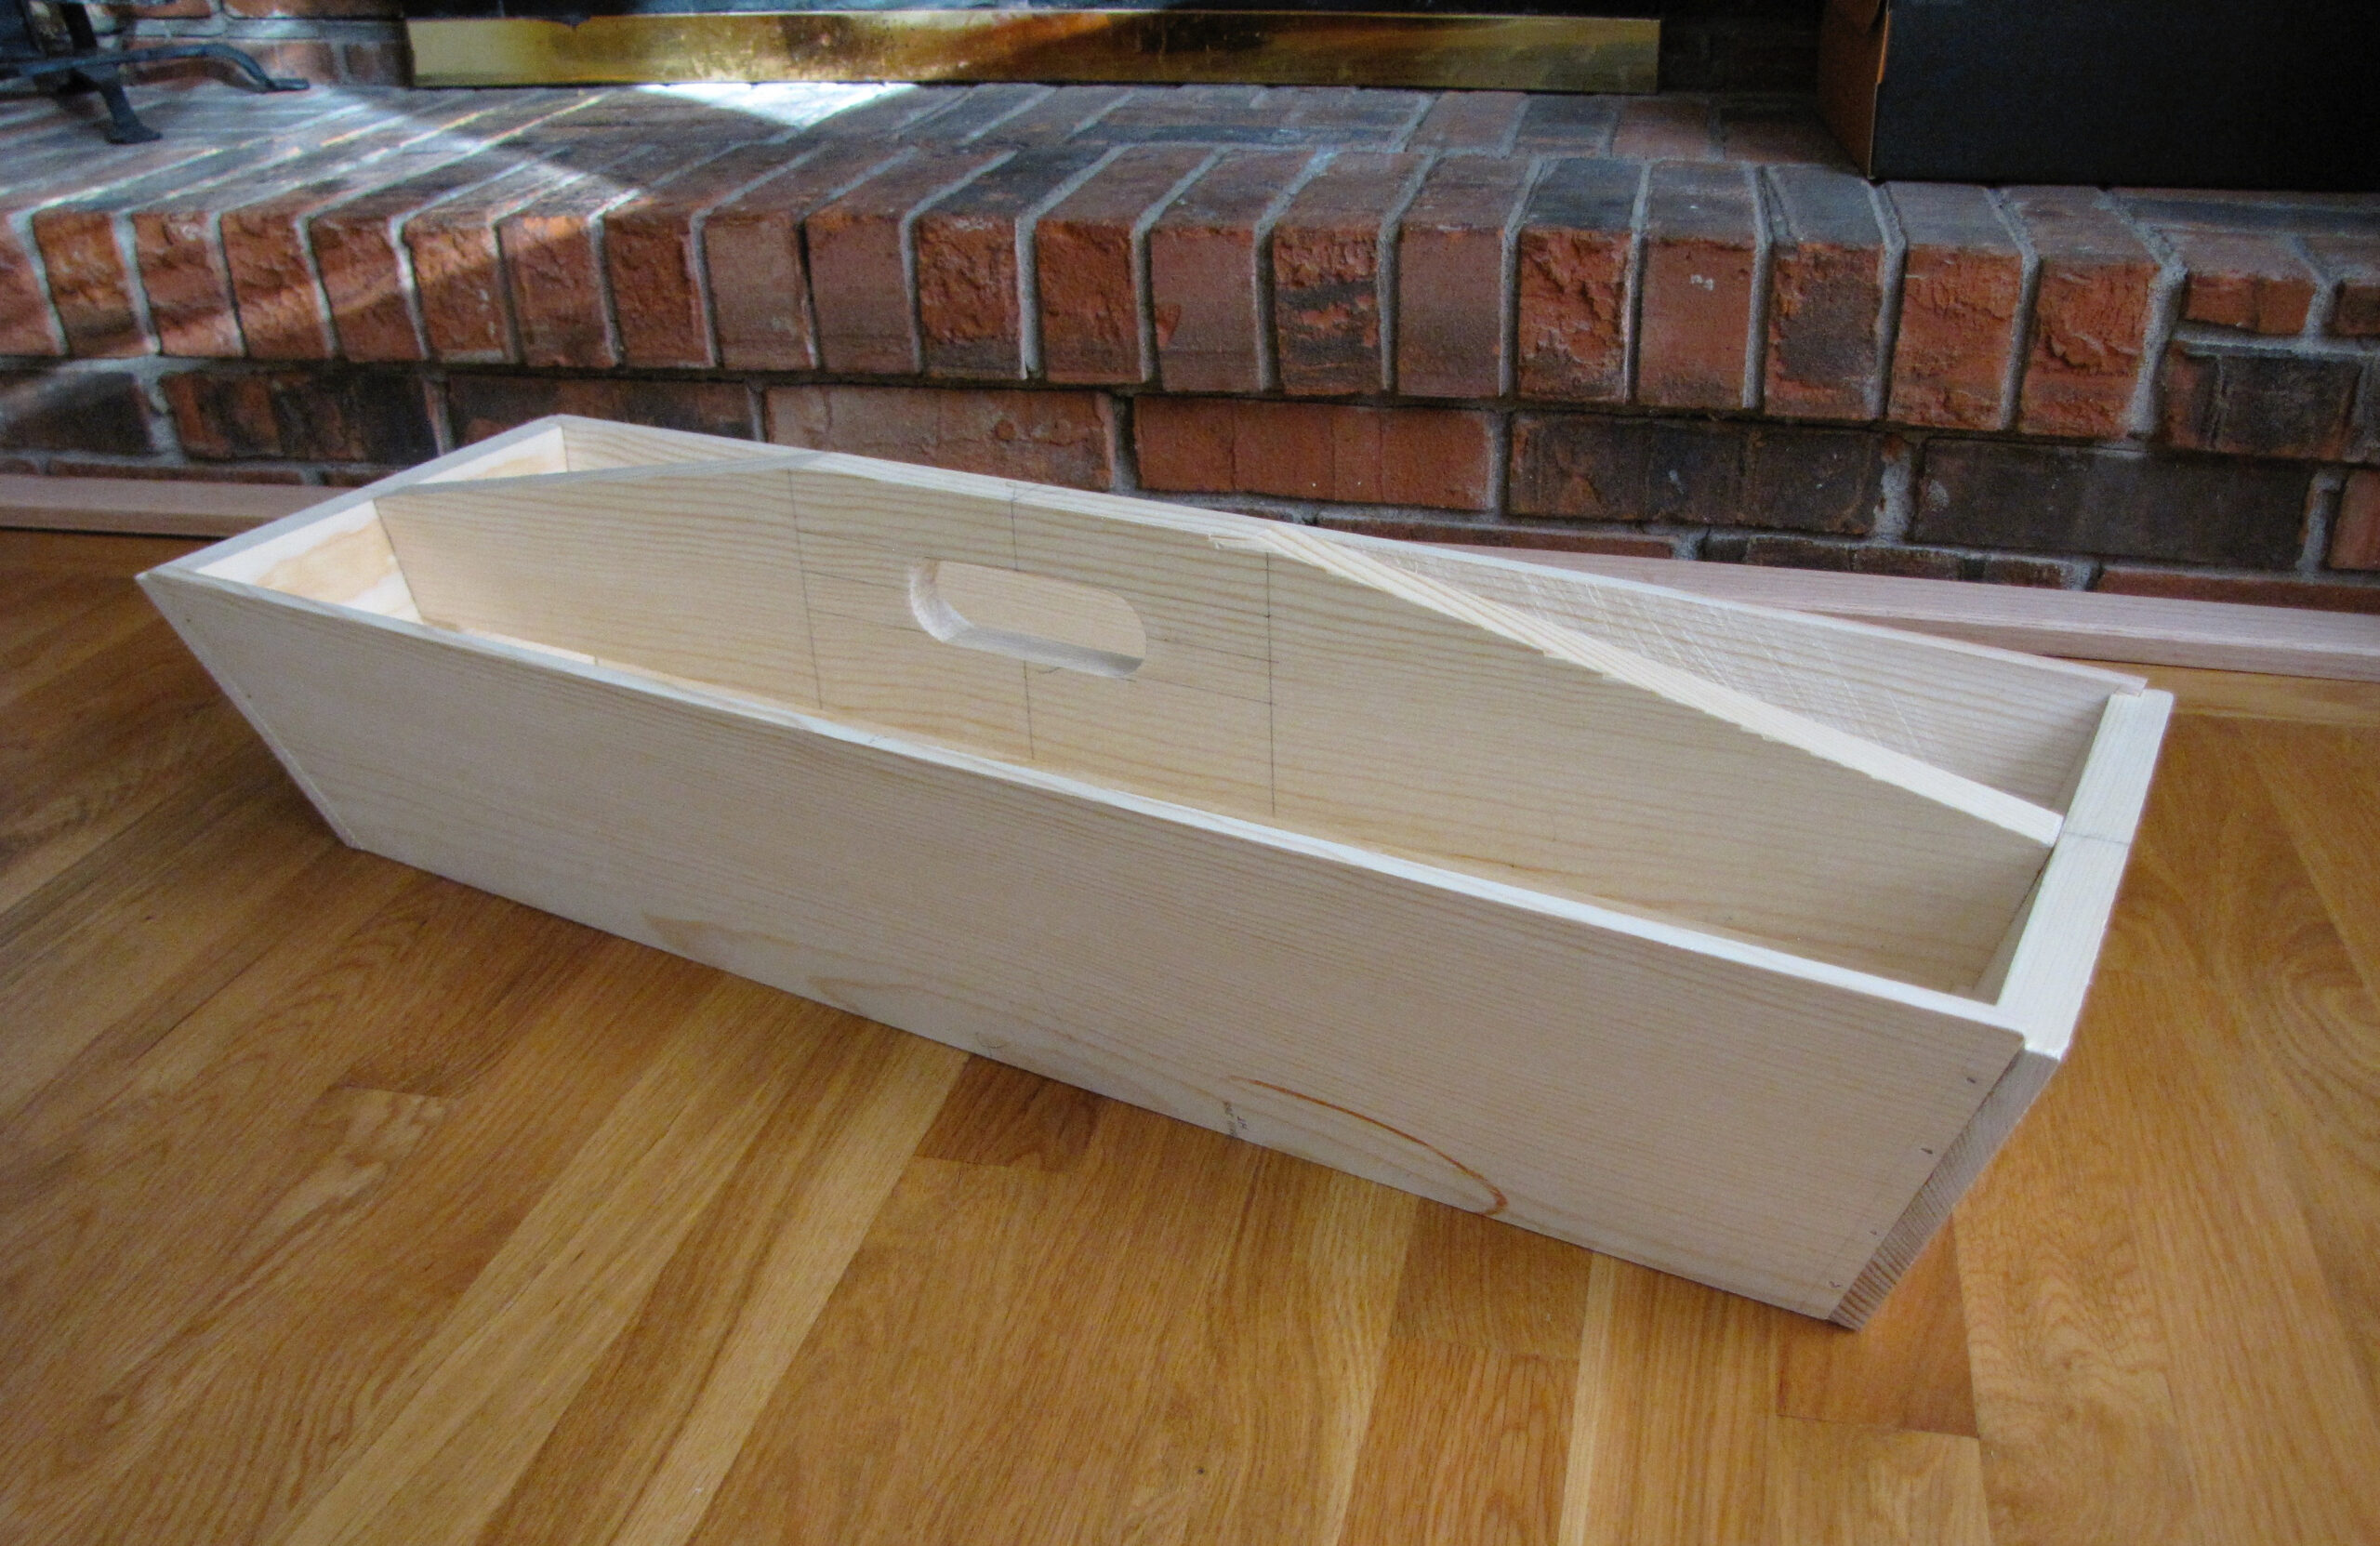
Notch Board

Another tool. Find a 1×6 about 12 inches long. Find the center and mark a point 4 inches from one end at that center.

Drop lines from a point 1 inch in from the edges to the center marked point.

Now drill a 1/4 inch hole at the center point.

Rip cut from the end to the hole. This will create a V notch, 3.5 inches wide at the mouth and just a 1/4 wide at the throat.

You can now attach this V notch board to the surface of your workbench near the left end, or in my case, one of my apron boards, with the notch facing the center of the board.

You can now place almost any board, on edge, and jam it into that notch. The notch will hold the board upright, on edge.

Now just plane to the lines.

Conclusion

I’m having a blast turning knowledge into skills. This is my daily exercise. I figure that by the end of today, I should have the second trestle completed.

While the adhesive is drying, I will plane the two apron boards smooth and flat, ready to be attached to the legs, which I have already planed smooth and flat.

Maybe I’ll have something good to report by Friday.

close up of Carpenter sawing a board with a hand wood saw

The Right Tools

My father was a woodworker. He made beautiful furniture. I have a couple of pieces he made.

His primary tool was the radial arm saw. He also had a hand drill. Everything else he did by hand. I wish I had learned more from him.

I think it was one of his quiet hobbies. Later, he became obsessed with model railroads, doing incredible things with them. He is actually published for his work on model railroading.

His skills didn’t seem to pass to me. It is/was so bad that I didn’t do woodworking until I had power tools and a place for them.

One of the basic tasks of wood working is sawing. This is rather simple. Move the saw back and forth in a straight line.

Yeah, not so much.

You have to cut a straight line, without a curve in it. That straight line must be in the correct place. It must not be tilted.

I think 3 degrees of freedom in that sawing.

So how the heck do you saw something correctly? And what the heck do you do when you have to “rip” a piece of wood that is 6 foot long? Or even harder, resaw something that is 6 foot long?

You start with the correct tools. With saws, there are a lot of them. But the real starting point is the marking gauge.

Instead of just marking the line you are cutting, you mark the sides as well. This will give you a visual of where you are supposed to be cutting.

Next, put your pencil aside. Use a marking knife instead. First, it gives a cleaner mark. Second, it is easier to transfer a knife line around a corner.

If you are working on light wood, you can then use that pencil to make that knife mark easier to see.

Finally, for precision work, make a knife wall. This is an artificial kerf. It makes a physical stop for the edge of your saw blade. Now, when you start sawing, your saw is already in a kerf. If you carry the knife wall down the sides, it will help to keep your saw properly aligned.

So that marking knife, a good combination square or try square, a metal ruler, and a good bench chisel are required.

The next thing to look at is the types of saws that are available, and what they are used for.

There are more than you can shake two sticks at. And each saw does a different task.

I’m going to focus on straight cuts and ignore Japanese pull saws.

Saws can be cross-cut, rip cut, or a combination cut. A combination cut saw does a poor job of both ripping and cross-cutting. But it can be handy when you don’t know which you will need.

Cross-cut blades are designed to cut across the wood fibers. Rip saws are for cutting with the fibers.

Normally, we want cross-cuts to be smooth. Smooth means more teeth per inch. More teeth per inch means smaller gullets. Smaller gullets mean slower cutting.

If we have two saws with the same level of sharpness, assume “very” sharp. The one with fewer teeth per inch will cut faster. The reason is the gullets.

The gullet is the space between the teeth. When you are pushing a saw forward, each tooth is cutting a small shaving from the wood.

That shaving has no place to go. It has to travel with the saw blade as it moves forward. The only place it can travel is in the gullet.

As the blade exits the wood, the wood that is traveling in the gullet drops free.

When enough wood dust/chips have built up in the gullet, the tooth can no longer cut and collect more wood shavings.

With fewer teeth, there is less room for wood shavings. The gullets fill up faster and the saw stops cutting.

There is so much more to this. I thought I had a better understanding.

In trying to explain it in this article, I figured out that I didn’t know enough.

professional carpenters and do it yourselfers need good tools

Flat, Straight and Square

Many years ago, I started to build a laminated wood workbench from hard maple. It was very slow-going. I think I have what I finished up in the rafters of the shop.

It is only 9 inches wide. It is not smooth, it is not flat. It is unlikely to be straight, and it is not square.

At the time, I did not have a place to use as a shop. We were living in a rental town house. All the work I did was done on saw horses in the kitchen with hand tools. I had purchased two very nice iron planes to use. But, I did not know how to tune them. I did not know how to use them.

In short, I lacked both skill and knowledge.

You can have something that is very smooth, but it might not be flat. You can have something be flat, but not smooth. You can have something that is flat and smooth, but not square. All three are needed to have a good face.

As a piece of wood comes off the saw, it has rough surfaces. The surfaces are mostly flat and square, but you can’t trust that until it is measured.

A piece of wood can also be cupped. This is when the center is higher than the edges. The board can also be twisted. All of these can be removed with a hand plane.

You start by examining the board and placing the cup up. This creates a stable surface. Looking down the board, you search for any high spots, end to end. These get your attention first.

Using a ‘fore plane, you remove those high spots. You then use a jack plane to make a flat surface that is also smooth.

Now that your board is flat and smooth, you use winding sticks to find any twist in the board. You plane that out.

Finally, you have a good face. Mark it, then move to an edge. Make it flat and smooth. Use a try square or a known good square to make sure your edge is square.

In the end, you will have two faces that are flat, smooth, and square to each other.

Moving on to the other sides becomes much easier.

Planes

I started with two planes from that failed project of years ago. One is a No 5 jack plane and the other is a joiner or try plane, I don’t remember which. I haven’t gotten tot hat stage yet.

What I didn’t have were smoothing or scrub planes.

Via YouTube recommendation, I found one that looked nice on e-bay, was a No 4 smoothing plane, and looked ready to go.

Friday, before I started work on the truck, I stopped in at the second hand store. I found four planes. One without any hardware or iron, one had an asking price of $175, and two that were only $6.

They followed me home.

Yesterday, I had the eBay one arrive. I went to test it, and it wasn’t ready to use.

Taking it apart, I realized the iron needed to be sharpened. About 30 minutes on the diamond plate and the back was mostly flat, again. The chip breaker also had its edge cleaned and straightened.

Then it was time to sharpen the iron. Using a 25° guide, I started working on it.

The bright was at the heel of the bevel. Looking at the bevel more closely, it was more of a half moon shape than flat.

This iron had been badly sharpened many times.

Today, I was able to get my slow speed grinder running with the correct jig for a plane iron. That iron now has a beautiful edge. It needs some hand work, but it is almost ready to go. Testing it shows reasonable shavings, before the hand work.

The first $6 plane needs to have the edge reworked. There is a chip out of it. I’ve not started that process yet. Nor have I looked at the iron of the other thrift shop plane.

Regardless, I will have my smoothing plane and scrub planes in the coming days. Good news for me!

A scrub plane is a smoothing plane with a rounded cutting edge. It is designed to remove bulk material rapidly.