First, a huge shoutout to CourtListener.com. These guys are doing an impressive job of exposing the inner workings of the legal system.
They haven’t hit the state-level courts yet, but at the federal level, they really can’t be beat.
They are a part of the Free Law Project. FLP has managed to get contracts and access to many court filings. They have created software to scrub court filings and collect them in one place. They have created a good search engine that just works.
Recently they announced a new feature: voice-to-text transcription of circuit court oral arguments.
In general, it is much faster for me to read a transcript than to listen to it. Plus, knowing who is speaking makes a difference in understanding what is happening.
With this new feature, I expect to be paying more attention to oral arguments at the appellate level.
I am biased towards them; I contributed a small bit of coding a while ago. They have just gotten better since I found them.
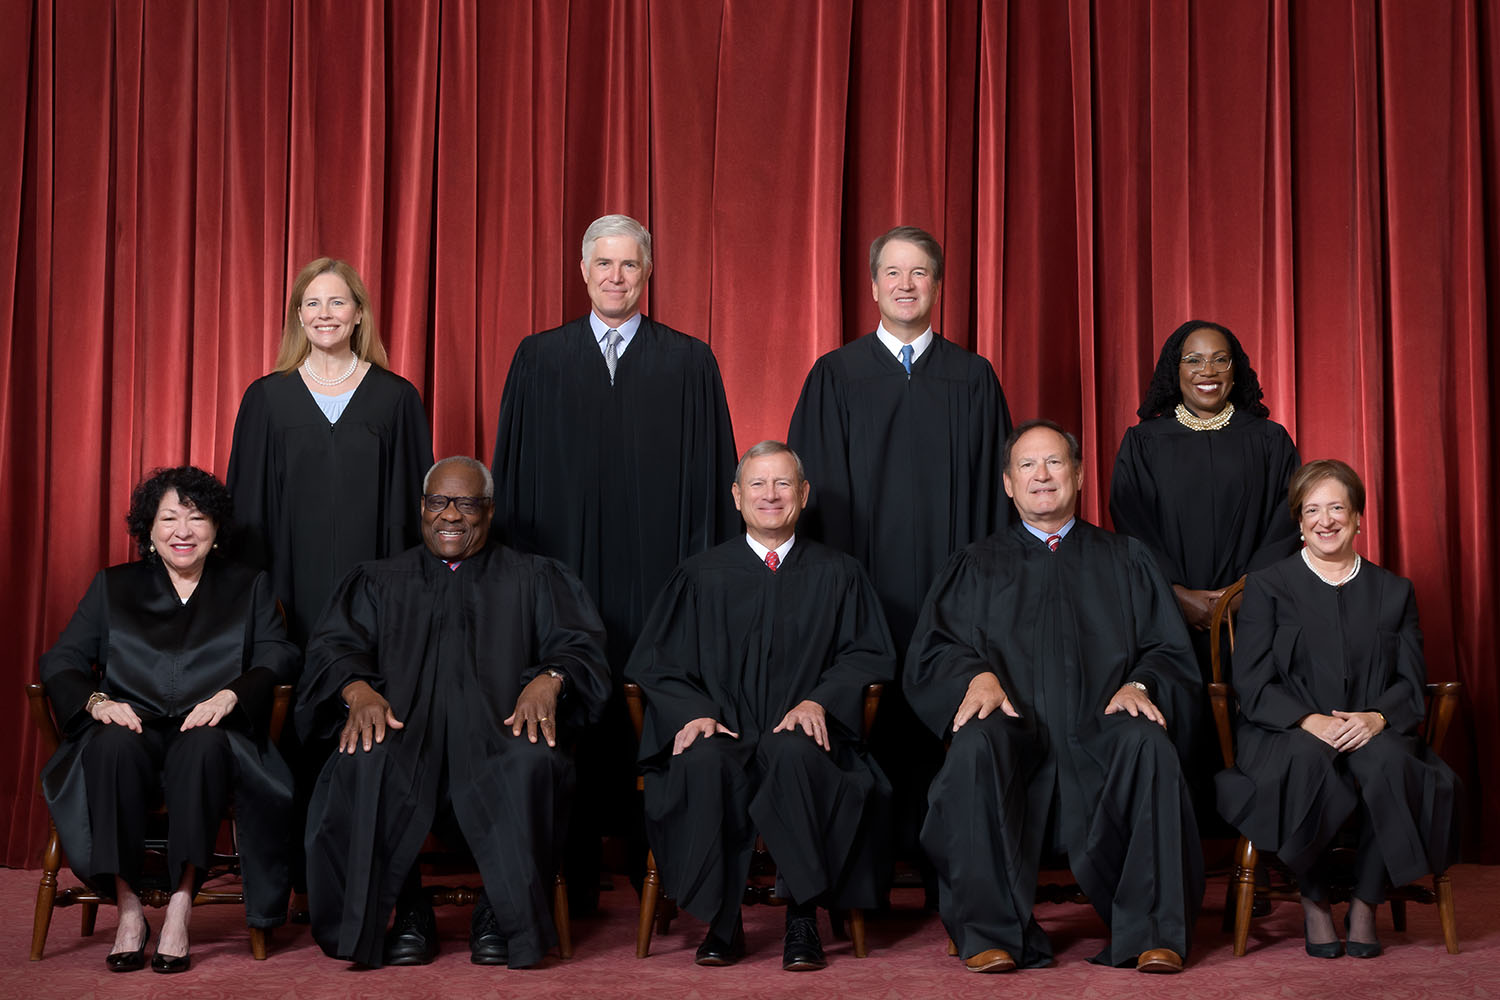
Supreme Court Terms
The Supreme Court term runs from July 1st to July 1st. The old term ends on June 30th, and the new term starts on July 1st with the court starting business in October.
In practical terms, this means that the case numbers change on July 1st. We are now seeing cases with a “25-” prefix, indicating the case was filed in the 2025 term. We won’t see anything really happen until October.
During a term, motions are filed on the docket and the emergency docket. These motions request certain actions of the court. The one we are most familiar with is a motion for a writ of certiorari.
Normally these are filed on the main docket. If a stay or injunction is requested, that will normally be done through the emergency docket.
Occasionally a motion for a stay or injunction will turn into a motion for a writ of certiorari.
Over the course of the term, the Court will hear oral arguments on 60 to 70 cases. These cases encompass all areas of law. Constitutional issues, business law, property law, criminal law, and all the other areas that I don’t know anything about.
The case that overturned Chevron was an administrative case. It just happened to be incredibly important to dismantling the administrative state.
Because of the breadth of types of cases, SCOTUS does not like to take on repetitive cases nor too many cases in the same area. They would rather pick one to three cases that address issues significant to the Nation.
We can expect two or three Second Amendment cases to be heard in a term. The cases chosen will address large issues that advance jurisprudence in Second Amendment law.
Will there be an assault weapons ban case? At this point, I believe the court has indicated that it will not. The refusal to grant cert to Snope (Bianchi) is a strong indicator.
Snope has been an ongoing case since 2017. It was one of the cases looking for cert before cert was granted in Bruen.
The case was brought in the Fourth Circuit to get a favorable ruling to reverse Kolbe v. Hogan.
Bianchi made it to the Supreme Court. Was granted cert after Bruen. The opinion of the Fourth Circuit Court was vacated. The case was remanded to the Fourth Circuit for a “do-over” in light of Bruen.
Two years later, the en banc Fourth Circuit decided they had gotten it right the first time around.
A motion for cert was made to the Supreme Court. That motion was denied.
Why Didn’t The Supreme Court Take These Second Amendment Cases?
Because they are a do-over.
Bruen was a licensing case. The question asked was does the Second Amendment-protected right to keep and bear arms extend outside the home? The resounding answer was “YES!” The right to keep and bear arms does exist outside the home. All states are now must-issue states.
The rest of the opinion is dicta. In that dicta, the Court explained how to evaluate Second Amendment challenges. They stated that when there is a constitutional challenge, the first step is to determine if the plain text is implicated. If the plain text is implicated, then it becomes the government’s burden to prove a history and tradition of that type of regulation.
Note, this is for all constitutional challenges. This is the basis of originalism in jurisprudence.
Because the question asked had to do with the right to keep and bear arms outside the home, it was not a repeat of Heller. The Heller methodology was and always has been: is the plain text of the Second Amendment implicated? If yes, then the burden shifts to the government to prove a historical tradition of matching firearms regulations.
Bruen did not change that in the least. It affirmed the Heller methodology.
Heller‘s dicta talks about how to find matching historical firearm regulations. It also discusses every word of the operative clause of the Second Amendment and why the operative clause is controlling and not “well regulated militia.”
In their research into the historical laws of this Nation, the Supreme Court could not find any regulations banning firearms that were in common use. Because there are no matching regulations, there is no history nor tradition of banning firearms in common use, such as the pistols at issue in Heller.
The opinion held that the Second Amendment protects an individual right to keep and bear arms. The specific question allowed the gun-grabbers to limit that to “in the home”.
The gun haters then created a two-step shuffle where they would first decide on the level of scrutiny required to balance away any practical Second Amendment-protected rights in the anti-gun states.
Bruen extend those protections outside the home and explained that the two-step shuffle was not allowed.
So what is Snope? The question asked in Snope is can the state ban a firearm in common use?
This is the same as Heller. The observed fact that the lower courts are not applying Heller correctly does not make the case significant to The Court.
Misbehaving inferior courts can be slapped down via other means.
Types of Second Amendment Cases
I believe there are a few types of cases that are making their way up the court system that will interest The Court.
The first is “sensitive places.” While SCOTUS gave examples of “sensitive places” and examples of what were not “sensitive places”, the states have decided on their definition.
The state’s definition of sensitive place is any place they don’t want armed people.
The second type of case is a definition of “The People.” There have been several cases where 18-20 year-olds have challenged laws restricting their right to keep and bear arms. There is a clear circuit split.
This case would allow The Court to clarify that “The People” means all the people. They might choose to extend that definition to people under the age of 18 as well as legal residents of the United States.
The more important part of that decision will be the dicta. That is where The Court will, again, tell the inferior courts how to do it right.
Finally, I believe we are going to see a case on the NFA. It won’t address machine guns; it will address infringements when there is no justification.
Remember, the reason that you can’t buy a short-barreled rifle with a 4473 is because the federal government has to collect a tax on the transfer of that firearm.
All the requirements, extra background checks, fingerprinting, and chief law enforcement officer approval exist to make sure that you pay your transfer fee and that you can prove that you have paid, on demand.
And nobody is stopping you from buying a machine gun if you are willing to meet the requirements and pay your $200 tax. The closing of the NFA to new machine guns isn’t stopping you from buying existing (pre-1986) machine guns.
In a few years, we might see something challenging the right to acquire machine guns. Acquiring would include making them.
If it ever becomes possible to add new machine guns to the NFA, I can see a booming business for drill guide jigs.
Conclusion
There are big things coming from the Supreme Court in the Second Amendment area. I’m sure it will be good.