The Weekly Feast – Chia Chocolate Pudding
You’ve seen pics of me. I obviously like food. However, I’m trying to be a lot healthier in what I’m eating. I love sweet treats, and if I could tolerate dairy, I could be happy with the occasional yogurt. However, dairy free yogurt is twice as expensive, and the cups are usually smaller. It’s a sad thing. That’s when I ran across this chia seed stuff.
So before you ask, yes, this is the same type of seed you used to smear on clay figurines in the 70’s and 80s (ch ch ch chia!). However, instead of growing them, you’re going to be eating them. It sounds odd, I know, but they’re cheap, and when they’re soaked overnight, they’re really tasty!
This recipe makes a single serving, so feel free to upscale as much as you like!
Ingredients:
- 2 tbsp chia seeds
- 1/2 cup coconut milk (or any other milk or milk substitute)
- 1 tbsp honey (or other sweetener of choice)
- 1 tsp cocoa powder
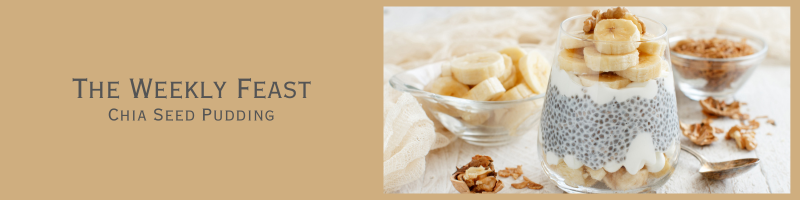
Put all of the ingredients into a jar or other container with a lid, and whisk together well. Let it sit for a couple of minutes, then whisk again, as sometimes the seeds or the cocoa can clump. Cover the container and put it in the fridge for at least two hours, and best overnight. Before serving, top it with a bit of fresh fruit or whatever you like!
It really is that simple, and it’s tasty. Just be careful to mix, let it sit for 2 to 3 minutes, then mix again. The seeds make a sort of gel around themselves (which makes them sort of like mini tapioca balls when you eat it), and so once that begins to happen they are easier to stir.
For those who are diet conscious, the above comes out to about 200 calories, 5g protein, 9g fat, and 28g carbs (but with a whopping 9g of fiber, which makes your net carbs only 19). A fairly balanced dessert!