Rise Up!
It’s here, and it’s available on Amazon!
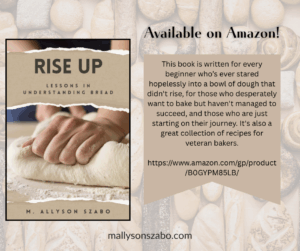
https://www.amazon.com/gp/product/B0GYPM85LB/
From the back:
I spent years failing at bread. Every attempt ended in frustration, with inedible bricks or doughy masses. I was told my hands were too warm, that I kneaded too much or not enough, or that one day the mystical “silky smooth” stage would simply make sense. It did not. It took me years of practice, failures, successes, and work to finally perfect my baking skills.
This book is written for every beginner who’s ever stared hopelessly into a bowl of dough that didn’t rise, for those who desperately want to bake but haven’t managed to succeed, and those who are just starting on their journey. It’s also a great collection of recipes for veteran bakers.
The first half of the book includes the real, often funny story of my own messy journey—from a childhood with no baking at all, through years of setbacks and irritation, to the gradual discovery that good bread is possible for everyone.
The second half is filled with the approachable recipes that finally worked for me: straightforward loaves, comforting sandwich breads, crusty rustic rounds, and sweet treats, all written with the nervous beginner in mind. No intimidating jargon. No vague instructions. Just clear, patient guidance, honest troubleshooting, and the gentle encouragement you need to keep going.
Join me on this journey. Whether you’re baking your very first loaf or trying again after past disappointments, I hope these stories and recipes help you find the same. Never give up, and you’ll be baking delicious loaves in no time!
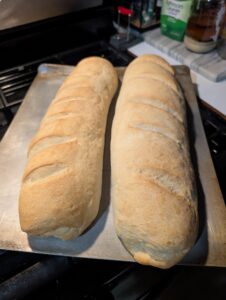
This book has been 25 years in the making, basically. When I first met Chris, I tried. Ask him about some of my “famous” birthday cakes I made for him. I think the first we called “Hamburger Hill” because it was so misshapen that it looked like a hill, so I frosted it green and put soldiers on it… and then they kept falling over, so I left them there and sprinkled red sprinkles around them to look like blood pools. LOL… Baking has been a struggle my whole life. If I had known that him basically bullying me into learning how to bake properly would lead to where I am today, I’d have done it much earlier.
Today, I whip out loaves of bread with very little stress, every week, and sometimes twice a week. I teach bread baking to others. I play with my bread, too, and do different things. If I could learn, then anyone can. This book really is my attempt at making bread something that can be done by ANYONE. It’s written very conversationally (which most of my books are, honestly), so that it doesn’t feel like I’m lecturing. But I don’t hide the hard parts, either. I talk about mistakes that can happen, and how to fix them or get around them, or avoid them going forward. And I challenge the reader, too!
At one time, bread was something everyone knew how to bake. Why? Because bread was 60% of the diet of early Americans. If you didn’t know how to make bread, you could starve. So everyone just knew. Today, we have at least two and sometimes three generations between ourselves and people who “just knew” how to bake. It’s both an art and a necessity, and it needs to return.
So if you want to learn to bake, this is the book for you!
 Well, I just ordered the proof/galley copy of my latest book. It’s been professionally edited, updated, fixed, futzed with. Provided there aren’t any major problems with the galley, it should be available on Amazon within two weeks. This will be my fourth cookbook. Once it hits the screens/shelves, I can start serious work on my 18th century cookbook, which is long overdue.