A Weekend at the Fort
This isn’t a prepping post, per se. I’m off schedule due to life being busy. I’ll try and get back on track in a week or two. Be aware that most articles through the month of November will be “canned” (ie written long in advance, probably this month) because it is National Novel Writing Month and I need to sit down and write a whole-ass book (this year it’s my 18th century cookbook) in 30 days. 50,000+ words in 30 days is not easy, and I don’t do a lot of other writing, though I may pop in to say hi. We’ll see.
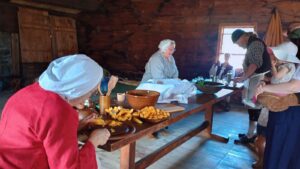
So last weekend, I was up at the Fort. It was the big “Out of Time” timeline event, meaning they invited people from other eras than the Fort’s (which is 1740s through 1760s, roughly) to come and set up outside the palisade and present information on their part of history. We had someone from 13th century, quite a bit from WWI and WWII, and of course my 15th century group, The Brotherhood of the Arrow and Sword. With all my favorite reenactors there (only the Vikings were missing, as they had an event elsewhere), I asked for and received permission to plan a grand meal for everyone.
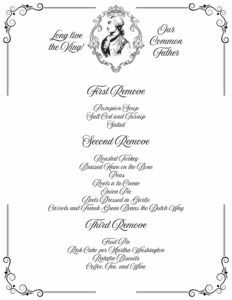
As you can see from the image to the left, it was quite the feast. I had three “removes” (we would call them courses, today). We ended up actually putting all the food onto a big table and letting people get stuff buffet style, which I totally lost control of. I really got descended upon by locusts, and that was not what I had intended. Next year will be better, with the “removes” going out on the table for people to get food from. Also, those with food allergies needed to go up first, and that didn’t happen. I learn new stuff every time I do this. 🙂
The preparations for this meal started on Friday evening. The salt cod had to go in to soak, as the water needed to be changed several times before it was put in with the turnip to cook. I think I changed the water five times? Regardless, the cod was not at all salty by the time it hit the table, and actually was quite good all mashed up with the turnip. The “pumpion soup” (squash soup) was incredibly tasty and easy, and I will be doing it again. The salad was “just” salad, but looked at tasted quite good.
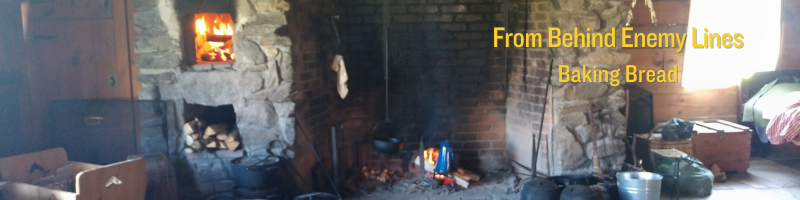
Yes, I cooked a turkey over a fire. This was my first time roasting a WHOLE turkey, as in the past I’ve always disjointed it and cooked it in pieces. I wanted to put the entire turkey out, though, and so I roasted it in my largest cast iron pot. I started it breast up, flipped it after 1.5 hours, then flipped it again after 1.5 hours. It spent its last hour in the beehive bake oven, crisping up its skin to a lovely brown shade. The turkey literally fell apart, was juicy and tender, and basically disappeared within a few minutes of being put out. The ham was “braised,” which means I seared all the sides first, and then boiled it. Or rather, it simmered most of the day. The result was delicious, and it was reduced to a single meatless bone and a piece of gristle before the end of the dinner. I was so pleased that everyone liked the food!
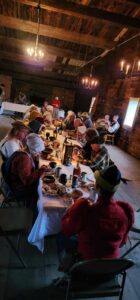
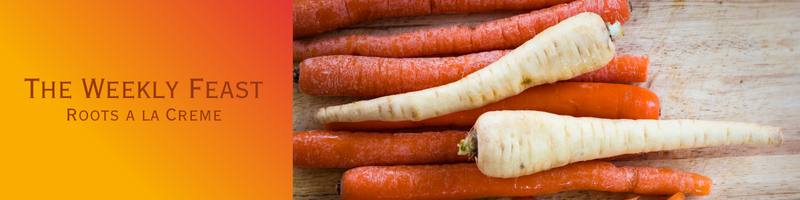
I think I served about 40 or so people. We ate in the Great Hall, which is also where I did most of the cooking. I baked bread in the outdoor beehive oven (four loaves) and did the rest of the cooking over coals in the two fireplaces at either end of the Hall. It was nice to have all that space for cooking! Of the side dishes I made, the clear favorite was the Roots a la Creme, which are basically root veggies in a cream sauce. I have to admit, they were very delicious, and I ate the leftovers (what few there were) the next day.
The star of the show, though, was definitely the Rich Cake, from Martha Washington. I have never made a cake like this before, which is dense and full of extremely alcoholic fruit. It was moist, solid, flavorful, sweet, and indeed very rich. I will absolutely be making it again, though perhaps with a few minor adjustments. I can see what that thing could be set on a shelf and left for a month, though. There’s so much alcohol and sugar in it, nothing will touch it! LOL! Think of it as an edible Christmas cake, the kind we usually use as door stoppers.
Ratafia biscuits were the other new-to-me dessert that I attempted. They did not turn out as well as I had hoped, but they were not a clear fail, either. They were very edible, with a lovely almond undertone to them. They didn’t “loft up” as much as I’d hoped, though. I think I folded in the almond flour too roughly, perhaps. I will say, I’m never making the ratafia biscuits again without modern conveniences. Whipping the egg whites until stiff BY HAND was quite the adventure, and my arm still hurts. Totally worth it, just to prove I could do it, though. It might not have been so difficult if I hadn’t started out by creaming the butter for the Rich Cake first, then creaming the sugar into the butter for that same cake, all before moving on to whipping egg whites by hand for 25 minutes. Yes, I’m nuts. But you know what? I know I can do it, now.
Here’s the thing. A lot of people there thought I was crazy for putting this dinner on. Cooking for that many mouths, spending an entire day in prepping, cooking, plating, and all the rest. I did have help, though, with two very good friends who took the time to show me the ropes (they’re both retirees from restaurant business, and know how to do proper mise en place). Everyone loved the meal, but yes, many of them thought I was insane for not putting at least some of this stuff into the very modern oven to bake. I was determined to do this “the 18th century way” though, because I know that if I can do it that way, then doing it with modern conveniences is easy.
This is also research. The cookbook I’m about to write next month will feature all of the recipes I used in this supper, along with many others that I’ve tried in the past two years. While I tailor my recipes to be cooked in a modern kitchen, the instructions suit those who want to do it the 18th century way, as well. I have to know how it works, so that I can explain it to others. Having the opportunity to work the kitchen for a big meal that way gave me a ton of insights into how an 18th century kitchen would have run. It makes my explanations better, when I’m talking to visitors at the Fort or to the encampment of my 18th century reenactors group.
Above everything, this is prepping (see how I masterfully brought it back to prepping? Go me!). I now know without a doubt that I can cook for a large group with nothing more than my two hands and fire. Nothing can stop me now! Oh, and everyone is looking forward to next year!